Did you know that you can recycle the yarn from store bought sweaters? It's definitely possible and once you know what you are doing, it is very easy to accomplish. In my experience, yarn that is unravelled from sweaters is much more fun to work with because there is less pressure than buying yarn brand new from the store. Yarn that is recycled is...
1) Less Expensive!
If you buy a sweater from a used clothing store, you can usually find a sweater's worth of yarn for $10 or less
2) Care Instructions
It is common practice for store bought garments to have labels on them that tell you how to wash it. Also, because the clothing in a thrift store is already worn, you can immediately weed out sweaters that are easily felted, hard to care for, pill easily because you get to see what the yarn looks like knit up before you buy it
3) Protects Landfills
Sweaters don't literally protect landfills but if you recycle yarn instead of always buying store bought, you are keeping that sweater out of the garbage heap and you are making something beautiful out of it (remember the 3 R's-Reduce, Reuse and Recycle?). Even though sweaters at thrift stores have the potential of being purchased as is and reused by another customer, it still helps the avid diy enthusiast from burdening the planet.
4) Protects the Ecosystem
Unless you purchase yarn that has a completely see-through policy about their production methods, you could potentially adding to the overuse of pesticides on plant crops such as cotton or bamboo. Reusing yarn decreases the need for yarn production and therefore pesticide use
5) Less Knots
This is just a personal preference, but I find that store bought sweater yarn has fewer knots than conventional yarn. Also, since you are unravelling whole garment pieces instead of using individual skeins, there are less knots necessary for connecting pieces together.
So, now that you are aware of how cool it is to reuse yarn, let's get on our merry way shall we?
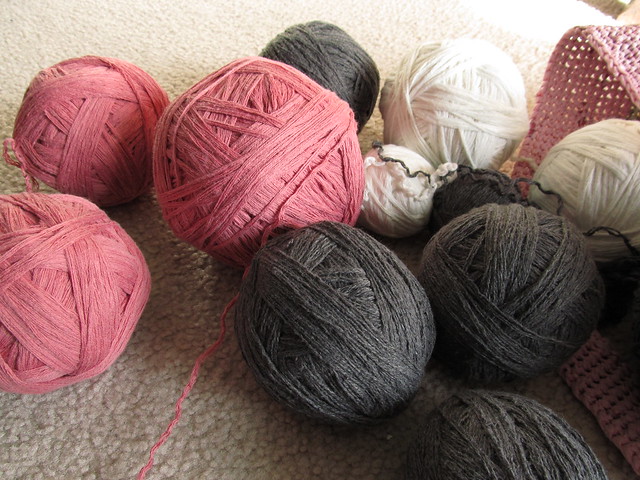 So, first thing you're going to need to do is acquire a sweater acceptable to our purposes. Not all sweaters are created equally but I am here to arm you with the knowledge you need to choose the right sweater.
TIP: It is always better to look for sweaters in the biggest sizes possible, including mens sweaters because obviously there is more yarn. You don't need to make sure the sweater fits your body because it is going to be deconstructed later.
So, first thing you're going to need to do is acquire a sweater acceptable to our purposes. Not all sweaters are created equally but I am here to arm you with the knowledge you need to choose the right sweater.
TIP: It is always better to look for sweaters in the biggest sizes possible, including mens sweaters because obviously there is more yarn. You don't need to make sure the sweater fits your body because it is going to be deconstructed later.
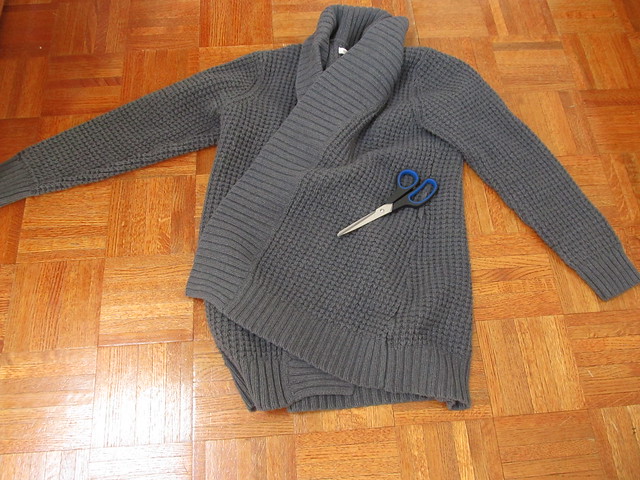 Let's have a look at the inside of the sweater. One of the ways you can tell if a sweater is good for recycling is to check out the seams. If all the seams on your sweater look like this one, which is serged with a serger machine and therefore the pieces of the sweater were cut up and sewn together, then you can put it right back down.
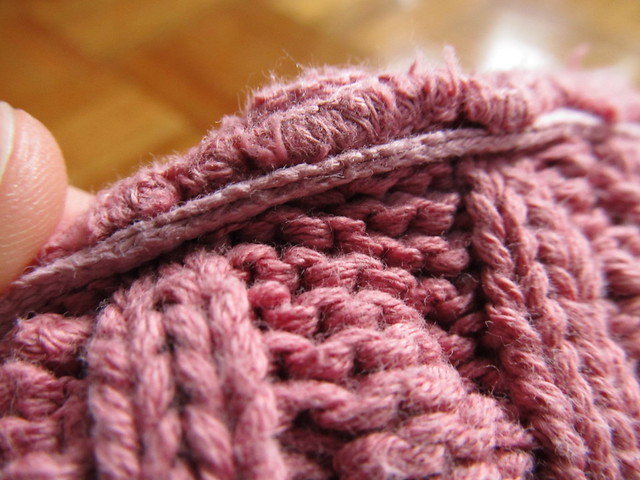 If your sweater seams all look like this, slightly bulky and not sewn together with a sewing machine, then you are one step closer to having a great sweater.
TIP: Make sure you look at the label of the sweater to see what the yarn is made out of and what the care instructions are. Cotton sweaters are pretty easy to unravel, although they might not be super soft when you are finished. Cotton is better for projects that don't need to be against the skin because it is made more durably than other yarns. Also, if the yarn is acceptable next to your skin when it is in thrift store sweater form, it will be acceptable once you unravel it. Be careful of purchasing wool because it will shrink on you if not properly cared for.
If your sweater seams all look like this, slightly bulky and not sewn together with a sewing machine, then you are one step closer to having a great sweater.
TIP: Make sure you look at the label of the sweater to see what the yarn is made out of and what the care instructions are. Cotton sweaters are pretty easy to unravel, although they might not be super soft when you are finished. Cotton is better for projects that don't need to be against the skin because it is made more durably than other yarns. Also, if the yarn is acceptable next to your skin when it is in thrift store sweater form, it will be acceptable once you unravel it. Be careful of purchasing wool because it will shrink on you if not properly cared for.
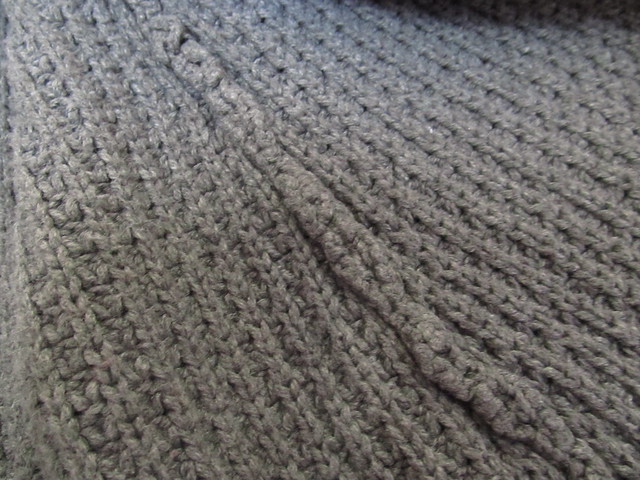 Next, you'll want to figure out what kind of seam you actually have. This sweater, except for the very top of the neck which was serged, has a crochet seam which is very easy to unravel. It is identifiable because it has a row of little v's on one side of the seam and a row of dashes on the other (look at the next picture to see what I'm talking about).
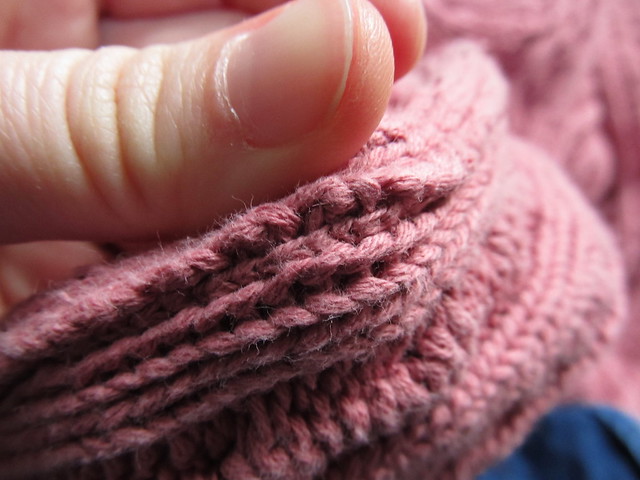 Using your scissors, you'll want to snip one of the edges of the little v's. This is the part that will take practice and might be a teeny bit frustrating at first but trust me, you'll get better. The crochet seam unravels from the top down, which means you'll want to snip one of them as far to the top of the little v's as you can get. Also, I've found that some sweaters are crochet seamed along the side all the way up to the sleeves so it might be as easy as finding the right seam to unravel.
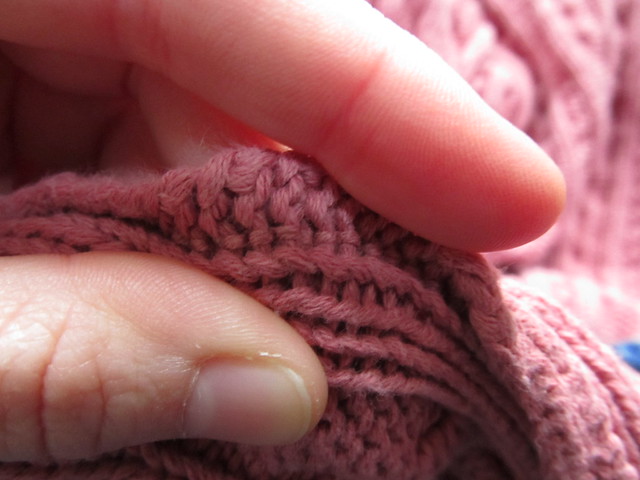 TIP: Don't forget to cut off any tags or care instructions from your garment using a seam ripper or by being very gentle with a pair of scissors. Since most often they are sewn on with a sewing machine, it is best to use a seam ripper if you have one.
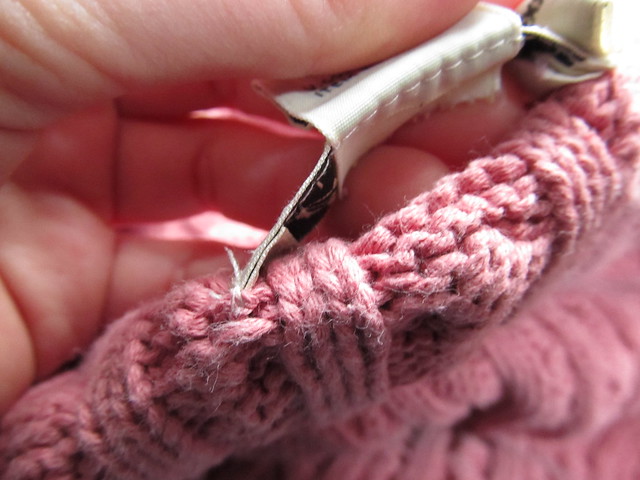 Now that you have cut one of your little v's, it's time to start unravelling your seam. You might need to untangle the thread a little bit first, but once you have your seam free, you can just pull on the string and it comes undone very nicely for you.
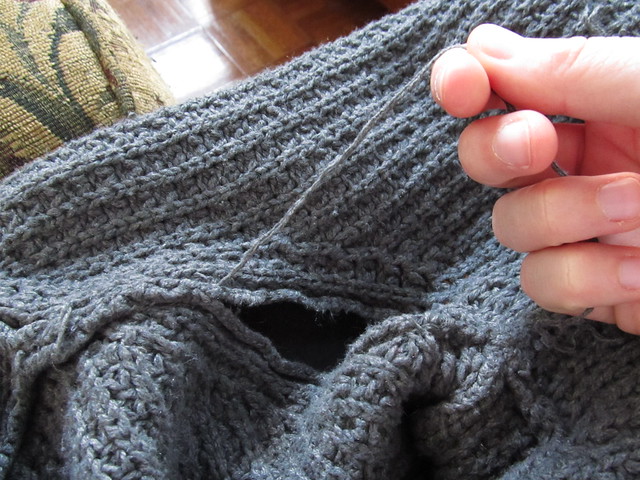 Once you have removed all of the seams from your garment, you can unravel each piece of the sweater. TIP: It is always better to wind the yarn into a ball as you go because it reduces the risk of tangling that would occur if you left all the unravelled yarn in a pile (trust me, I know from experience how much "fun" unravelling knots is!)
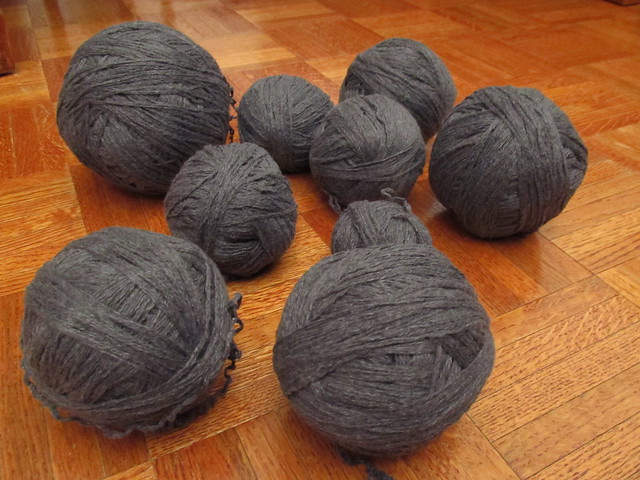 With a little practice, you can start knitting from recycled sweaters in no time! If you have any questions, feel free to ask, I'd love to help!
So, it's been a crazy and rough week, but I thought I'd round out Friday with a little project that you can do with your new crochet skills... making a plant hanger!
I know you're probably thinking "Weird, I haven't seen plant hangers like these since the '90's!" Well, I'm here to tell you that they are awesome and they have the added benefit of creating more surfaces for my plants to rest on! Without further ado, here's how you make one...
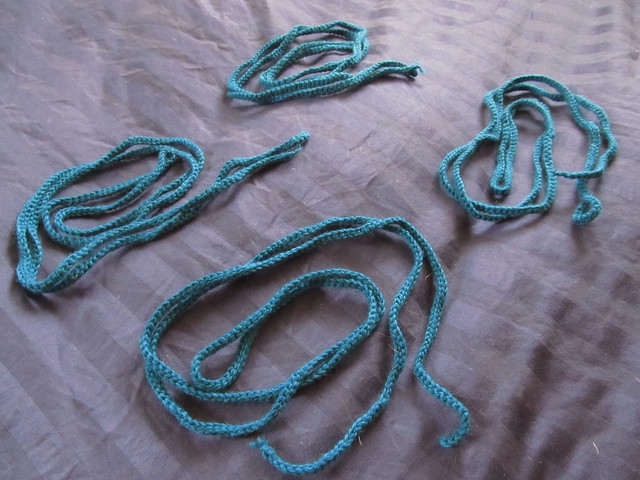
Start off with 4 icords of equal length. You want to make sure that you measure the chain that you make with some kind of ruler or soft tape measure so that all your icords come out the same length. I had the misfortune of making two of very different lengths because I forgot to compensate for the shrinkage that happens when you make an icord.
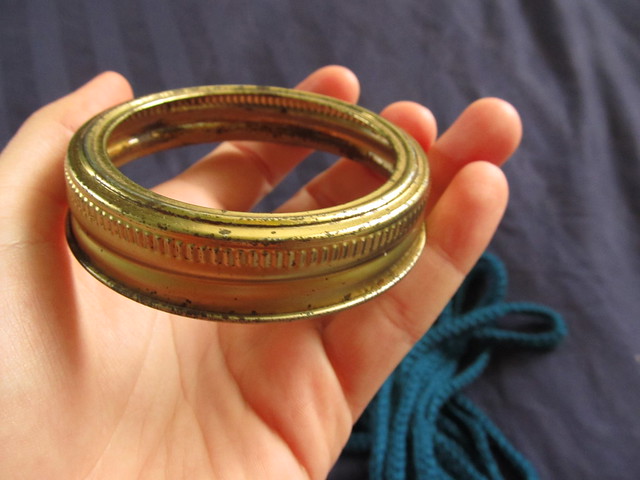
 You'll also need some kind of sturdy round thing. Since I'm all about reusing what I already have, I took a ring off one of the jars of applesauce that I made a few weeks ago and repurposed it for this project.
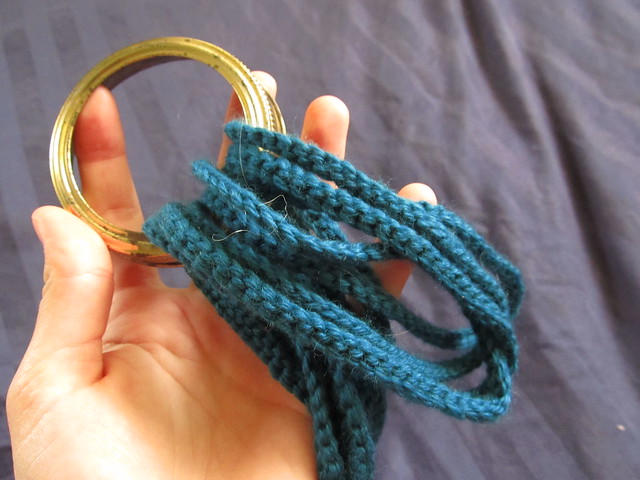
 Next, you'll need to find the middle of your icords. When you find the middle, place the loops through your sturdy ring like so...
 Now, stick the tails of the icords through that loop.
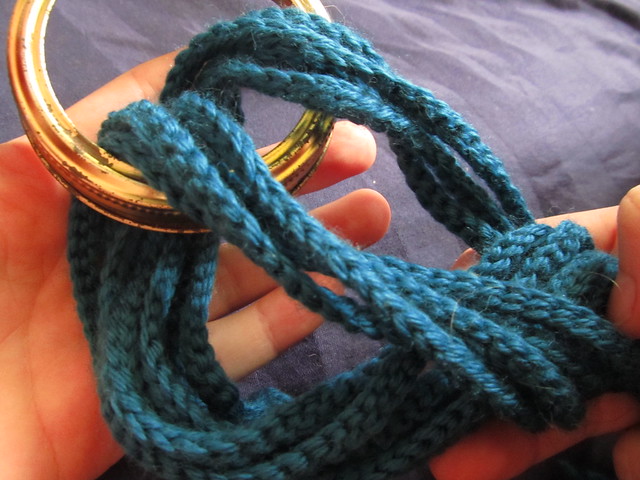 And pull it tight like so. Now, your plant will stay secured because there's no way a plant can rip through a metal jar ring.... knock on wood, I don't want anything crazy happening to me this week!
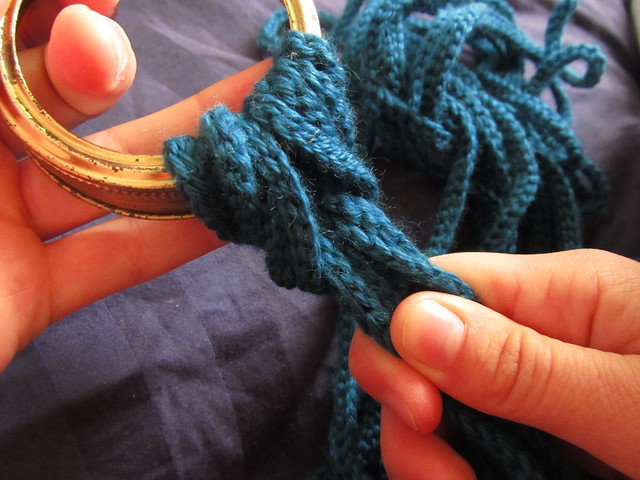 You'll probably want a good surface to work on like a bed or a table. Spread out the different strands of icord that come from the bottom of the ring.
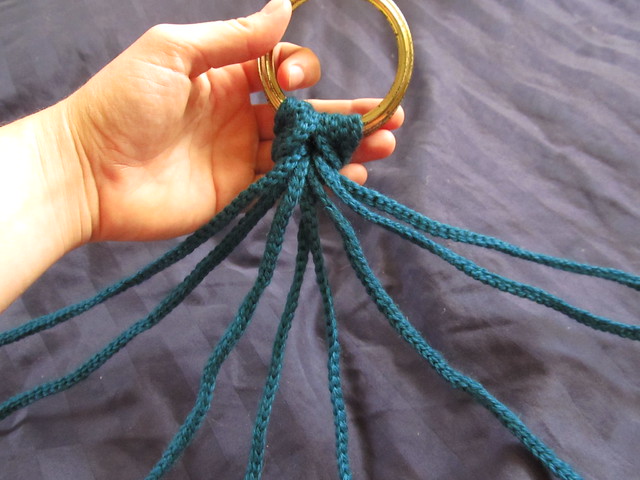 What you want to do now is take the first two cords and tie a knot in them about a foot down from the ring at the top. If your knots are too high on the icord, you won't be able to fit your pot inside the hanger.
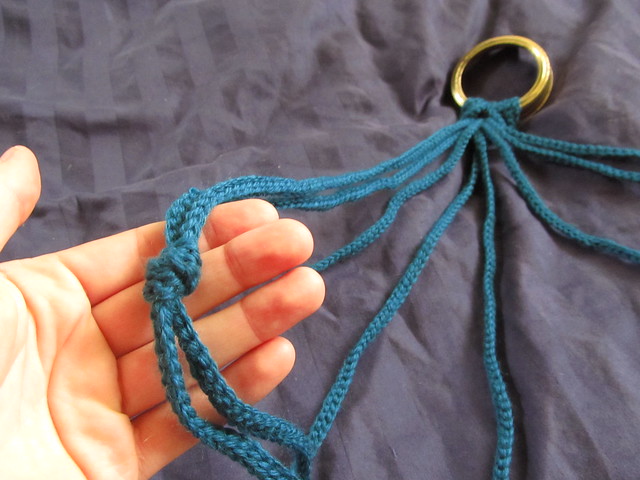 Make knots in all of the strings like so. When you are done with the knotting, your hanger should look like this. Separate the cords so that opposite cords are next to each other.
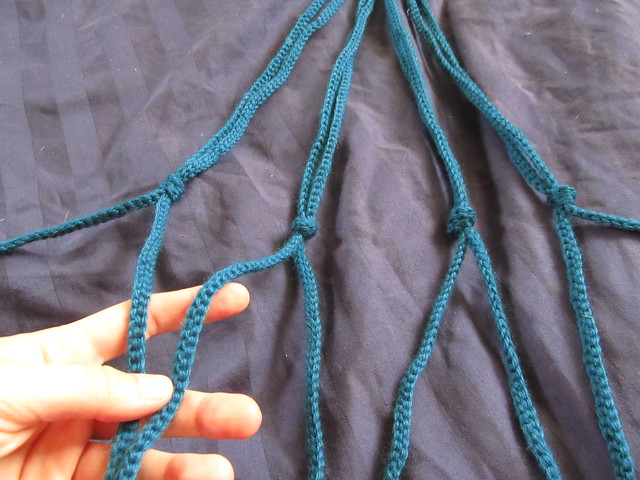 You might be able to guess the next step... make knots in each of the cords that are next to each other. I put my knots about 4 inches down from the top ones, but it's really up to you and how much cord you have.
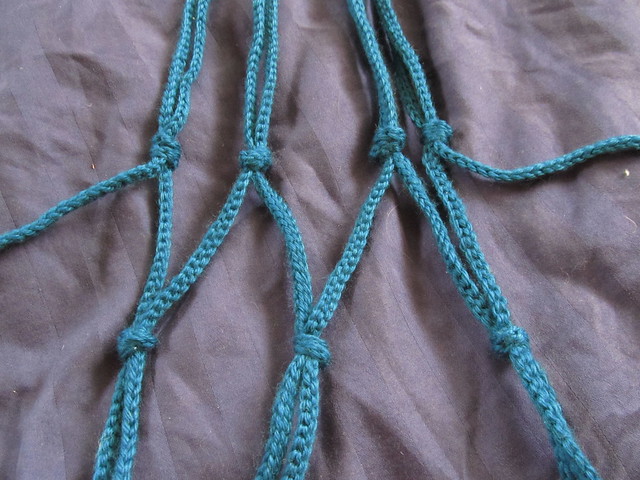 Next, take the last two cords and tie a knot about the same height as your other knots. You may notice that my knots are about the same height and distance from the ring as the other knots on each level. This is important so that your plant hangs properly in its hanger. We don't want any uncomfortable plants now do we?!
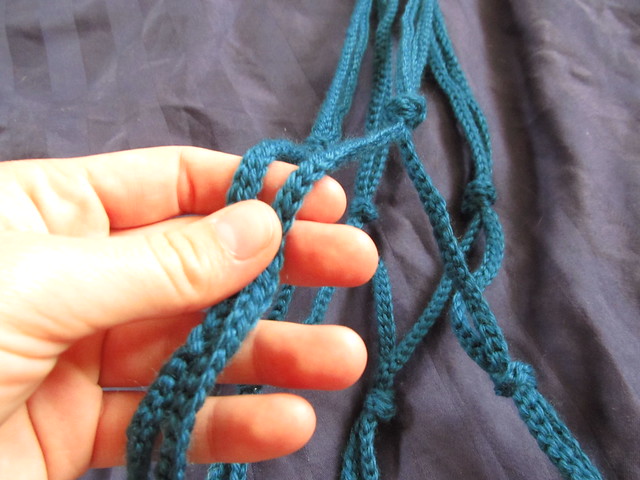 Now, I kind of jumped ahead of you and did a whole next row of knots, but it's the same principle as the first two rows. You'll just separate the strands and tie a knot, continuing to make knots until you have 4! You can keep separating strands and creating new knots until you run out of cord but it is important to at least have one diamond in your hanger... see the diamond? This ensures that the plant hangs securely and evenly on the hanger.
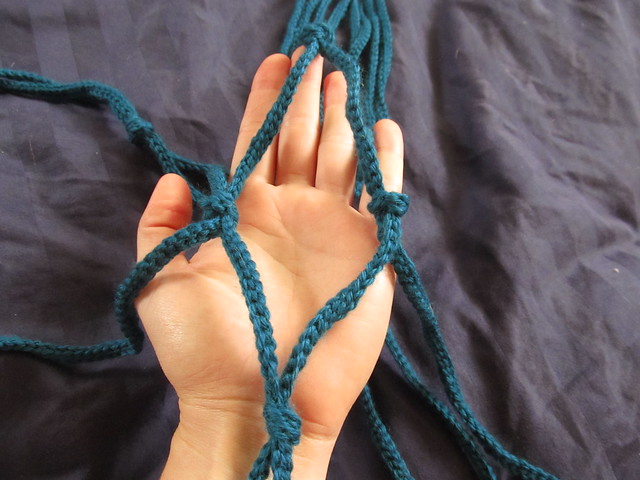 Once you've decided to be done making knots and separating strands, you'll want to gather up all the ends like so. It's okay if they are a little bit different lengths but they should be pretty close.
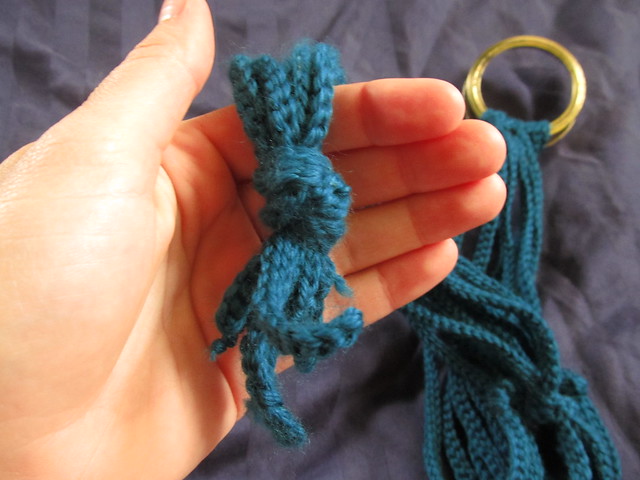
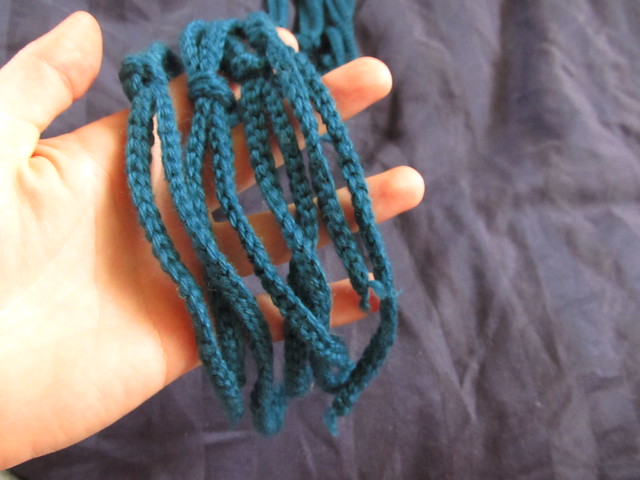 Make a big, jinormous knot out of all eight strands from your hanger and...
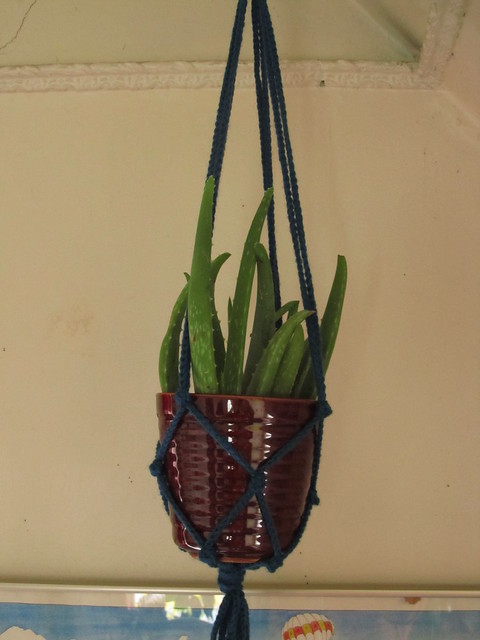
 Put your happy plant inside of it! Mine is a medicinal aloe plant that I'm trying not to kill but we shall see. Look at you go, making plant hangers and everything!
It's time to get back to that little mini-series I was telling you about before. Today, I am going to show you how to make a crochet i-cord and now that you know the very basics of crocheting a chain, you should be able to follow along pretty well. Let me know if you have any questions, I would love to help a fellow fiber-enthusiast.
So, the first step in making an i-cord is to whip out a chain from the last tutorial. Once you have a chain of your desired length, go ahead and flip the chain over to the backside where it looks a little bit like chain links or some kind of weird stitching. It may help you to remember that the front of the chain looks a bit like v's and the back of the chain looks a bit like dashes.
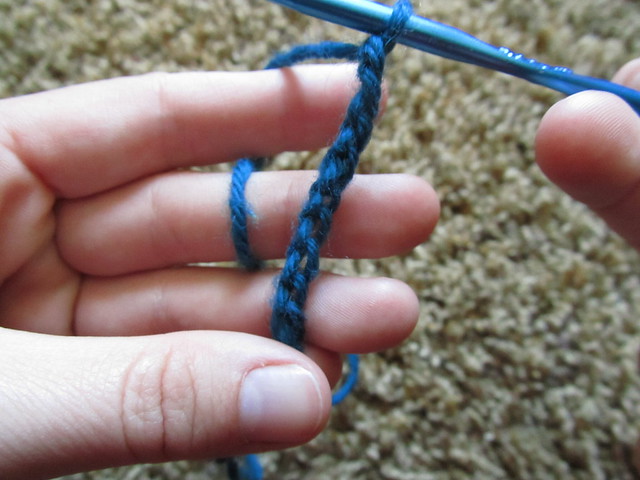 Now that you've found the back of your chain, you're going to put the hook into the first little dash that you can easily find. Trust me, the first one is a little bit tricky but the rest are sooooo much easier! It should look like this.
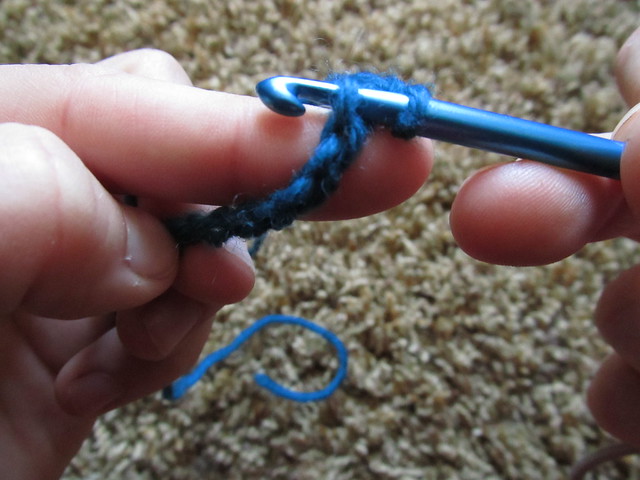 Go ahead and grab the working yarn that is attached to the ball with the crochet hook. Now you should have three little loops on your hook; one from the ball of yarn you just grabbed, the first dash in the back of the chain, and the very first loop that you had before.
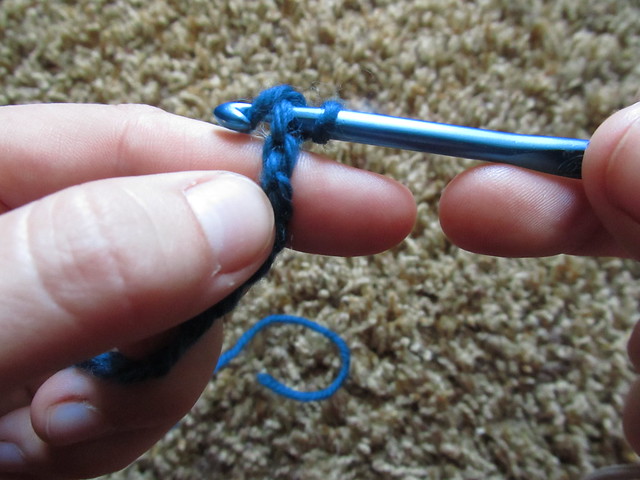 Now, gently pull the last loop on your hook through the other two loops on your hook. It will look a little something like this when you are done.
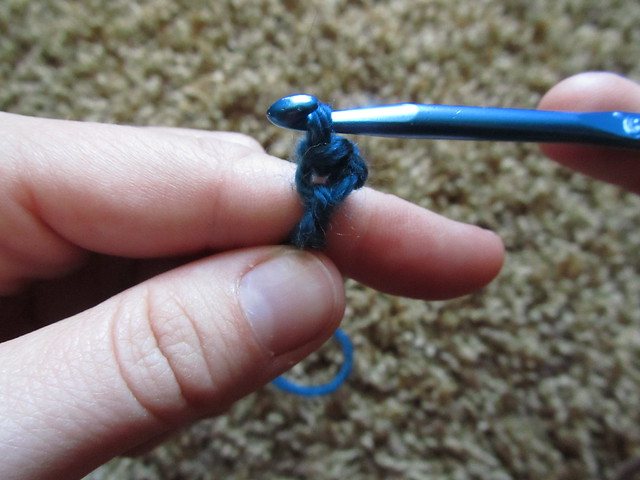 Now, all that's left to do is repeat that process with all the rest of the little dashes in your chain. It can be a little bit tedious but it is so rewarding! This little section is what the i-cord will look like when it's all finished.
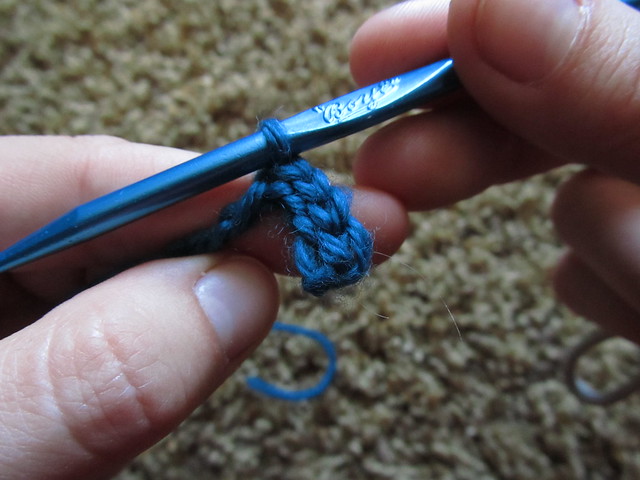 Keep going all the way til you reach the end of your chain until there is only one loop left on your hook. Cut the yarn that is attached to the ball (the working yarn) with a little bit of room for leeway (I always give at least an inch or two, maybe more) and pull the cut yarn through that last loop on your hook. Mine is a baby i-cord for demonstration purposes but there are so many uses for an i-cord. You are basically making rope that is slightly stretchy and very strong.
 At the end of the week, I'll show you what all the commotion is leading up to because it is a super fun project that I'm sure you're going to love!
I've got a little mini-series planned for you this week that I hope you will enjoy. It will be leading up to making something super cool and sustainable (it's a mystery! you'll just have to wait and see!), but first you need the proper tools to start.
So, as you may have gathered from the post title, we're going to be talking about crochet today. This will be a photo heavy post, and some of the next few as well, but I am hoping it will be very useful to you in the future. Crochet is one of the most useful skills I have learned because it is so versatile! You can keep electronic devices organized using a chain sinnet (secret code for crochet!), you can use it to mend holes in your favorite sweater, and you can make anything from clothing to socks, hats to toys and even gloves. Crochet is also awesome because it can be very relaxing and it reduces screen time when done as a hobby.
Today, I have a photo tutorial of how to make a slip knot and a crochet chain. All you need is a hook and a ball of yarn (I'm using some worsted weight yarn and a size G hook. Don't worry if that means nothing to you, size doesn't really matter)
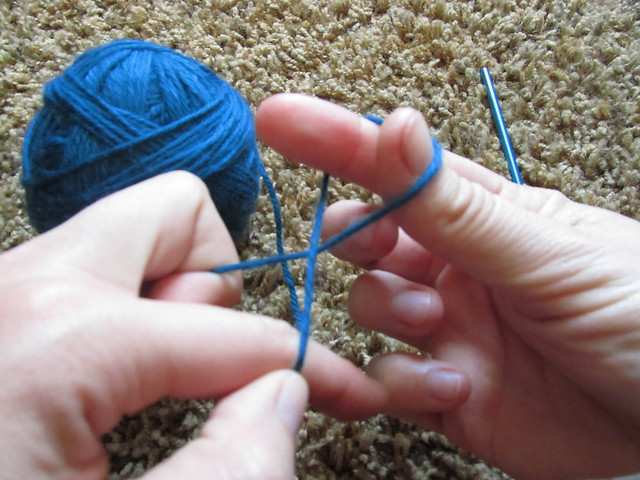 First you'll want to hold the tail of the yarn and the end that is connected to the ball in two separate fingers with a loop on your other hand (I'm right handed!). Twist the loop so that the tail side of the yarn is on top of the side connected to the ball of yarn.
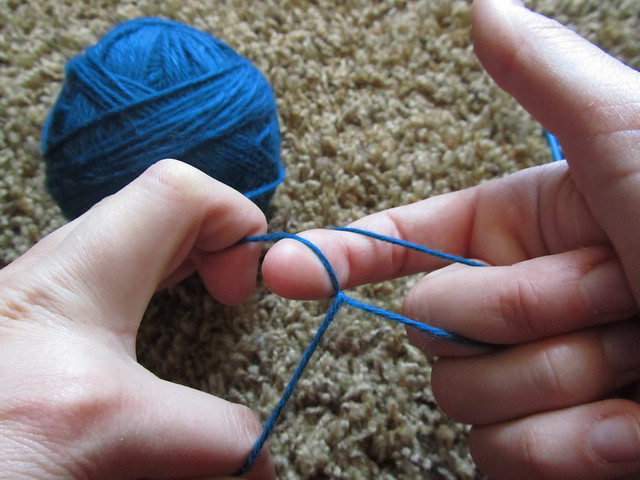 Using your index finger, reach through the hole that you just made and grab onto the yarn end that is connected to the ball... NOT THE TAIL SIDE!!!
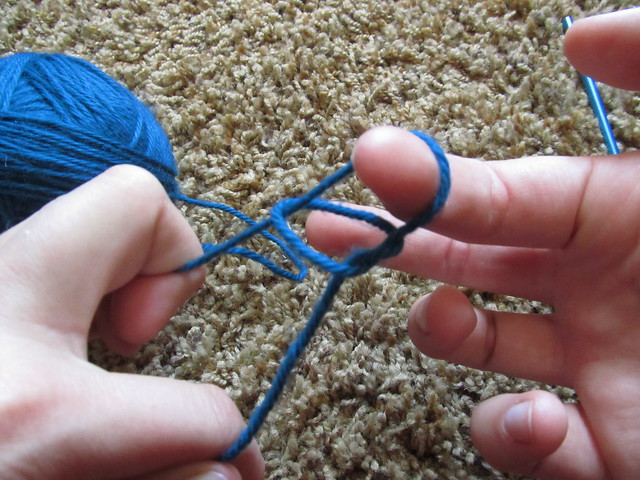 Pull the yarn through the loop so it looks something like this. With the loop still on your index finger, pull the two ends of the yarn tight. Now you have a loop.
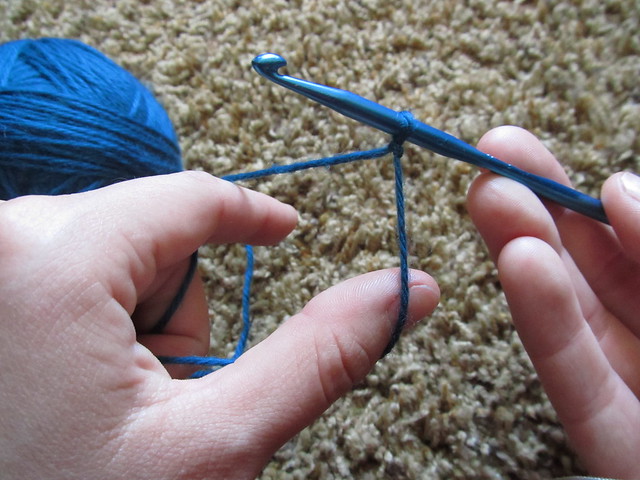 To make the chain, put the slip knot that you just created onto your crochet hook and pull it tight. I wrap the tail end around the thumb of my left hand and the ball end around my index finger but whatever works for you is fine...
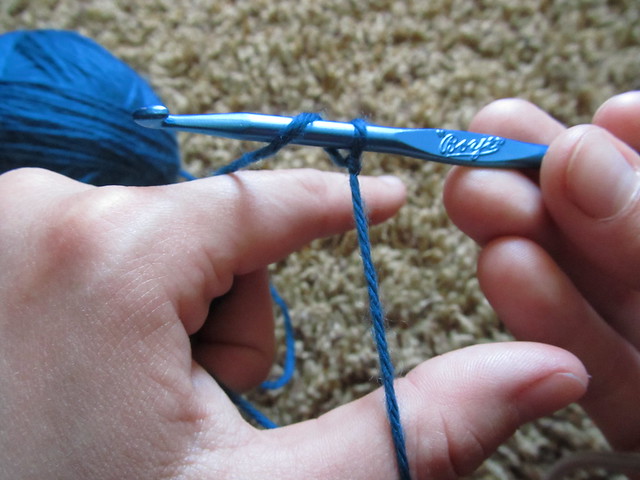 Wrap the yarn around the hook that is connected to the ball.
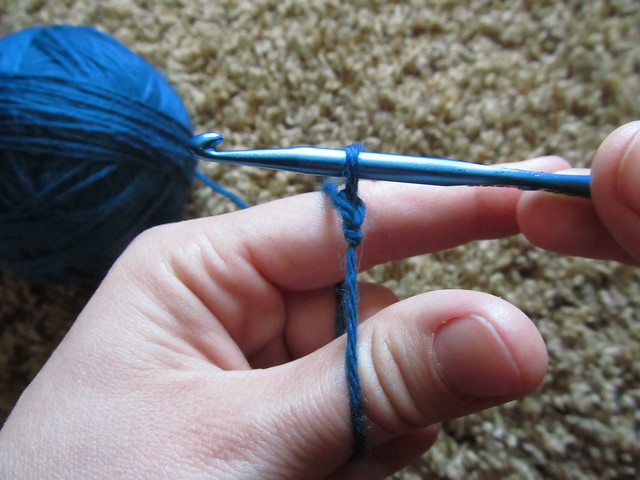 Gently pull it through the first hole of the slip knot. CAUTION: This part may be a little bit tricky for beginners because you don't have the muscle memory built up and it may feel like you are attempting to follow my directions with flippers on your hands. That's ok, as long as you don't give up and start crying. Just keep trying and you should pick it up soon.
 a
Once you get the hang of the whole crocheting business, you should have this nice little line of v's that looks like a chain. If you want to leave your chain as is, all you have to do is cut the yarn from the ball with about 2-3" of a tail (just to be safe, you don't really need this but you can cut it off later once your chain is secure). Wrap the yarn around the hook as if you are going to make another chain but then just pull the whole string through the loop and pull it tight. Look at you crocheting and everything! Does anyone else have a cool use for crochet that I didn't think of?
a
Once you get the hang of the whole crocheting business, you should have this nice little line of v's that looks like a chain. If you want to leave your chain as is, all you have to do is cut the yarn from the ball with about 2-3" of a tail (just to be safe, you don't really need this but you can cut it off later once your chain is secure). Wrap the yarn around the hook as if you are going to make another chain but then just pull the whole string through the loop and pull it tight. Look at you crocheting and everything! Does anyone else have a cool use for crochet that I didn't think of?
