It's time for another free pattern! I debated whether or not I wanted to share this one but it's so darn fun that I couldn't keep it from you. This pattern, which I call Janet, is a reference to my Grandma Janet who is the one who taught me how to knit (Hi Grandma!). When I first started knitting, there were so many dropped stitches, you'd think I was attempting to knit lace. Eventually, with a lot of patience, the best knitting reference guide ever, and a lot of repetition from my grandma, I finally mastered knitting. Now, somewhere between 8 and 12 years later (none of us can remember when I started knitting because I've been doing it so long), I am designing my own patterns and sharing them with you. It feels so good to have come this far :)
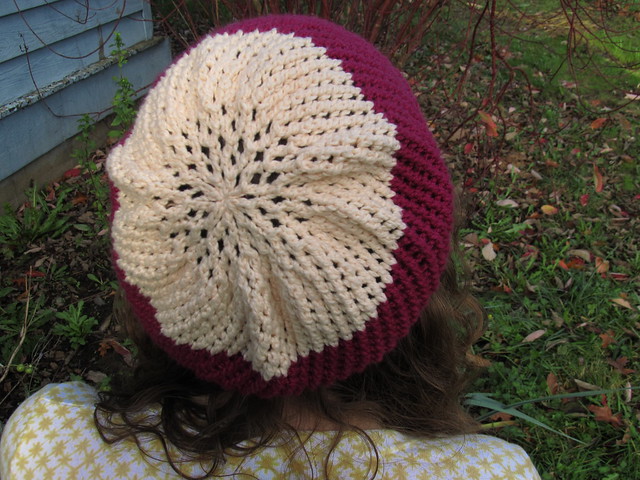
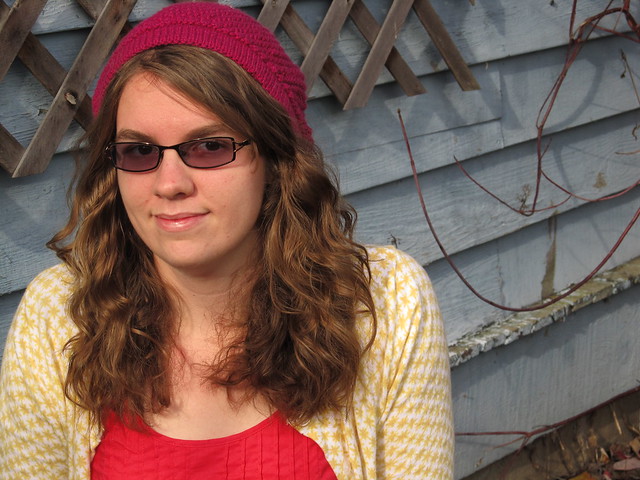 Anyway, as usual with knitting, nothing really ever turns out exactly how you want it. I thought to myself "Self, I'm going to make a raspberry beret like in that Prince song. Hey, Self, I can use the scrap yarn that I got from my fiber teacher last year that just happens to be raspberry." Well, that didn't exactly turn out because I ran out of yarn (GASP!). If you're a knitter and you knit with scrap yarn, you know how frustrating it can be to get full swing into a project and not be able to finish. Instead of giving up, I decided to embrace the color block trend that is going on right now (not that I'm very trendy... I buy everything at Goodwill remember?). I grabbed another hunk of scrap yarn that I got from the same fiber teacher and Voila! Janet was born (the lace hat, not my grandma!)
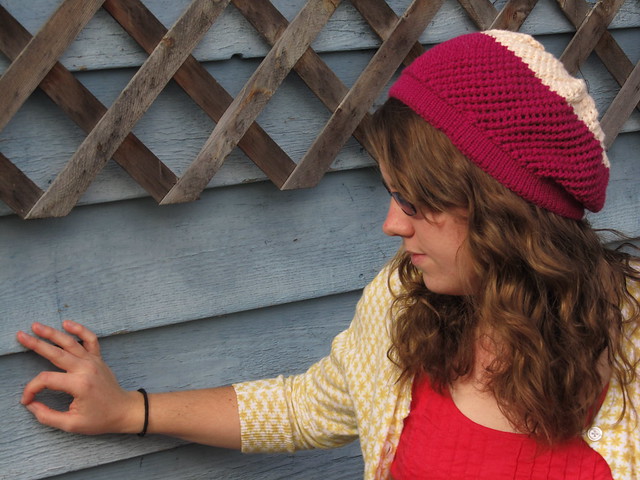 Janet Hat
Yarn: I used some scrap yarn that I had lying around in my stash. It appears to be worsted but in order to be positive, make sure you make a gauge swatch!
Needles: US Size 7 double pointed needles or appropriate needles to obtain gauge
Gauge: 21 stitches and 36 rows equals 4" in stockinette stitch, 22 stitches and 32 rows equals 4" in lace pattern.
Note: It is less important to achieve row gauge for this project because it is based on measurements. If you are a row or two off for the row gauge but are able to achieve stitch gauge, that should be fine.
Janet Hat
Yarn: I used some scrap yarn that I had lying around in my stash. It appears to be worsted but in order to be positive, make sure you make a gauge swatch!
Needles: US Size 7 double pointed needles or appropriate needles to obtain gauge
Gauge: 21 stitches and 36 rows equals 4" in stockinette stitch, 22 stitches and 32 rows equals 4" in lace pattern.
Note: It is less important to achieve row gauge for this project because it is based on measurements. If you are a row or two off for the row gauge but are able to achieve stitch gauge, that should be fine.
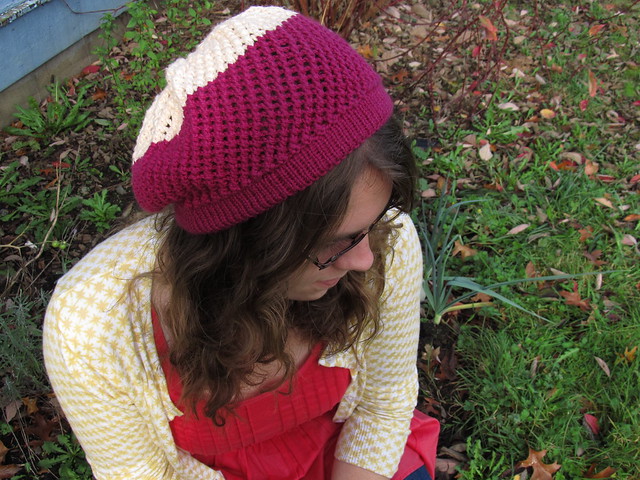 Lace Pattern:
Round 1: (yo, ssk) around
Round 2: knit every stitch
Lace Pattern:
Round 1: (yo, ssk) around
Round 2: knit every stitch
Pattern:
Cast on 100 stitches onto 4 double pointed needles, place a stitch marker at end of round or keep track of the beginning and end of the round.
Knit 9 rounds, purl 1 round, knit 9 rounds.
Now what you're going to do is fold the cast on edge backward at the purl row so that the knit side is facing out. Pick up the first stitch from the cast on edge and knit it together with the first live stitch on the needle. Continue all the way around. I'll be making a photo tutorial of how to do this later in the week which I will link back to.
Next round: (knit 4 stitches, knit into the front and back of the next stitch) repeat around. 120 stitches.
Purl 1 round
Begin Lace Pattern. Continue in pattern until piece measures 7-8 inches (mine is 7.75 inches to be exact).
Decrease Section:
Round 1: (ssk, yo, ssk) repeat around (90 stitches)
Round 2 and every even round: knit every stitch
Round 3: (yo, sl1k2togpsso) around (60 stitches)
Round 5: Repeat Round 1 (45 stitches)
Round 7: Repeat Round 3 (30 stitches)
Round 9: Repeat Round 1 until last two stitches, ssk (22 stitches)
Round 11: Repeat Round 3 until last four stitches, yo, sl1k3togpsso (14 stitches)
Cut yarn, leaving a 3 inch tail. With a tapestry needle, thread tail through every stitch. Pull tight and weave in end.
Note: There is no right or wrong way to make the color block happen. I decided to change yarns when I ran out of one color. You can use lots of scraps and make a hat with multiple thick stripes, you can knit the hat in all one color, or you can knit a hat with only two colors like I did. The possibilities are endless!
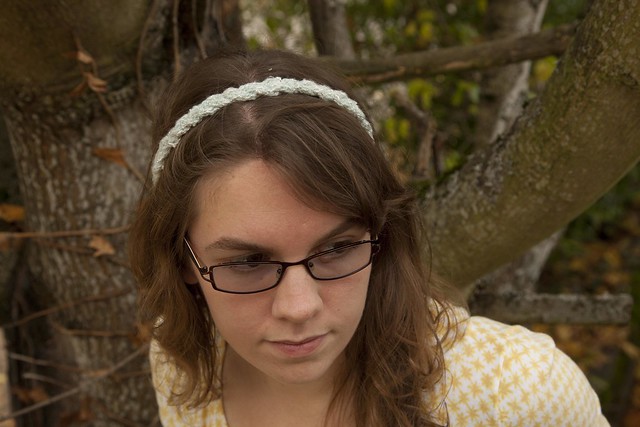 A few years ago, I had a dream about myself wearing this braided headband. Don't ask me what the dream was about, all I remember is that I had this braided headband on and I was frolicking through a forest (weird right?!). Anyway, fast forward to last year when I made an awesome headband that was straight out of that dream. It's girly, cute, shimmery and so easy to style. It's more of a recipe than a pattern but it's yours for the taking.
After changing blogs, I lost the photos from the original pattern so I have a new and improved version for you which will also be linked to Ravelry if anyone is interested in seeing my patterns there.
Rosa Headband
Yarn:I suggest using sport weight or sock yarn. You will also need a tapestry needle, or a sewing needle with an eye big enough to put your yarn through
Needles: I used size US 2 double pointed needles. You will need double pointed needles
Gauge: Any guess? It's not really that important, as long as you've got a good i-cord width that is pleasing to you
Notes: If the idea of having some of your stitches hanging freely scares you, it might be wise to invest in a stitch holder. Also, when you knit an i-cord (which is what you will be doing), you are basically knitting a very skinny tube without using a circular needle or 4 double pointed needles. If you've never done it before, just do what I say and it should work out. It's very easy!
Pattern: With one double pointed needle (you will only need 2), cast on 9 stitches.
Row 1: (knit 1, purl 1) across all stitches.
Row 2-9: Work in ribbing as established
Now, if you would like to use a stitch holder, slip the last 6 stitches of the row onto a stitch holder so that the three remaining stitches include the stitch connected to the yarn ball. You can also let your stitches hang around; I found that the yarn I was using was not prone to unravelling easily.
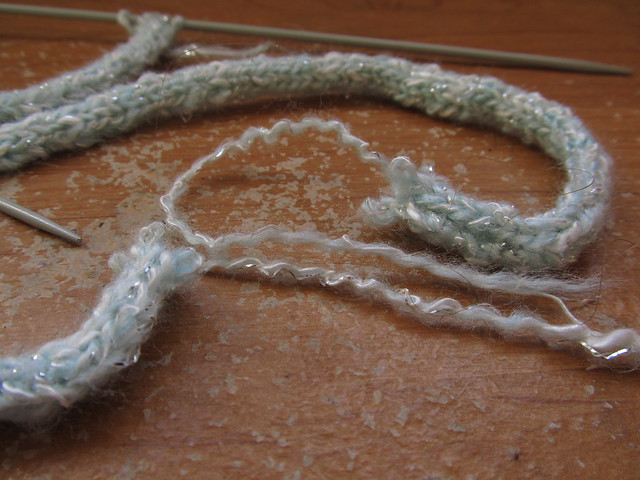 With 3 stitches on the needle, knit each stitch across. DO NOT FLIP YOUR KNITTING OVER! Slide the stitches from the left side of the needle to the right side of the needle and bring the yarn to the right side, keeping the yarn slightly taut. Put the needle with the stitches in your left hand and prepare to knit as you would normally. If you're a visual learner, here's a video you can watch that will show you how it's done.
For the next row, you are going to knit into the front and the back of the first stitch so that you have 4 stitches on your needle. Knit the rest of the stitches and slide them to the right of the needle.
With 3 stitches on the needle, knit each stitch across. DO NOT FLIP YOUR KNITTING OVER! Slide the stitches from the left side of the needle to the right side of the needle and bring the yarn to the right side, keeping the yarn slightly taut. Put the needle with the stitches in your left hand and prepare to knit as you would normally. If you're a visual learner, here's a video you can watch that will show you how it's done.
For the next row, you are going to knit into the front and the back of the first stitch so that you have 4 stitches on your needle. Knit the rest of the stitches and slide them to the right of the needle.
After you've increased to 4 stitches, continue knitting each row and sliding the stitches over (you should never see the back of your work while you are knitting), to produce an i-cord. It is unnecessary to count each row because we are going to measure it with a ruler.
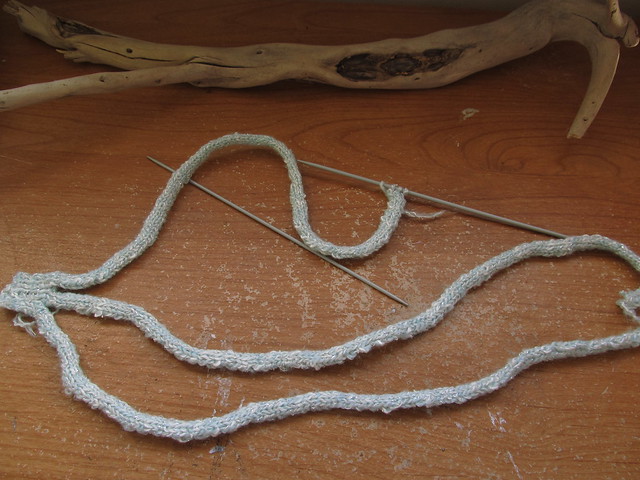 Once your first i-cord is about 18 inches long (or it can be placed around your head without going all the way around), place the four stitches onto a needle holder and break the yarn with an inch long tail. Repeat the i-cord process with the remaining 6 stitches (3 stitches for each i-cord) until you have 3 i-cords total. You will not need to break the yarn from the third i-cord
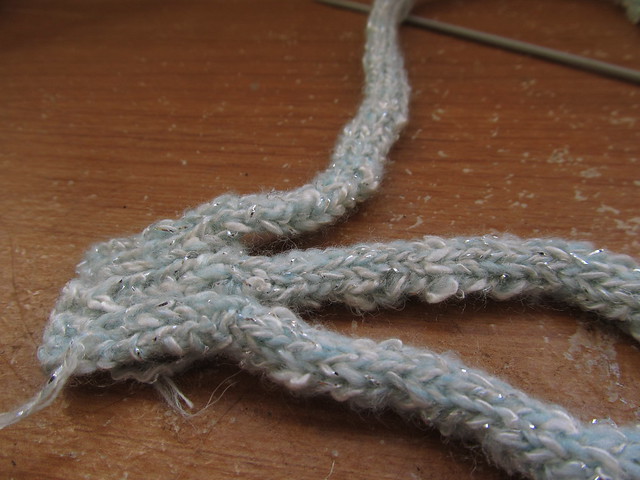
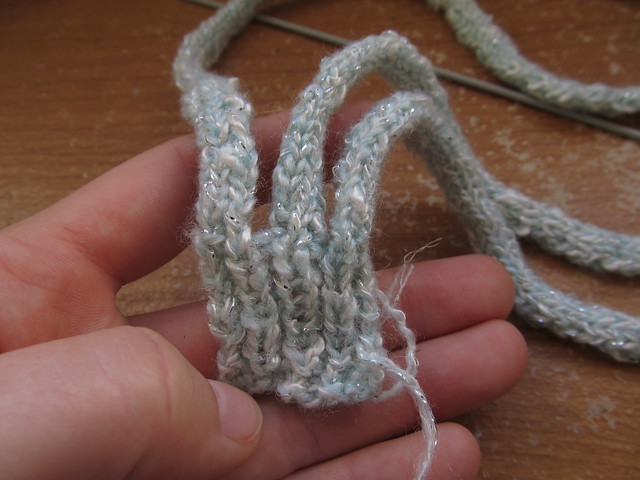
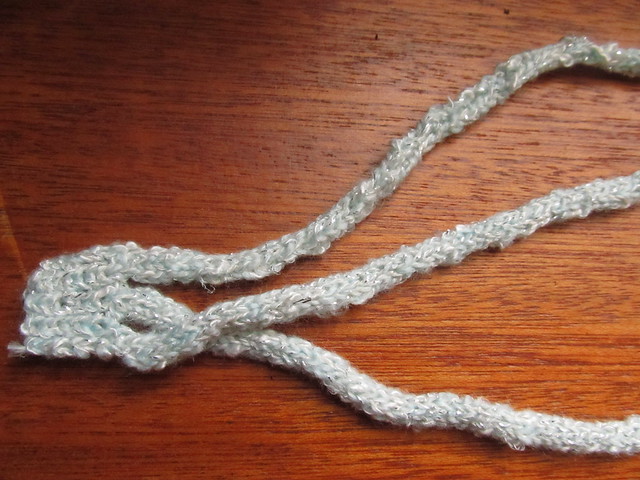 Being careful not to unravel your i-cords, braid them together like so
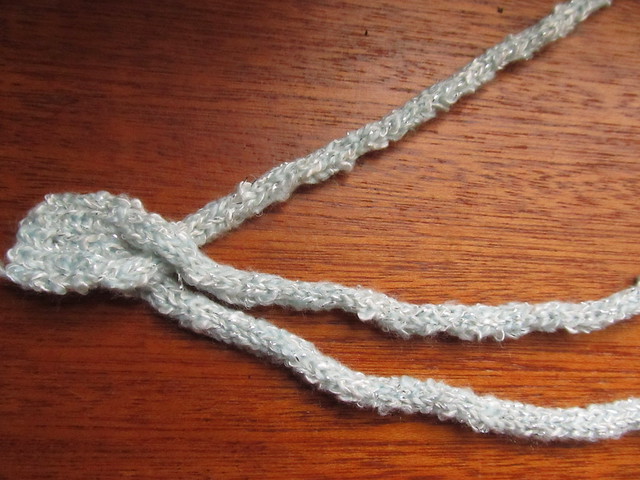
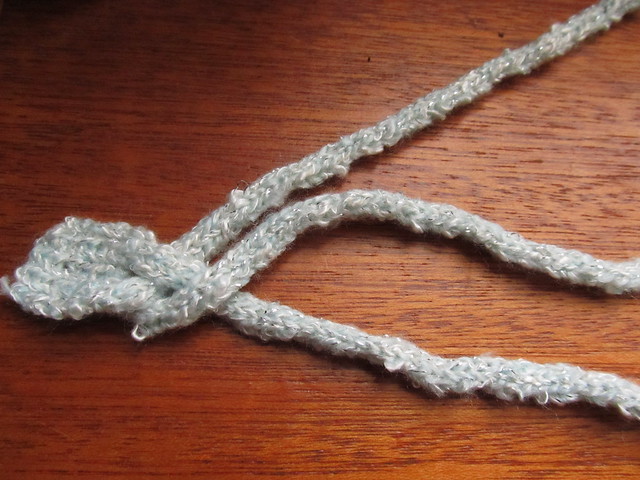
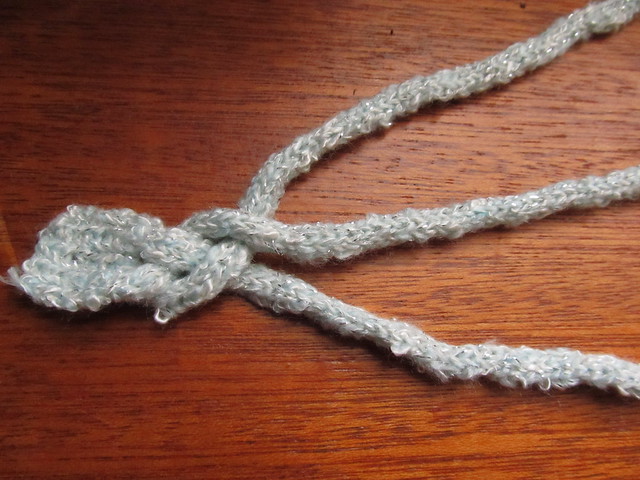 Until you've reached the end of your i-cords and the stitches look like this. You'll want to have the i-cord attached to the ball of yarn on the far right.
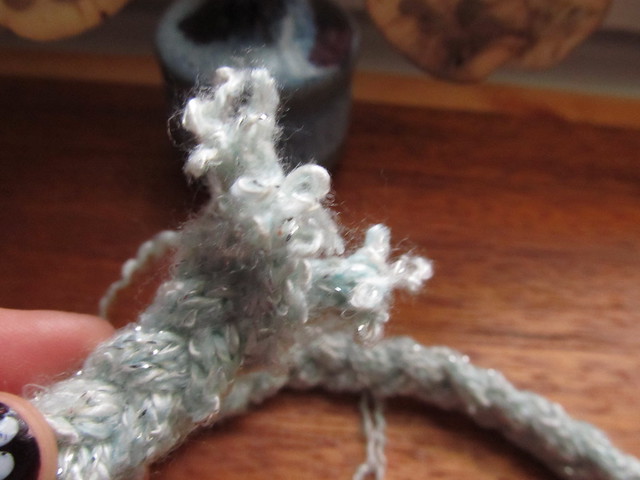 One at a time, pick up the stitches from your i-cords on the same needle
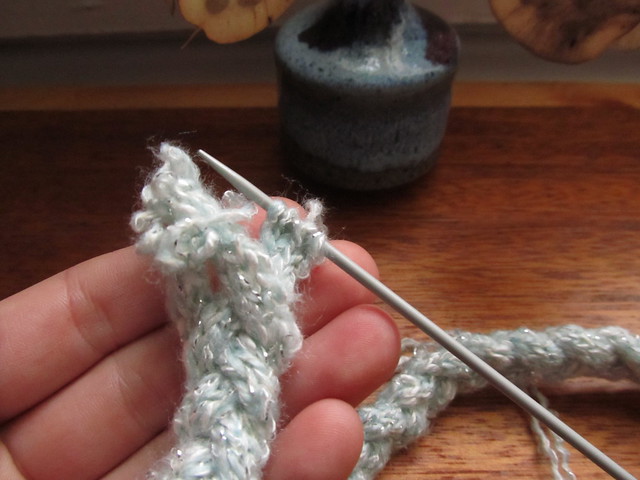
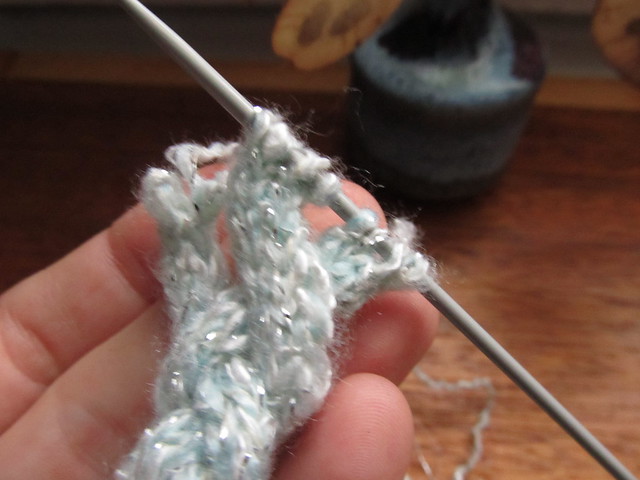
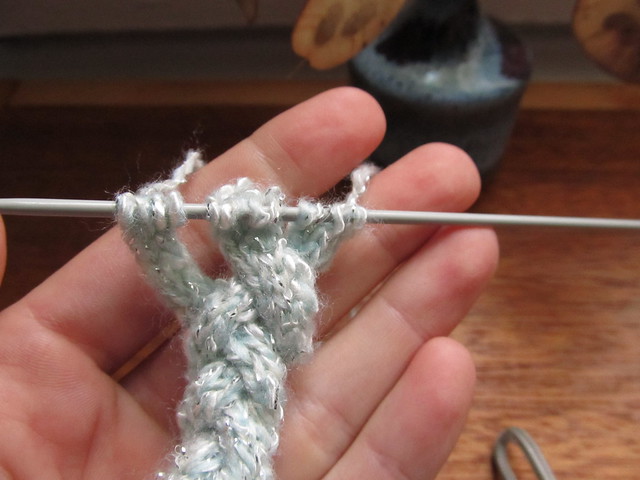 If your i-cords are not the same length after you've braided them, it's ok to unravel a few rows to even them out a little bit.
Row 1: (knit 2 stitches, knit 2 together) x 3. (9 stitches total)
Row 2: (knit 1, purl 1) across all stitches
Row 3-5: Work in ribbing as established
Row 6: knit 1, purl 1, knit 1, cast off 3 stitches, purl 1, knit 1
Row 7: purl 1, knit 1, purl 1, cast on 3 stitches, purl 1, knit 1, purl 1
Row 8-10 Work in ribbing as established
Row 11: Bind off all stitches. Weave in all ends with a tapestry needle
If your i-cords are not the same length after you've braided them, it's ok to unravel a few rows to even them out a little bit.
Row 1: (knit 2 stitches, knit 2 together) x 3. (9 stitches total)
Row 2: (knit 1, purl 1) across all stitches
Row 3-5: Work in ribbing as established
Row 6: knit 1, purl 1, knit 1, cast off 3 stitches, purl 1, knit 1
Row 7: purl 1, knit 1, purl 1, cast on 3 stitches, purl 1, knit 1, purl 1
Row 8-10 Work in ribbing as established
Row 11: Bind off all stitches. Weave in all ends with a tapestry needle
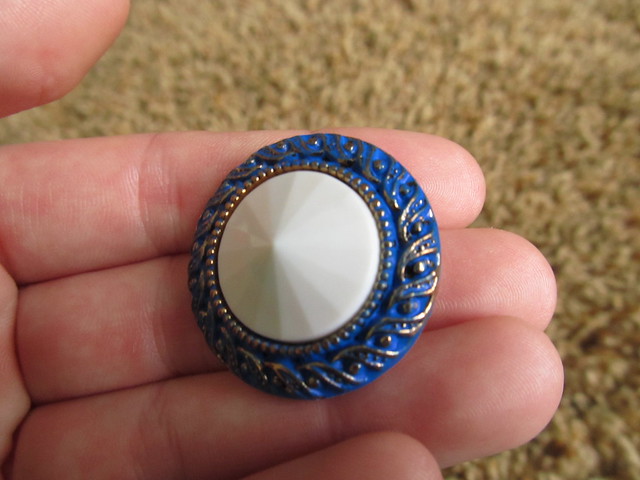 To fasten the headband, you will need a button that is small enough to pass through the hole that you made. I chose one that had similar colors.
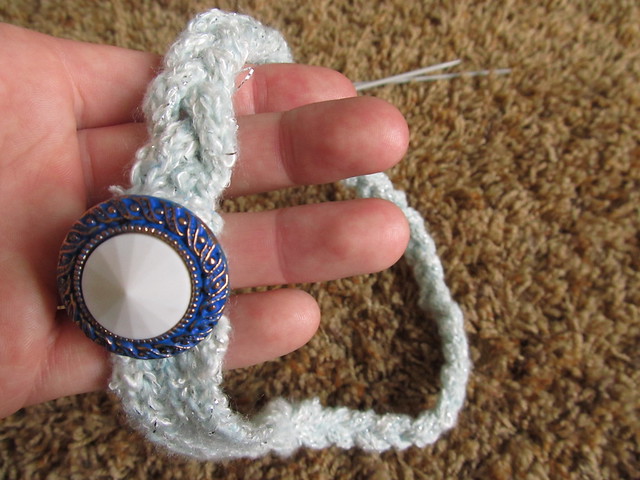 Sew the button in place. You've got yourself a new braided headband!
Did you know that you can recycle the yarn from store bought sweaters? It's definitely possible and once you know what you are doing, it is very easy to accomplish. In my experience, yarn that is unravelled from sweaters is much more fun to work with because there is less pressure than buying yarn brand new from the store. Yarn that is recycled is...
1) Less Expensive!
If you buy a sweater from a used clothing store, you can usually find a sweater's worth of yarn for $10 or less
2) Care Instructions
It is common practice for store bought garments to have labels on them that tell you how to wash it. Also, because the clothing in a thrift store is already worn, you can immediately weed out sweaters that are easily felted, hard to care for, pill easily because you get to see what the yarn looks like knit up before you buy it
3) Protects Landfills
Sweaters don't literally protect landfills but if you recycle yarn instead of always buying store bought, you are keeping that sweater out of the garbage heap and you are making something beautiful out of it (remember the 3 R's-Reduce, Reuse and Recycle?). Even though sweaters at thrift stores have the potential of being purchased as is and reused by another customer, it still helps the avid diy enthusiast from burdening the planet.
4) Protects the Ecosystem
Unless you purchase yarn that has a completely see-through policy about their production methods, you could potentially adding to the overuse of pesticides on plant crops such as cotton or bamboo. Reusing yarn decreases the need for yarn production and therefore pesticide use
5) Less Knots
This is just a personal preference, but I find that store bought sweater yarn has fewer knots than conventional yarn. Also, since you are unravelling whole garment pieces instead of using individual skeins, there are less knots necessary for connecting pieces together.
So, now that you are aware of how cool it is to reuse yarn, let's get on our merry way shall we?
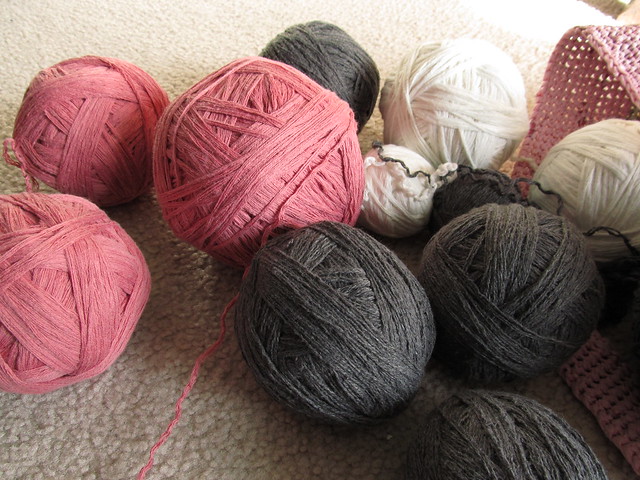 So, first thing you're going to need to do is acquire a sweater acceptable to our purposes. Not all sweaters are created equally but I am here to arm you with the knowledge you need to choose the right sweater.
TIP: It is always better to look for sweaters in the biggest sizes possible, including mens sweaters because obviously there is more yarn. You don't need to make sure the sweater fits your body because it is going to be deconstructed later.
So, first thing you're going to need to do is acquire a sweater acceptable to our purposes. Not all sweaters are created equally but I am here to arm you with the knowledge you need to choose the right sweater.
TIP: It is always better to look for sweaters in the biggest sizes possible, including mens sweaters because obviously there is more yarn. You don't need to make sure the sweater fits your body because it is going to be deconstructed later.
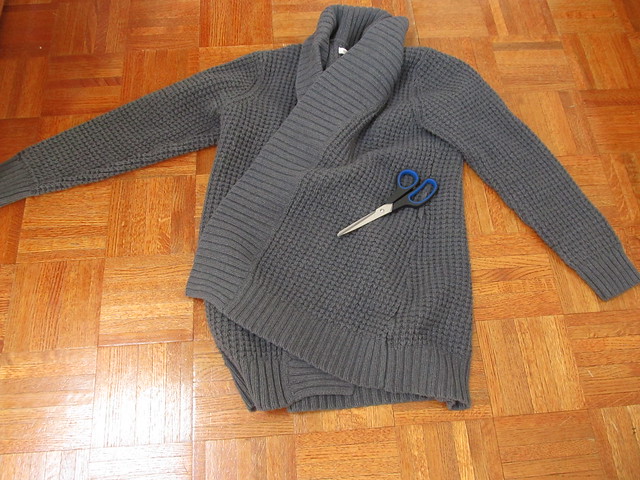 Let's have a look at the inside of the sweater. One of the ways you can tell if a sweater is good for recycling is to check out the seams. If all the seams on your sweater look like this one, which is serged with a serger machine and therefore the pieces of the sweater were cut up and sewn together, then you can put it right back down.
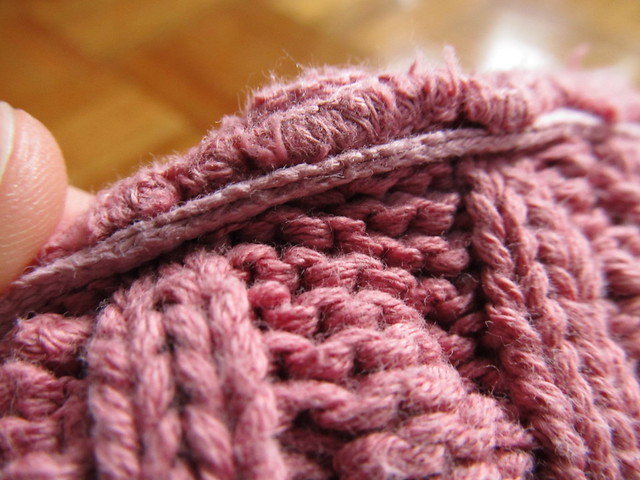 If your sweater seams all look like this, slightly bulky and not sewn together with a sewing machine, then you are one step closer to having a great sweater.
TIP: Make sure you look at the label of the sweater to see what the yarn is made out of and what the care instructions are. Cotton sweaters are pretty easy to unravel, although they might not be super soft when you are finished. Cotton is better for projects that don't need to be against the skin because it is made more durably than other yarns. Also, if the yarn is acceptable next to your skin when it is in thrift store sweater form, it will be acceptable once you unravel it. Be careful of purchasing wool because it will shrink on you if not properly cared for.
If your sweater seams all look like this, slightly bulky and not sewn together with a sewing machine, then you are one step closer to having a great sweater.
TIP: Make sure you look at the label of the sweater to see what the yarn is made out of and what the care instructions are. Cotton sweaters are pretty easy to unravel, although they might not be super soft when you are finished. Cotton is better for projects that don't need to be against the skin because it is made more durably than other yarns. Also, if the yarn is acceptable next to your skin when it is in thrift store sweater form, it will be acceptable once you unravel it. Be careful of purchasing wool because it will shrink on you if not properly cared for.
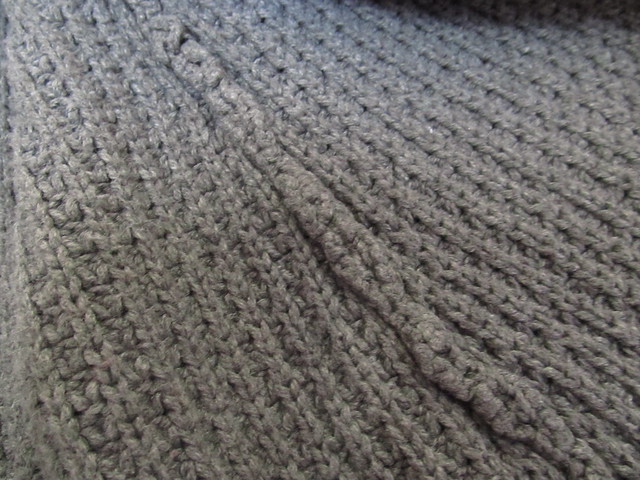 Next, you'll want to figure out what kind of seam you actually have. This sweater, except for the very top of the neck which was serged, has a crochet seam which is very easy to unravel. It is identifiable because it has a row of little v's on one side of the seam and a row of dashes on the other (look at the next picture to see what I'm talking about).
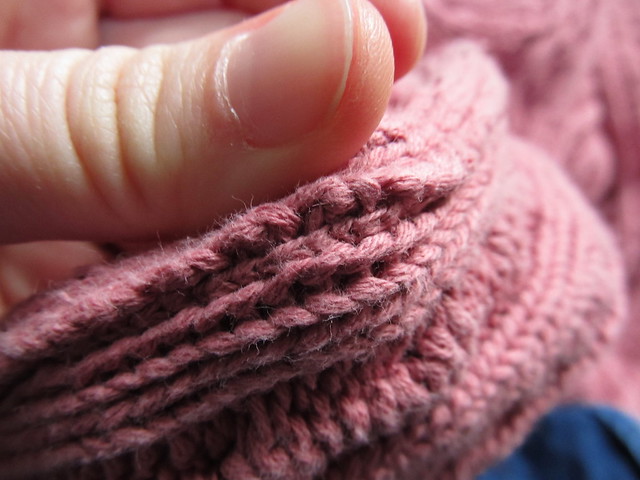 Using your scissors, you'll want to snip one of the edges of the little v's. This is the part that will take practice and might be a teeny bit frustrating at first but trust me, you'll get better. The crochet seam unravels from the top down, which means you'll want to snip one of them as far to the top of the little v's as you can get. Also, I've found that some sweaters are crochet seamed along the side all the way up to the sleeves so it might be as easy as finding the right seam to unravel.
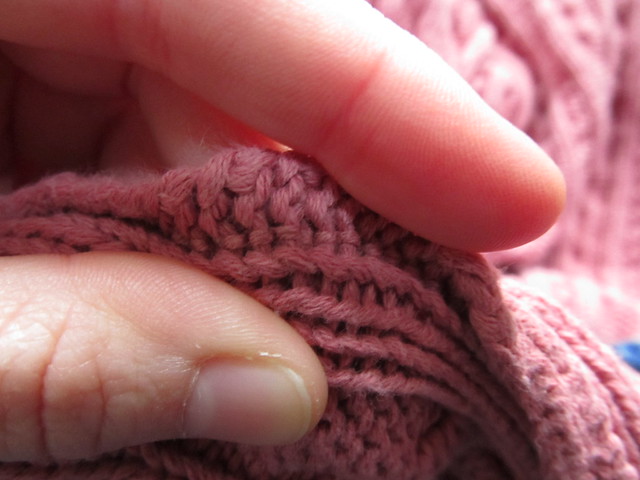 TIP: Don't forget to cut off any tags or care instructions from your garment using a seam ripper or by being very gentle with a pair of scissors. Since most often they are sewn on with a sewing machine, it is best to use a seam ripper if you have one.
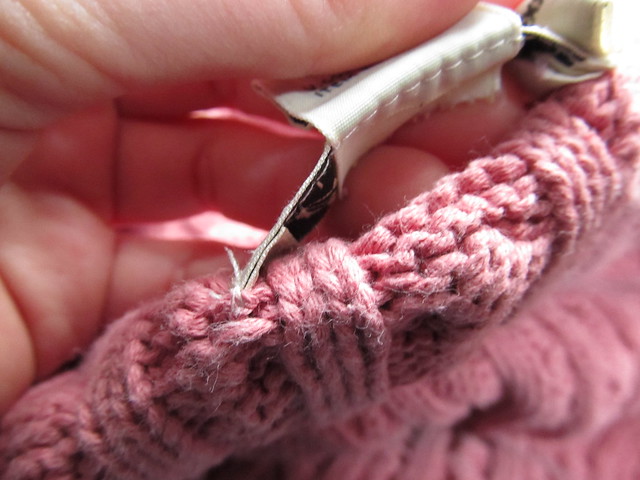 Now that you have cut one of your little v's, it's time to start unravelling your seam. You might need to untangle the thread a little bit first, but once you have your seam free, you can just pull on the string and it comes undone very nicely for you.
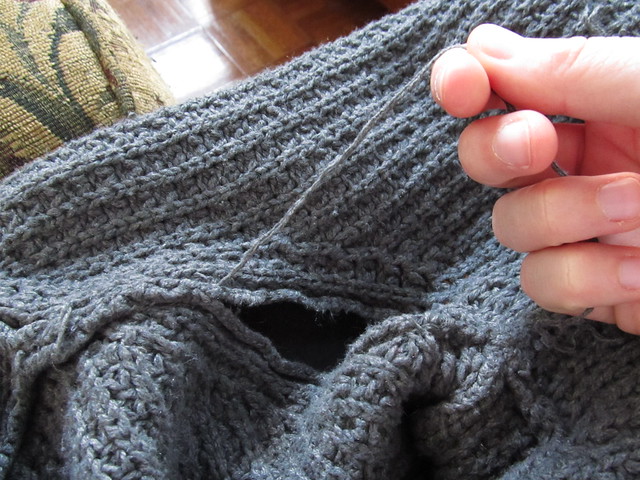 Once you have removed all of the seams from your garment, you can unravel each piece of the sweater. TIP: It is always better to wind the yarn into a ball as you go because it reduces the risk of tangling that would occur if you left all the unravelled yarn in a pile (trust me, I know from experience how much "fun" unravelling knots is!)
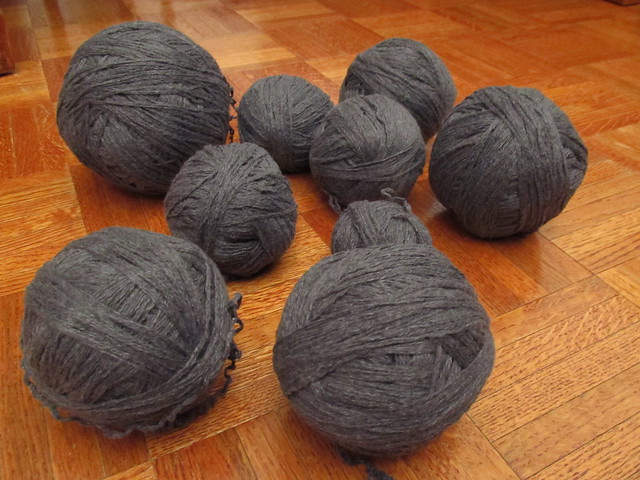 With a little practice, you can start knitting from recycled sweaters in no time! If you have any questions, feel free to ask, I'd love to help!
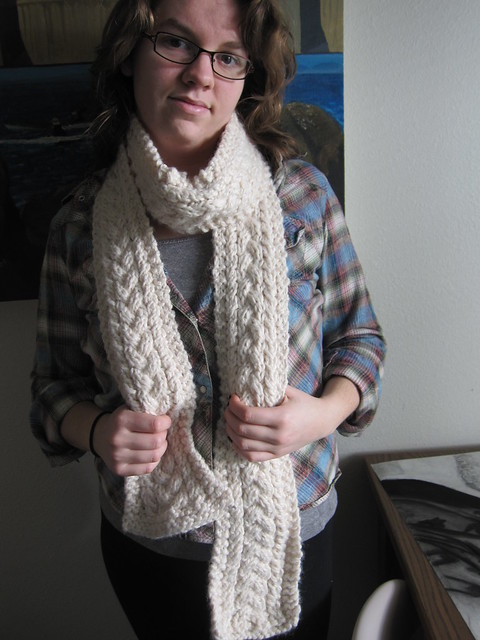
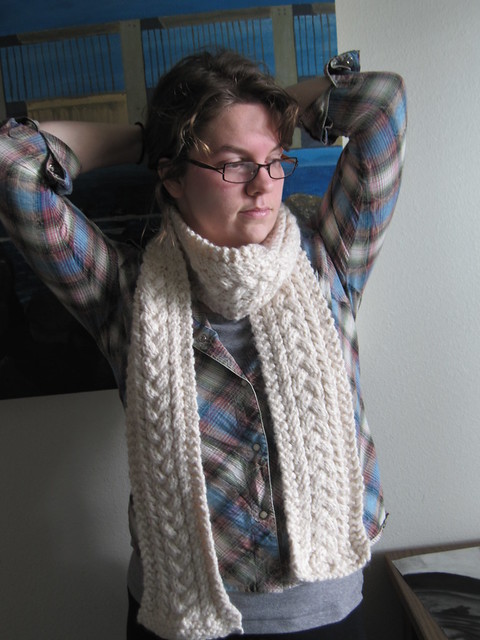
I wasn't planning on starting now, but I have a pattern for any of you knitters out there! I am an avid knitter and I have been working on a lot of knitting patterns because I have big big plans for the blog in the near-ish future. This pattern is called Durga because at the time of its creation, I was studying Hindu art and I was inspired. She is a Hindu goddess who was created from the other male gods when their powers weren't strong enough to slay the demon Mahishasura. I really like this goddess because she is more powerful than all the men; she was created when no one else could get the job done!
Durga the scarf pattern was also created when no other scarf pattern could get the job done. Made from bulky wool yarn, it is the perfect scarf to wrap around enough times to make your neck warm and cozy on those blustery days when none of your other scarves can do the job. Also, because the bulky yarn is thicker than most yarns, it is a fairly easy, mindless knit... in case you need to forget that you are making a giant rectangle... Oops, you just finished a scarf!
Materials: US size 13 and 15 needles (I used circular needles)
Yarn: Lion Brand Wool Ease Thick and Quick. 2-3 skeins depending on preferred length
Gauge: Your gauge isn't really important to the scarf because it doesn't require shaping. If you really need a size reference, the final scarf width should be between 4 and 5 inches wide. The width depends on how much you want to knit.
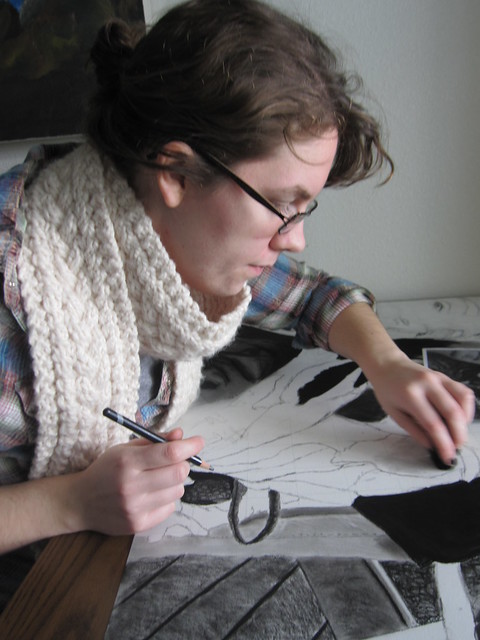
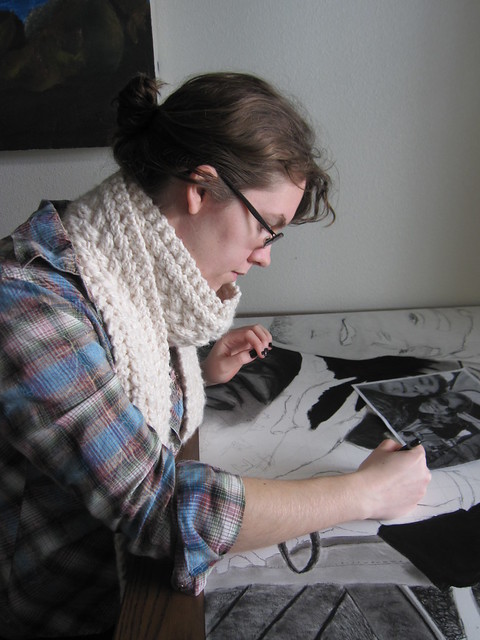 Pattern:
Using size 13 needles, cast on 18 stitches. Knit 4 rows.
Switch to size 15 needles and begin cable pattern. Continue in cable pattern until piece reaches desired length (personal preference).
Switch back to size 13 needles. Knit 3 rows. Bind off all stitches.
Pattern:
Using size 13 needles, cast on 18 stitches. Knit 4 rows.
Switch to size 15 needles and begin cable pattern. Continue in cable pattern until piece reaches desired length (personal preference).
Switch back to size 13 needles. Knit 3 rows. Bind off all stitches.
Cable Pattern:
Row 1- k2, p1, C2F, p1, C4F, k2, p1, C2B, p1, k2
Row 2 and all even rows- k3, p2, k1, p6, k1, p2, k3
Row 3- k2, p1, C2F, p1, k2, C4B, p1, C2B, p1, k2
I have one more thing to add before I finish... I used to have a knitting blog. There is a whole knitting community out there if you are interested and I was involved in it for a long time. I published patterns, including this one, on a different blog and I was really happy with it for a while. This summer, however, I realized that I didn't want to just focus on knitting anymore.
I have become much more interested in sustainability over the past few years and I wanted a way to showcase my experiments and simple ways that I changed my lifestyle. I created this blog just for that purpose, but I am still crazy about knitting. Every once in a while, I will add a new pattern for free because I believe that knitting/crocheting/crafting can be an integral part of your sustainable lifestyle if that's something you're interested in. I focus on accessories and my preferred medium is usually wool because I live in a colder climate. My knitwear designs are generally fairly practical, easy, and of course, free. Have a wonderful day and don't forget to bring along your new wool scarf!
UPDATE: I had a question about what the abbreviations meant for the cable section so here's a new list of what the abbreviations mean:
C2F-Put next stitch on the cable needle and hold stitch in the front of the piece, knit one stitch, replace the stitch from the cable needle to the left hand needle, knit one stitch.
C2B-Put next stitch on the cable needle and hold stitch in the back of the piece, knit one stitch, replace the stitch from the cable needle to the left hand needle, knit one stitch.
C4F-Put next 2 stitches on the cable needle and hold stitches to the front of the piece, knit two stitches, replace the stitches from the cable needle to the left hand needle, knit two stitches.
C4B-Put next 2 stitches on the cable needle and hold stitches to the back of the piece, knit two stitches, replace the stitches from the cable needle to the left hand needle, knit two stitches.