Hello everyone! Do you want to learn how to make infused vodka? It's really easy! Just watch (and rock out to) this awesome video that my good friend helped me make and you'll learn. If you need a gift idea, this would be a great option!
Showing posts with label diy. Show all posts
Showing posts with label diy. Show all posts
Thursday, January 10, 2013

Wednesday, December 26, 2012
Hand Felting Tutorial
Recently, I made a new friend that just happened to know how to knit too. He had plenty of family members that knit and had been gifted these really awesome felted clogs that I must say I am jealous of. You see, years ago, I attempted knitting and felting a pair of mary jane slippers that turned out to be just a little bit too short for my feet and provided very little warmth because the majority of my foot was still exposed to the air.
Instead of pining for said slippers, I decided to try some for myself and see what happens. The particular pattern that I used was Fuzzy Feet and it took me three days to knit and felt these slipper socks. I decided to hand felt them because I didn't want to use any machinery for the entire process. Also, the purple yarn in the socks was an experimental yarn that I dyed with purple juice years ago and I wasn't sure whether or not it would bleed. Since the process worked out so well, I thought I'd make a little tutorial of how to hand felt knitted items.
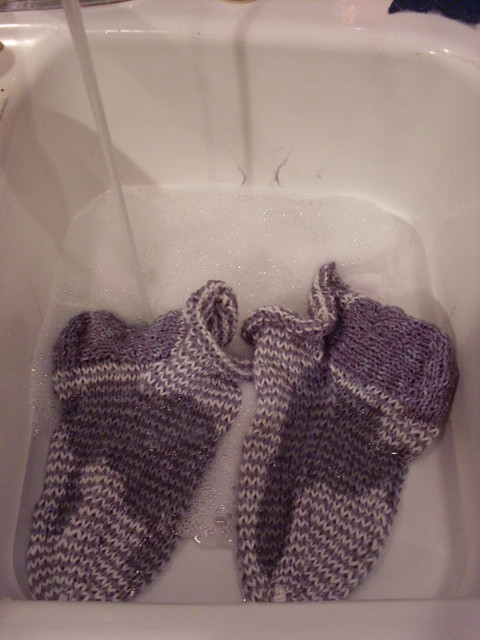
First, you start out by filling a sink full of hot water and soap. Soak your giant items ready to be felted in the water bath and prepare yourself for the work ahead. NOTE: If your fabric isn't 100% wool, start over and make whatever you want to felt with 100% wool because it will never work.


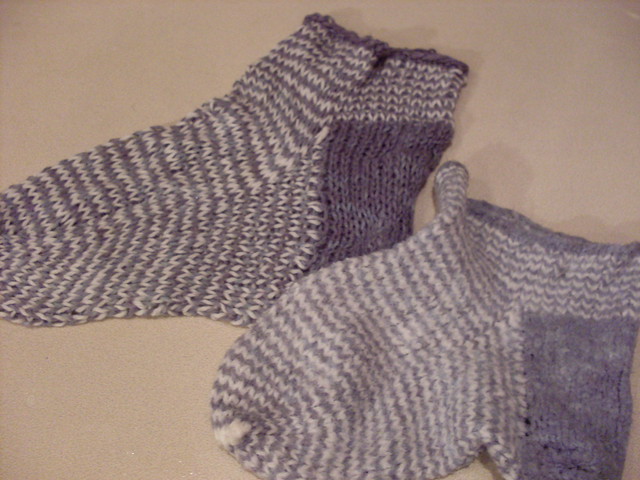
I felted the slippers one at a time so here is a size comparison for you. Felted garments shrink to about 1/3 of their original size so you'll want to make sure your garment is about 3 times bigger than your finished dimensions.

These slippers turned out pretty cute and very warm! The pattern was great and the slippers made a good addition to the holiday gifts I was giving. I wish I had more time before the holidays to make a few more pairs but I'm also a fan of giving gifts at random so I might still make some anyway.

PS, these were a great way to use up some stash scraps of yarn. I want to make a few that have thicker stripes in the near future so keep an eye out in the near future :)
Saturday, December 22, 2012
Foraging and an Update
Look what I found! It's an amanita muscaria mushroom (you know, the Alice in Wonderland looking mushrooms that are such a popular icon nowadays). Amanitas have a red cap with white spots and I found this one growing a few blocks from my house. I'm no mycologist but these babies are pretty rare and I was so happy to see one!
![SDC10528[1]](http://farm9.staticflickr.com/8353/8298366450_b3ed32797c_z.jpg)
I did pluck it out of the ground to photograph it but there were several more in the ground so don't worry. If you end up in Bellingham anytime soon, send me a message and I'll tell you where I found them.
![SDC10526[1]](http://farm9.staticflickr.com/8073/8297324637_f7ea4c7770_z.jpg) And, since I am in the process of reading a super cool book that I want to get back to, I just wanted to post an updated picture of my brown pullover that I sewed an applique to. Eventually, I'd like to embroider something over the top, but I don't want to reveal what just in case I decide not to. Be sure to check back in within a couple of days because I've got a few projects up my sleeves I'll be writing about soon. Have a great day!
And, since I am in the process of reading a super cool book that I want to get back to, I just wanted to post an updated picture of my brown pullover that I sewed an applique to. Eventually, I'd like to embroider something over the top, but I don't want to reveal what just in case I decide not to. Be sure to check back in within a couple of days because I've got a few projects up my sleeves I'll be writing about soon. Have a great day!
![SDC10537[1]](http://farm9.staticflickr.com/8355/8297313265_fb2c9dacf6_z.jpg)
I did pluck it out of the ground to photograph it but there were several more in the ground so don't worry. If you end up in Bellingham anytime soon, send me a message and I'll tell you where I found them.
Monday, December 10, 2012
Success?
I've been struggling this week to accomplish some of my projects because I'm fighting poor lighting, lack of internet, and failed projects. Well, not necessarily failed, just not 100% successful. On Thanksgiving, I decided to make some homemade lotion because my skin always gets dry in winter and I use lotion all the time. Store bought lotion has all kinds of chemicals in it that actually make your skin drier which is very counterproductive when you have patches that get so dry, they split and bleed.
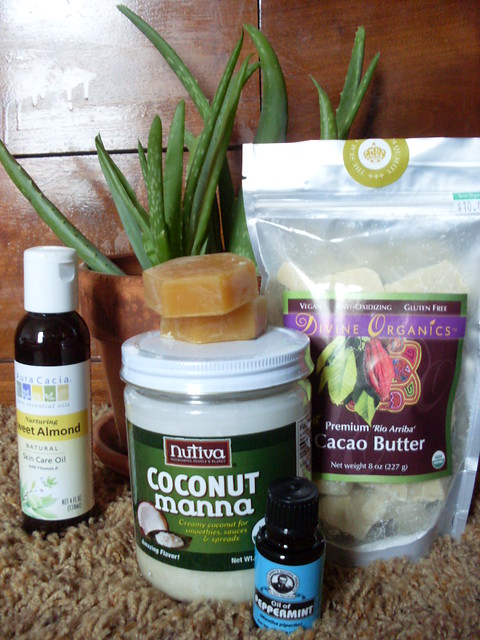

One of the challenges I faced was deciding how much of the aloe to use. I had never cut aloe fronds before but I experimented with different methods to get the pulp out.

Cutting the edges off and sort of julienne-ing the plant worked mildly well. I discovered that you can't just slit one end open and massage the goo out, you just need to be patient and willing to get pretty sticky.
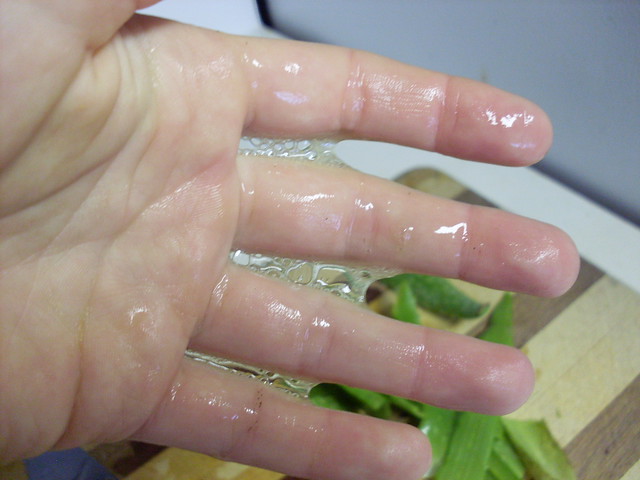
So my hands ended up a sticky mess!

Then, since I could only find .8 oz bars of beeswax, I sort of fudged a little bit on the math and used two. I don't own a scale so getting the accurate amount of each of the ingredients was a challenge.
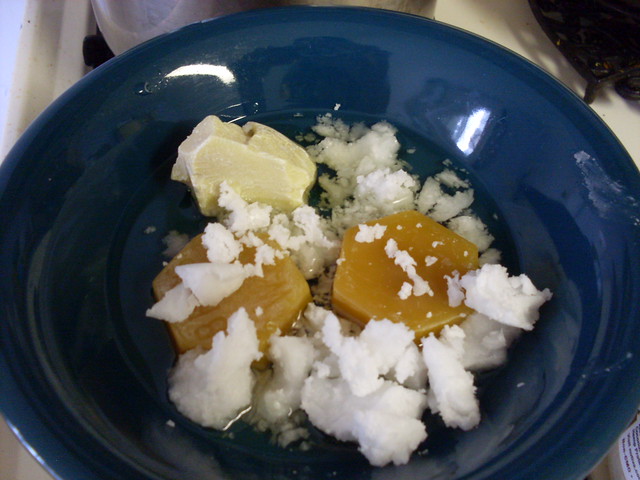
After combining everything except the aloe and the essential oil, I melted everything down until it was all incorporated.
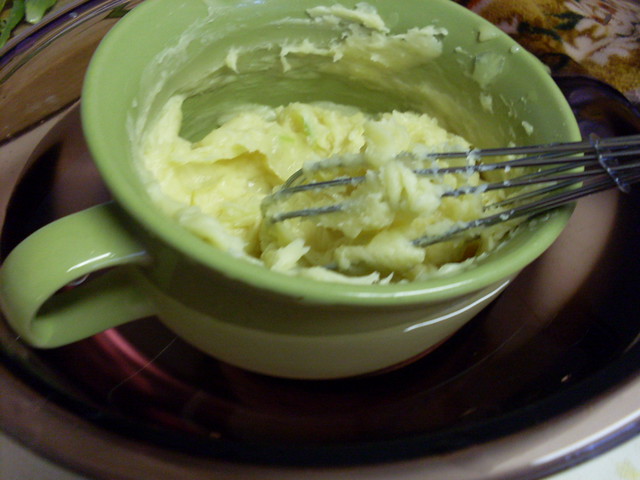
Then, I mixed everything together in a separate bowl submerged in some cold water. The result was a mash that looks more like mashed potatoes, is very clumpy because I didn't have a useful blender, and the aloe chunks didn't really mix together that well so it's not the prettiest lotion that has ever been made....
But you know what? My hands have never been more soft! I'm going to keep experimenting and hoping that the days will get brighter so I can photograph all the projects I'm working on.
Saturday, December 1, 2012
Low Tech Machines: Un-Knitting is Knotty Too
I meant to post this yesterday but what better way to celebrate the first day of December than to stumble upon an awesome new machine. I shared with you in this post that I love to recycle store bought sweaters, but this machine turns it into a much more efficient process. The teapot is used to steam the yarn, removing any kinks in it before it is wound onto the ferris wheel. After that, the ball is wound using a ball winder into a center pull cake. How awesome would it be to have one of these? I could unravel a sweater in a few short sittings and get exercise while doing it! I'm off to go hunt through the garage to see if it might be possible to make one of these bad boys!
Imogen Hedges from Rachel Mc Closkey on Vimeo.
Monday, November 26, 2012
Easy and Free Knitting Patterns: Lace Hat
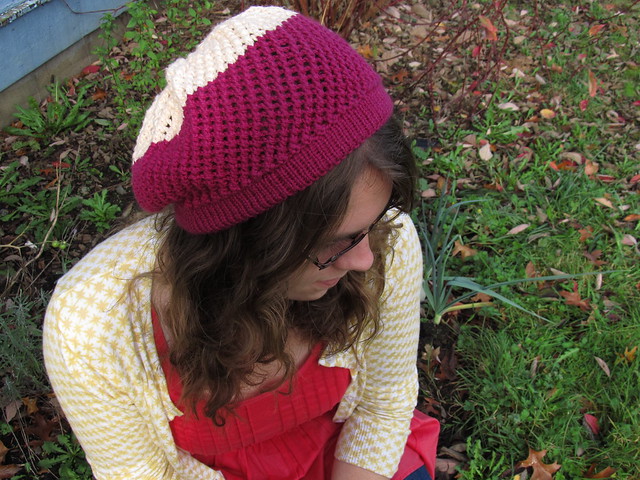
It's time for another free pattern! I debated whether or not I wanted to share this one but it's so darn fun that I couldn't keep it from you. This pattern, which I call Janet, is a reference to my Grandma Janet who is the one who taught me how to knit (Hi Grandma!). When I first started knitting, there were so many dropped stitches, you'd think I was attempting to knit lace. Eventually, with a lot of patience, the best knitting reference guide ever, and a lot of repetition from my grandma, I finally mastered knitting. Now, somewhere between 8 and 12 years later (none of us can remember when I started knitting because I've been doing it so long), I am designing my own patterns and sharing them with you. It feels so good to have come this far :)
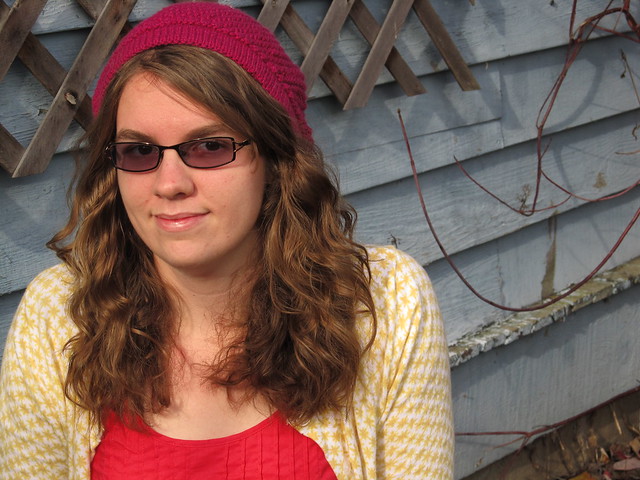
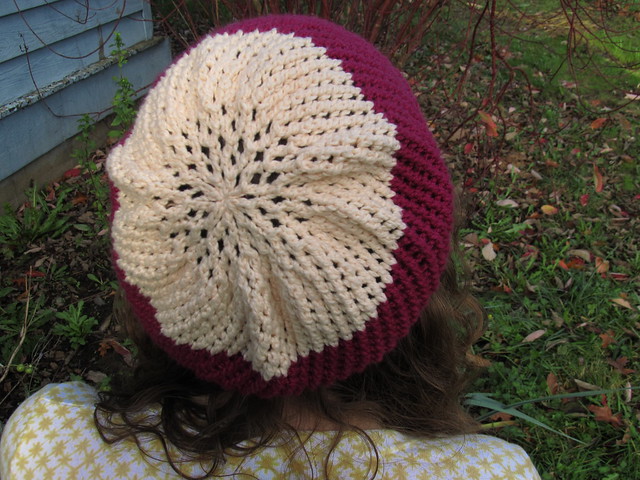
Anyway, as usual with knitting, nothing really ever turns out exactly how you want it. I thought to myself "Self, I'm going to make a raspberry beret like in that Prince song. Hey, Self, I can use the scrap yarn that I got from my fiber teacher last year that just happens to be raspberry." Well, that didn't exactly turn out because I ran out of yarn (GASP!). If you're a knitter and you knit with scrap yarn, you know how frustrating it can be to get full swing into a project and not be able to finish. Instead of giving up, I decided to embrace the color block trend that is going on right now (not that I'm very trendy... I buy everything at Goodwill remember?). I grabbed another hunk of scrap yarn that I got from the same fiber teacher and Voila! Janet was born (the lace hat, not my grandma!)
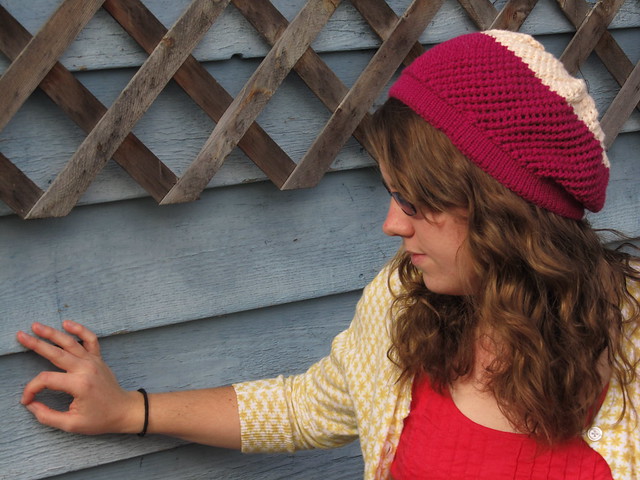
Janet Hat
Yarn: I used some scrap yarn that I had lying around in my stash. It appears to be worsted but in order to be positive, make sure you make a gauge swatch!
Needles: US Size 7 double pointed needles or appropriate needles to obtain gauge
Gauge: 21 stitches and 36 rows equals 4" in stockinette stitch, 22 stitches and 32 rows equals 4" in lace pattern.
Note: It is less important to achieve row gauge for this project because it is based on measurements. If you are a row or two off for the row gauge but are able to achieve stitch gauge, that should be fine.
Lace Pattern:
Round 1: (yo, ssk) around
Round 2: knit every stitch
Pattern:
Cast on 100 stitches onto 4 double pointed needles, place a stitch marker at end of round or keep track of the beginning and end of the round.
Knit 9 rounds, purl 1 round, knit 9 rounds.
Now what you're going to do is fold the cast on edge backward at the purl row so that the knit side is facing out. Pick up the first stitch from the cast on edge and knit it together with the first live stitch on the needle. Continue all the way around. I'll be making a photo tutorial of how to do this later in the week which I will link back to.
Next round: (knit 4 stitches, knit into the front and back of the next stitch) repeat around. 120 stitches.
Purl 1 round
Begin Lace Pattern. Continue in pattern until piece measures 7-8 inches (mine is 7.75 inches to be exact).
Decrease Section:
Round 1: (ssk, yo, ssk) repeat around (90 stitches)
Round 2 and every even round: knit every stitch
Round 3: (yo, sl1k2togpsso) around (60 stitches)
Round 5: Repeat Round 1 (45 stitches)
Round 7: Repeat Round 3 (30 stitches)
Round 9: Repeat Round 1 until last two stitches, ssk (22 stitches)
Round 11: Repeat Round 3 until last four stitches, yo, sl1k3togpsso (14 stitches)
Cut yarn, leaving a 3 inch tail. With a tapestry needle, thread tail through every stitch. Pull tight and weave in end.
Note: There is no right or wrong way to make the color block happen. I decided to change yarns when I ran out of one color. You can use lots of scraps and make a hat with multiple thick stripes, you can knit the hat in all one color, or you can knit a hat with only two colors like I did. The possibilities are endless!
Thursday, November 22, 2012
Hot Apple Cider
Happy Thanksgiving everyone! This is the first year I have been away from my family for Thanksgiving and it feels a little weird. I went home last weekend, though, and supplied the apple cider for my family. It was super easy to make and the only down side I found was that using a juicer instead of an apple press doesn't produce as much juice. If you have a compost pile or feel brave enough to make some apple bread out of the pulp, it doesn't really matter whether you use a juicer or not. So, in honor of Turkey Day, here's how I did it...
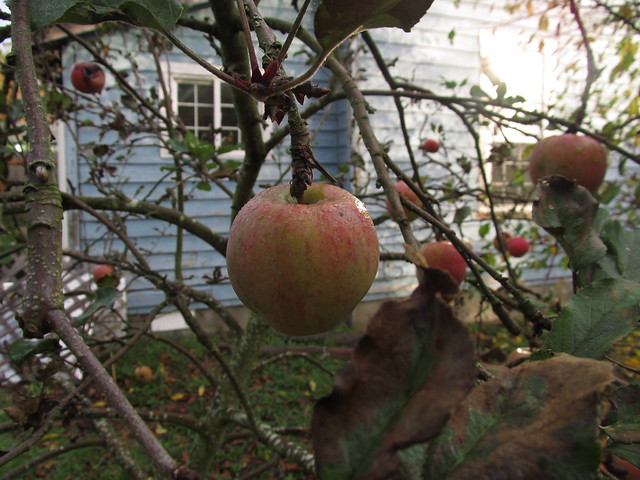
Of course, you have to get a bunch of apples! I still have a bunch on the tree in my yard, although some trees are already devoid of apples at this point. If you don't have access to a tree, you'll want about 12 organic apples. Organic is really important when juicing because all those pesky chemicals and pesticides that your body can sorta handle in whole fruit form are now reduced to a much higher concentration in your juice. It's just safer if you go with organics when juicing.
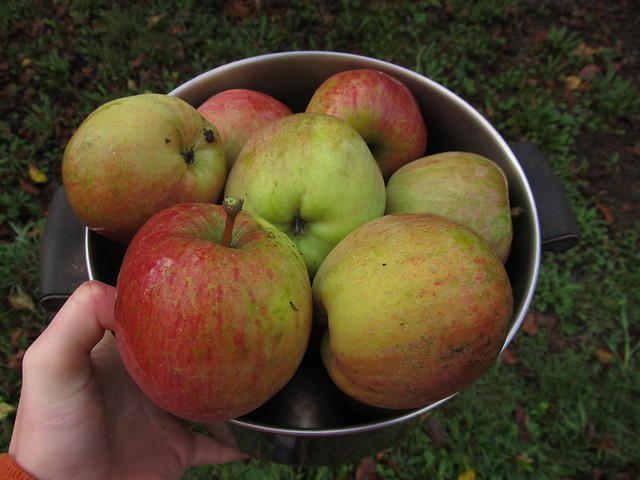
Here's my haul of apples, probably fuji but I'm not sure what kind they are.
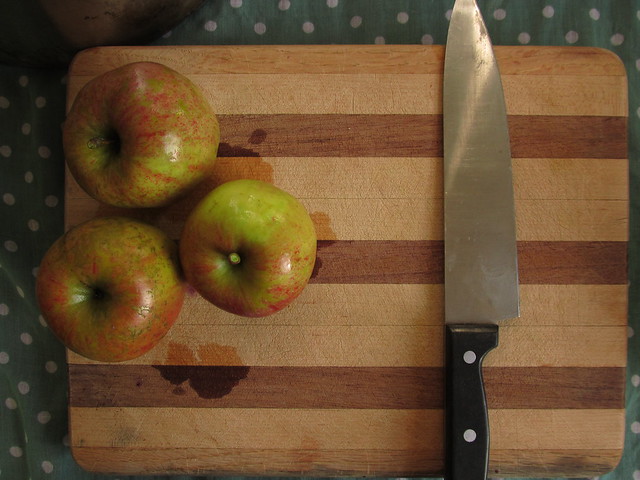
Next, you'll want a clean working space, a cutting board and a sharp knife. You might want to work on a big table with nothing on it depending on your juicer. Mine likes to splatter a little bit so I used a scarf as a "table cloth" and just washed it when I was through.
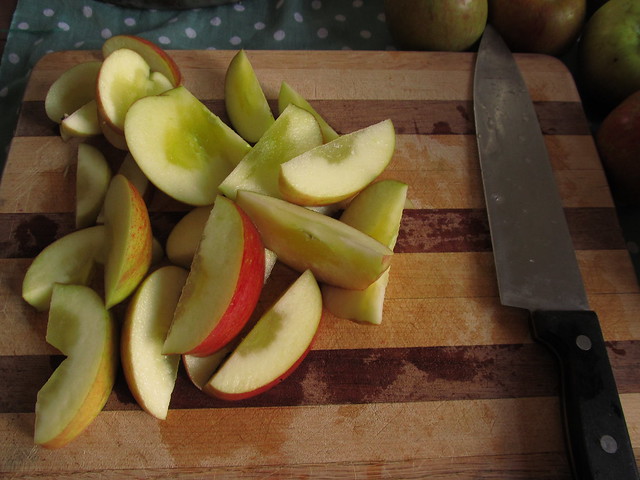
Chop up all those apples and make sure all the stems, seeds, and hard bits are cut off. You can leave the peel on if you want since the juicer can usually handle a little bit of peel.
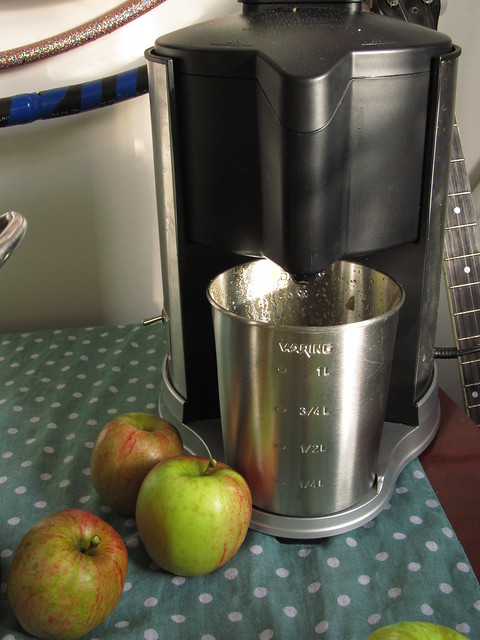 My juicer is a Waring Pro that I got last year on Amazon. The way it works: there is a small cutting thing, sorta like a cheese grater that rotates when the machine is turned on. The funnel at the top allows you to feed your fruits and vegetables into it and the pulp collects in the black bowl. The juice comes out of a little hole under the cheese grater part that leads to the funnel and into the silver cup. Mine splatters because the blade rotates so fast that it produces a lot of froth and air to get into the juice. When the bubbles pop, juice flies out a little bit. No problem if you have protected your work surface though.
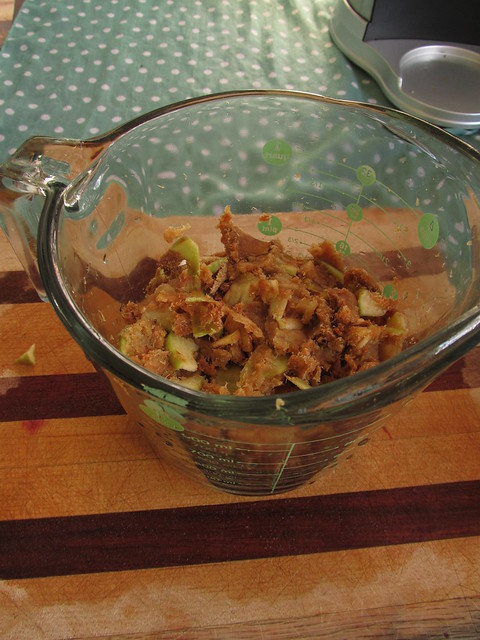 I collected all the pulp and used a cheese cloth to squeeze more of the juice out. I also made bread from the pulp but it was dense and very ugly. I'm going to continue experimenting with the pulp because I don't want to waste it.
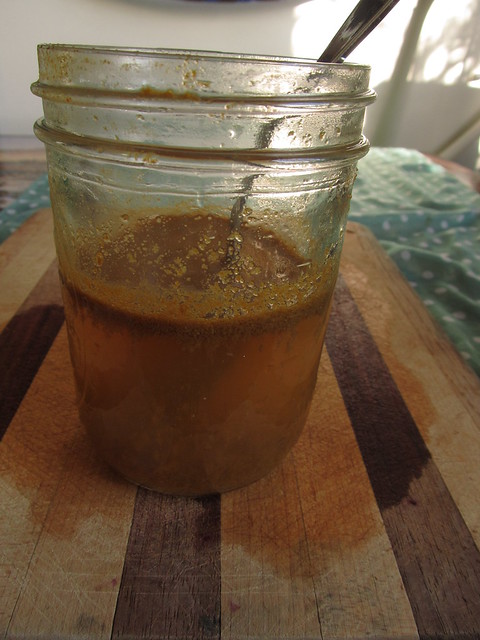
Of course, you have to get a bunch of apples! I still have a bunch on the tree in my yard, although some trees are already devoid of apples at this point. If you don't have access to a tree, you'll want about 12 organic apples. Organic is really important when juicing because all those pesky chemicals and pesticides that your body can sorta handle in whole fruit form are now reduced to a much higher concentration in your juice. It's just safer if you go with organics when juicing.
Here's my haul of apples, probably fuji but I'm not sure what kind they are.
Next, you'll want a clean working space, a cutting board and a sharp knife. You might want to work on a big table with nothing on it depending on your juicer. Mine likes to splatter a little bit so I used a scarf as a "table cloth" and just washed it when I was through.
Chop up all those apples and make sure all the stems, seeds, and hard bits are cut off. You can leave the peel on if you want since the juicer can usually handle a little bit of peel.
Finally, I added 1 tsp each of cinnamon, nutmeg, ground cloves, and ginger to my cider. I heated it up on the stove until it boiled to pasteurize it a little bit and then served it in mugs! Happy Thanksgiving everyone!
Wednesday, November 7, 2012
Easy and Free Knitting Patterns: Rosa
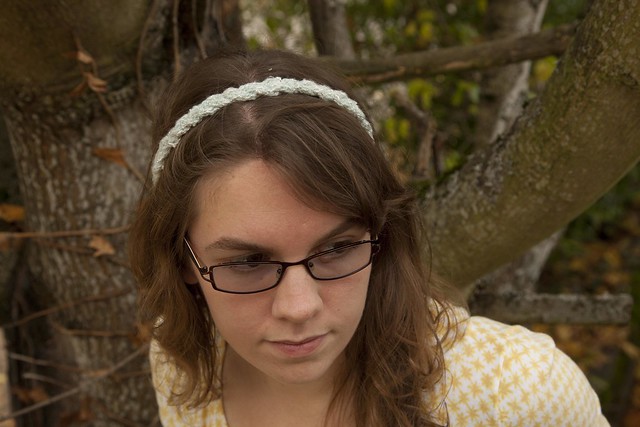
A few years ago, I had a dream about myself wearing this braided headband. Don't ask me what the dream was about, all I remember is that I had this braided headband on and I was frolicking through a forest (weird right?!). Anyway, fast forward to last year when I made an awesome headband that was straight out of that dream. It's girly, cute, shimmery and so easy to style. It's more of a recipe than a pattern but it's yours for the taking.
After changing blogs, I lost the photos from the original pattern so I have a new and improved version for you which will also be linked to Ravelry if anyone is interested in seeing my patterns there.
Rosa Headband
Yarn:I suggest using sport weight or sock yarn. You will also need a tapestry needle, or a sewing needle with an eye big enough to put your yarn through
Needles: I used size US 2 double pointed needles. You will need double pointed needles
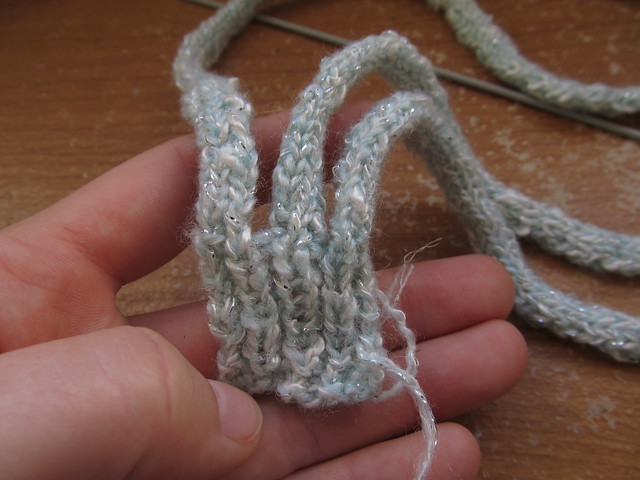
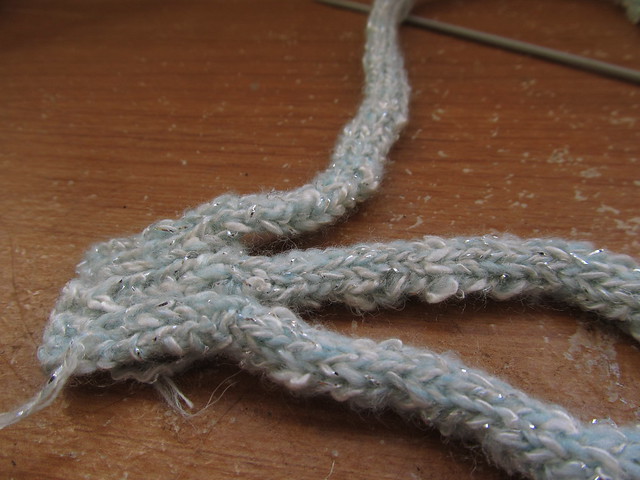
Notes: If the idea of having some of your stitches hanging freely scares you, it might be wise to invest in a stitch holder. Also, when you knit an i-cord (which is what you will be doing), you are basically knitting a very skinny tube without using a circular needle or 4 double pointed needles. If you've never done it before, just do what I say and it should work out. It's very easy!
Pattern: With one double pointed needle (you will only need 2), cast on 9 stitches.
Row 1: (knit 1, purl 1) across all stitches.
Row 2-9: Work in ribbing as established
Now, if you would like to use a stitch holder, slip the last 6 stitches of the row onto a stitch holder so that the three remaining stitches include the stitch connected to the yarn ball. You can also let your stitches hang around; I found that the yarn I was using was not prone to unravelling easily.
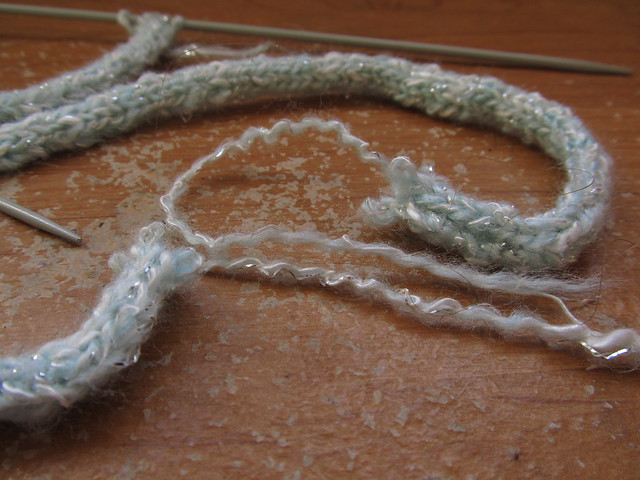
With 3 stitches on the needle, knit each stitch across. DO NOT FLIP YOUR KNITTING OVER! Slide the stitches from the left side of the needle to the right side of the needle and bring the yarn to the right side, keeping the yarn slightly taut. Put the needle with the stitches in your left hand and prepare to knit as you would normally. If you're a visual learner, here's a video you can watch that will show you how it's done.
For the next row, you are going to knit into the front and the back of the first stitch so that you have 4 stitches on your needle. Knit the rest of the stitches and slide them to the right of the needle.
After you've increased to 4 stitches, continue knitting each row and sliding the stitches over (you should never see the back of your work while you are knitting), to produce an i-cord. It is unnecessary to count each row because we are going to measure it with a ruler.
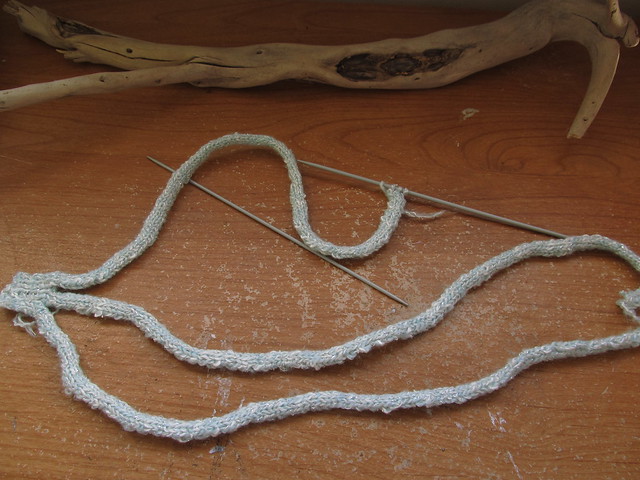
Once your first i-cord is about 18 inches long (or it can be placed around your head without going all the way around), place the four stitches onto a needle holder and break the yarn with an inch long tail. Repeat the i-cord process with the remaining 6 stitches (3 stitches for each i-cord) until you have 3 i-cords total. You will not need to break the yarn from the third i-cord
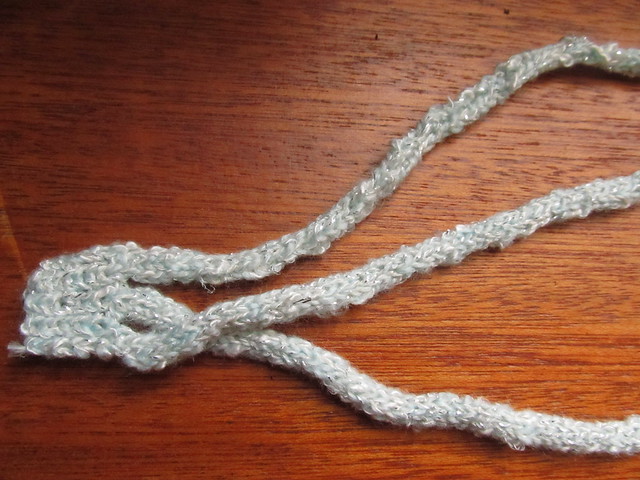
Being careful not to unravel your i-cords, braid them together like so
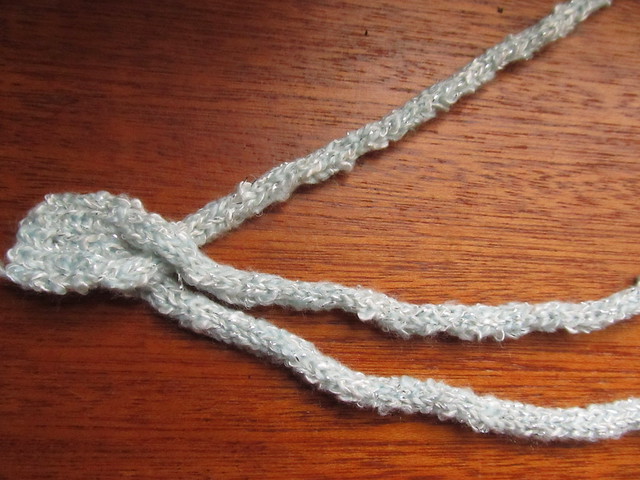
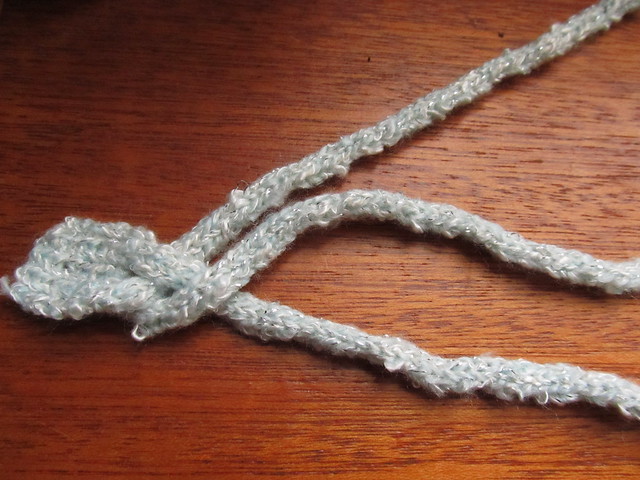
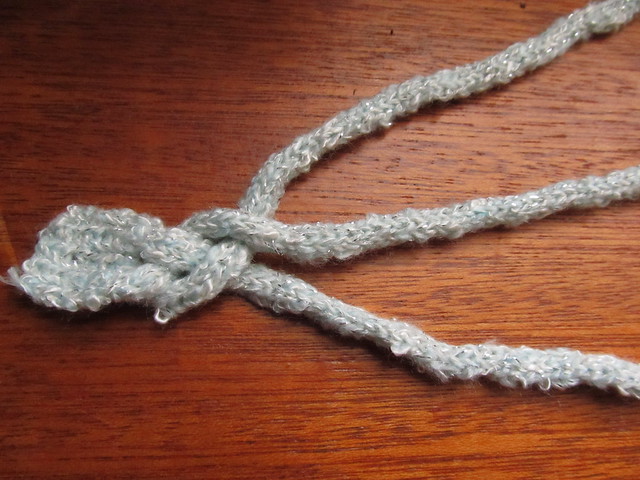
Until you've reached the end of your i-cords and the stitches look like this. You'll want to have the i-cord attached to the ball of yarn on the far right.
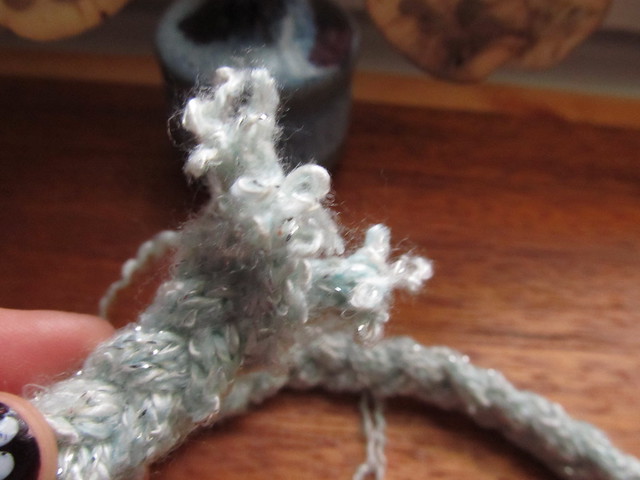
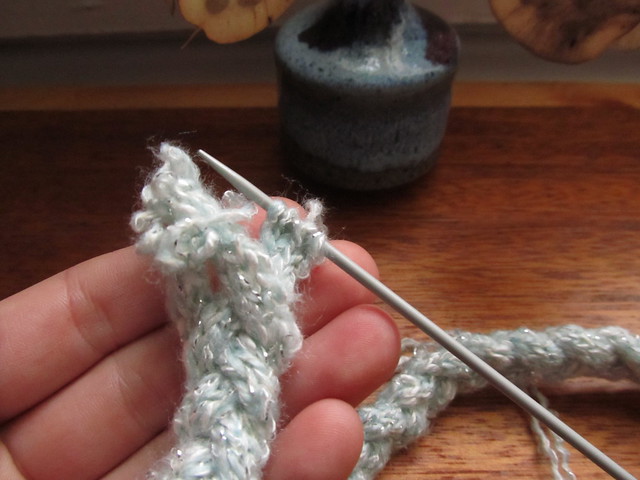
One at a time, pick up the stitches from your i-cords on the same needle
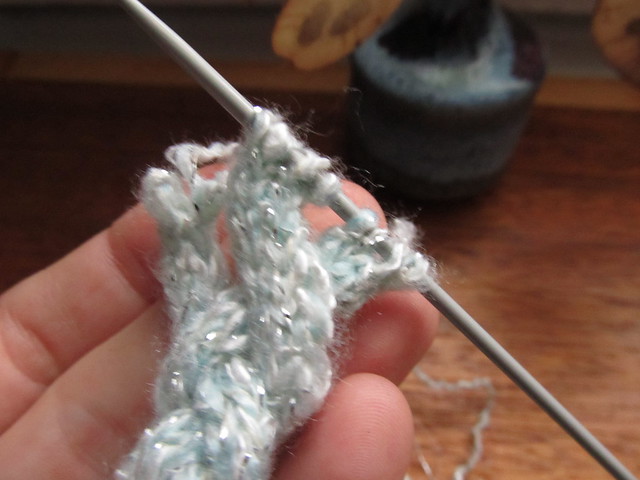
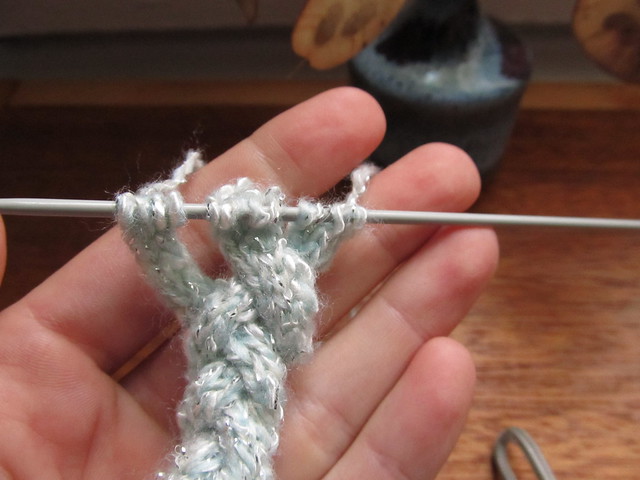
If your i-cords are not the same length after you've braided them, it's ok to unravel a few rows to even them out a little bit.
Row 1: (knit 2 stitches, knit 2 together) x 3. (9 stitches total)
Row 2: (knit 1, purl 1) across all stitches
Row 3-5: Work in ribbing as established
Row 6: knit 1, purl 1, knit 1, cast off 3 stitches, purl 1, knit 1
Row 7: purl 1, knit 1, purl 1, cast on 3 stitches, purl 1, knit 1, purl 1
Row 8-10 Work in ribbing as established
Row 11: Bind off all stitches. Weave in all ends with a tapestry needle
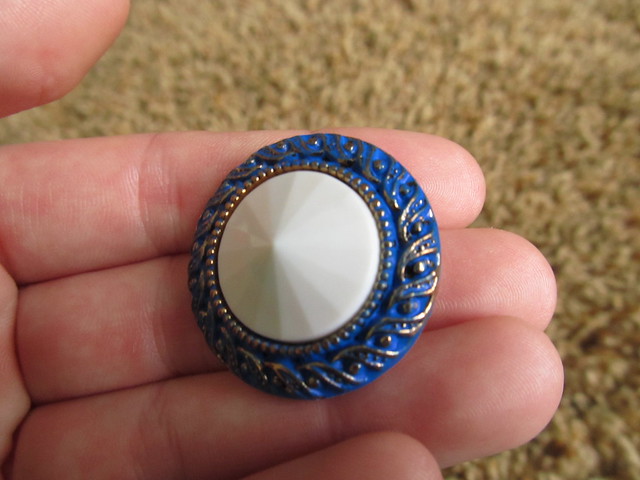
To fasten the headband, you will need a button that is small enough to pass through the hole that you made. I chose one that had similar colors.
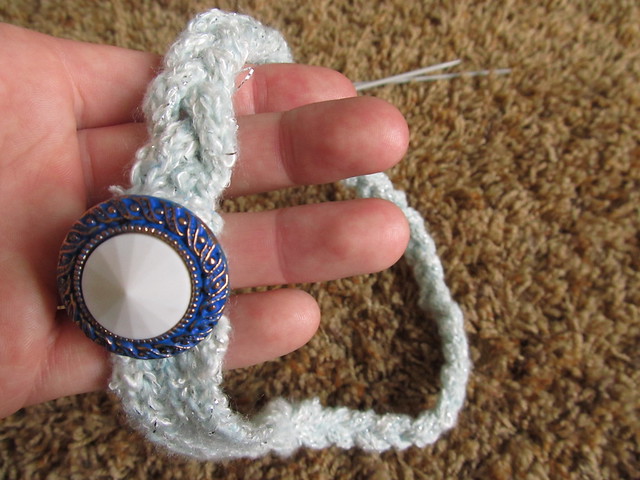
Sew the button in place. You've got yourself a new braided headband!

Monday, October 29, 2012
Recycling Yarn from Store Bought Sweaters
Did you know that you can recycle the yarn from store bought sweaters? It's definitely possible and once you know what you are doing, it is very easy to accomplish. In my experience, yarn that is unravelled from sweaters is much more fun to work with because there is less pressure than buying yarn brand new from the store. Yarn that is recycled is...
1) Less Expensive!
If you buy a sweater from a used clothing store, you can usually find a sweater's worth of yarn for $10 or less
2) Care Instructions
It is common practice for store bought garments to have labels on them that tell you how to wash it. Also, because the clothing in a thrift store is already worn, you can immediately weed out sweaters that are easily felted, hard to care for, pill easily because you get to see what the yarn looks like knit up before you buy it
3) Protects Landfills
Sweaters don't literally protect landfills but if you recycle yarn instead of always buying store bought, you are keeping that sweater out of the garbage heap and you are making something beautiful out of it (remember the 3 R's-Reduce, Reuse and Recycle?). Even though sweaters at thrift stores have the potential of being purchased as is and reused by another customer, it still helps the avid diy enthusiast from burdening the planet.
4) Protects the Ecosystem
Unless you purchase yarn that has a completely see-through policy about their production methods, you could potentially adding to the overuse of pesticides on plant crops such as cotton or bamboo. Reusing yarn decreases the need for yarn production and therefore pesticide use
5) Less Knots
This is just a personal preference, but I find that store bought sweater yarn has fewer knots than conventional yarn. Also, since you are unravelling whole garment pieces instead of using individual skeins, there are less knots necessary for connecting pieces together.
So, now that you are aware of how cool it is to reuse yarn, let's get on our merry way shall we?
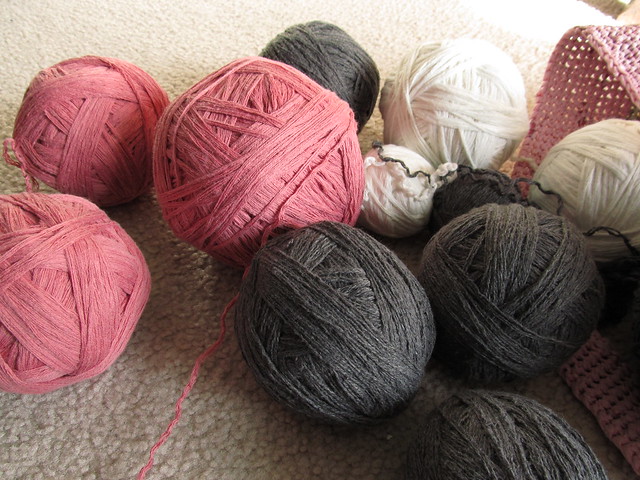
So, first thing you're going to need to do is acquire a sweater acceptable to our purposes. Not all sweaters are created equally but I am here to arm you with the knowledge you need to choose the right sweater.
TIP: It is always better to look for sweaters in the biggest sizes possible, including mens sweaters because obviously there is more yarn. You don't need to make sure the sweater fits your body because it is going to be deconstructed later.
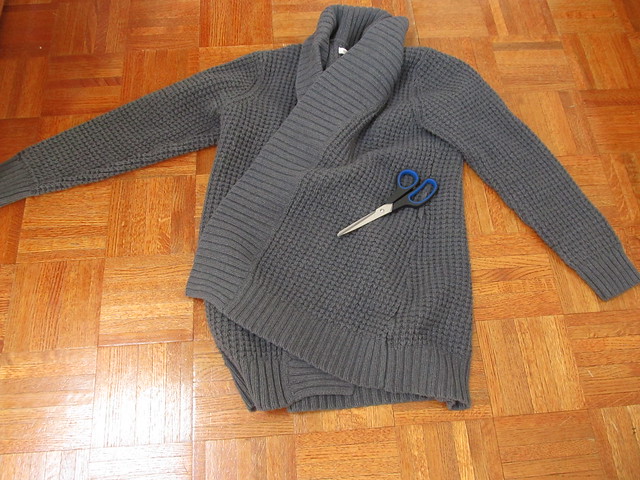
Let's have a look at the inside of the sweater. One of the ways you can tell if a sweater is good for recycling is to check out the seams. If all the seams on your sweater look like this one, which is serged with a serger machine and therefore the pieces of the sweater were cut up and sewn together, then you can put it right back down.
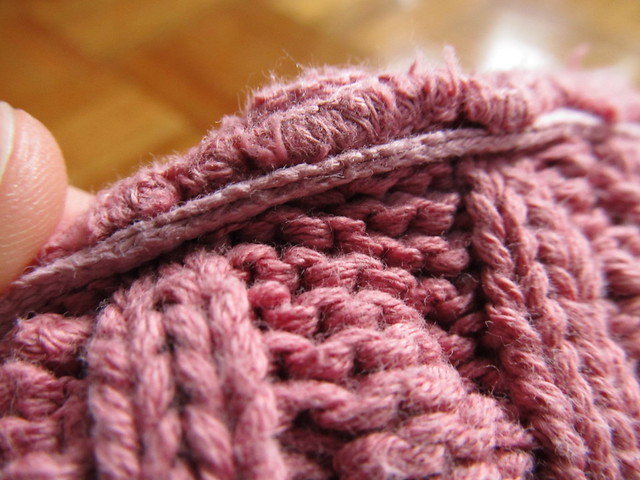
If your sweater seams all look like this, slightly bulky and not sewn together with a sewing machine, then you are one step closer to having a great sweater.
TIP: Make sure you look at the label of the sweater to see what the yarn is made out of and what the care instructions are. Cotton sweaters are pretty easy to unravel, although they might not be super soft when you are finished. Cotton is better for projects that don't need to be against the skin because it is made more durably than other yarns. Also, if the yarn is acceptable next to your skin when it is in thrift store sweater form, it will be acceptable once you unravel it. Be careful of purchasing wool because it will shrink on you if not properly cared for.
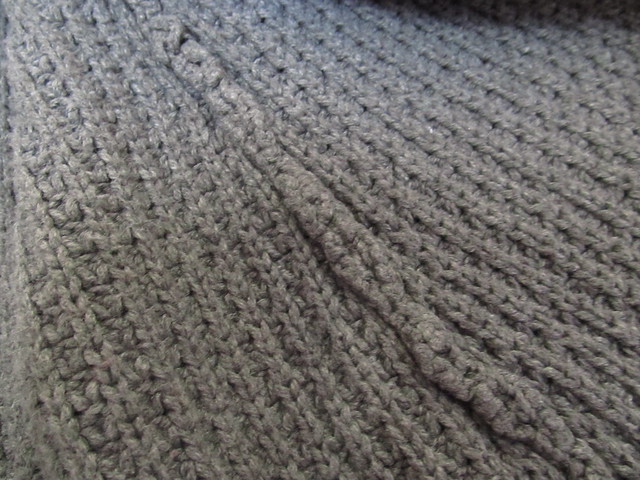
Next, you'll want to figure out what kind of seam you actually have. This sweater, except for the very top of the neck which was serged, has a crochet seam which is very easy to unravel. It is identifiable because it has a row of little v's on one side of the seam and a row of dashes on the other (look at the next picture to see what I'm talking about).
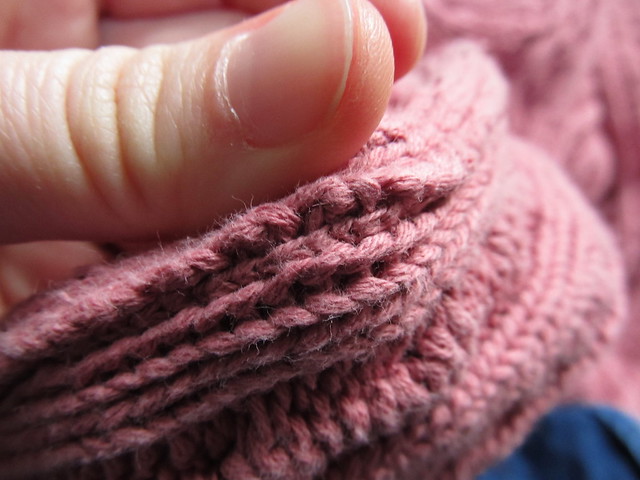
Using your scissors, you'll want to snip one of the edges of the little v's. This is the part that will take practice and might be a teeny bit frustrating at first but trust me, you'll get better. The crochet seam unravels from the top down, which means you'll want to snip one of them as far to the top of the little v's as you can get. Also, I've found that some sweaters are crochet seamed along the side all the way up to the sleeves so it might be as easy as finding the right seam to unravel.
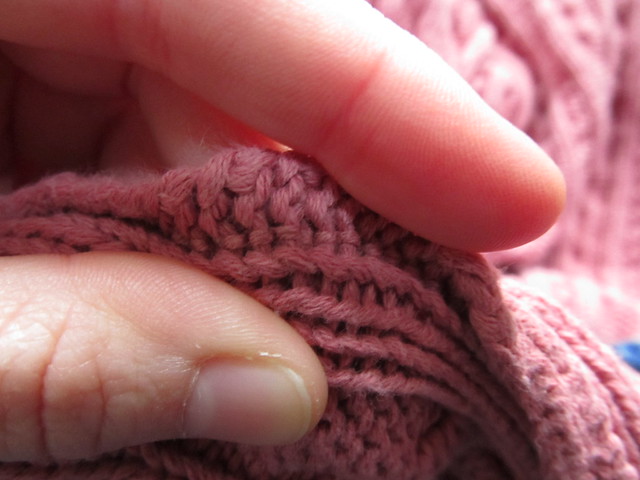
TIP: Don't forget to cut off any tags or care instructions from your garment using a seam ripper or by being very gentle with a pair of scissors. Since most often they are sewn on with a sewing machine, it is best to use a seam ripper if you have one.
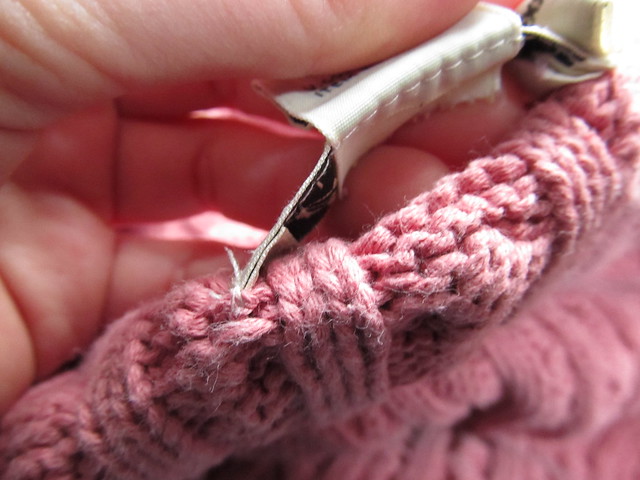
Now that you have cut one of your little v's, it's time to start unravelling your seam. You might need to untangle the thread a little bit first, but once you have your seam free, you can just pull on the string and it comes undone very nicely for you.
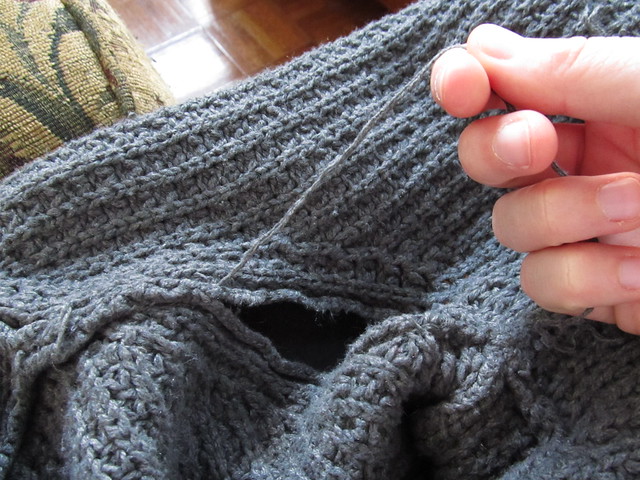
Once you have removed all of the seams from your garment, you can unravel each piece of the sweater. TIP: It is always better to wind the yarn into a ball as you go because it reduces the risk of tangling that would occur if you left all the unravelled yarn in a pile (trust me, I know from experience how much "fun" unravelling knots is!)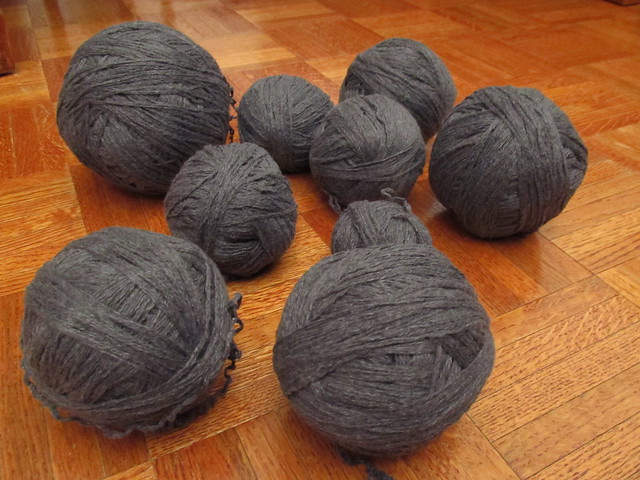
With a little practice, you can start knitting from recycled sweaters in no time! If you have any questions, feel free to ask, I'd love to help!
1) Less Expensive!
If you buy a sweater from a used clothing store, you can usually find a sweater's worth of yarn for $10 or less
2) Care Instructions
It is common practice for store bought garments to have labels on them that tell you how to wash it. Also, because the clothing in a thrift store is already worn, you can immediately weed out sweaters that are easily felted, hard to care for, pill easily because you get to see what the yarn looks like knit up before you buy it
3) Protects Landfills
Sweaters don't literally protect landfills but if you recycle yarn instead of always buying store bought, you are keeping that sweater out of the garbage heap and you are making something beautiful out of it (remember the 3 R's-Reduce, Reuse and Recycle?). Even though sweaters at thrift stores have the potential of being purchased as is and reused by another customer, it still helps the avid diy enthusiast from burdening the planet.
4) Protects the Ecosystem
Unless you purchase yarn that has a completely see-through policy about their production methods, you could potentially adding to the overuse of pesticides on plant crops such as cotton or bamboo. Reusing yarn decreases the need for yarn production and therefore pesticide use
5) Less Knots
This is just a personal preference, but I find that store bought sweater yarn has fewer knots than conventional yarn. Also, since you are unravelling whole garment pieces instead of using individual skeins, there are less knots necessary for connecting pieces together.
So, now that you are aware of how cool it is to reuse yarn, let's get on our merry way shall we?
So, first thing you're going to need to do is acquire a sweater acceptable to our purposes. Not all sweaters are created equally but I am here to arm you with the knowledge you need to choose the right sweater.
TIP: It is always better to look for sweaters in the biggest sizes possible, including mens sweaters because obviously there is more yarn. You don't need to make sure the sweater fits your body because it is going to be deconstructed later.
Let's have a look at the inside of the sweater. One of the ways you can tell if a sweater is good for recycling is to check out the seams. If all the seams on your sweater look like this one, which is serged with a serger machine and therefore the pieces of the sweater were cut up and sewn together, then you can put it right back down.
If your sweater seams all look like this, slightly bulky and not sewn together with a sewing machine, then you are one step closer to having a great sweater.
TIP: Make sure you look at the label of the sweater to see what the yarn is made out of and what the care instructions are. Cotton sweaters are pretty easy to unravel, although they might not be super soft when you are finished. Cotton is better for projects that don't need to be against the skin because it is made more durably than other yarns. Also, if the yarn is acceptable next to your skin when it is in thrift store sweater form, it will be acceptable once you unravel it. Be careful of purchasing wool because it will shrink on you if not properly cared for.
Next, you'll want to figure out what kind of seam you actually have. This sweater, except for the very top of the neck which was serged, has a crochet seam which is very easy to unravel. It is identifiable because it has a row of little v's on one side of the seam and a row of dashes on the other (look at the next picture to see what I'm talking about).
Using your scissors, you'll want to snip one of the edges of the little v's. This is the part that will take practice and might be a teeny bit frustrating at first but trust me, you'll get better. The crochet seam unravels from the top down, which means you'll want to snip one of them as far to the top of the little v's as you can get. Also, I've found that some sweaters are crochet seamed along the side all the way up to the sleeves so it might be as easy as finding the right seam to unravel.
TIP: Don't forget to cut off any tags or care instructions from your garment using a seam ripper or by being very gentle with a pair of scissors. Since most often they are sewn on with a sewing machine, it is best to use a seam ripper if you have one.
Now that you have cut one of your little v's, it's time to start unravelling your seam. You might need to untangle the thread a little bit first, but once you have your seam free, you can just pull on the string and it comes undone very nicely for you.
Once you have removed all of the seams from your garment, you can unravel each piece of the sweater. TIP: It is always better to wind the yarn into a ball as you go because it reduces the risk of tangling that would occur if you left all the unravelled yarn in a pile (trust me, I know from experience how much "fun" unravelling knots is!)
With a little practice, you can start knitting from recycled sweaters in no time! If you have any questions, feel free to ask, I'd love to help!
Subscribe to:
Posts (Atom)