It's time to get back to that little mini-series I was telling you about before. Today, I am going to show you how to make a crochet i-cord and now that you know the very basics of crocheting a chain, you should be able to follow along pretty well. Let me know if you have any questions, I would love to help a fellow fiber-enthusiast.
So, the first step in making an i-cord is to whip out a chain from the last tutorial. Once you have a chain of your desired length, go ahead and flip the chain over to the backside where it looks a little bit like chain links or some kind of weird stitching. It may help you to remember that the front of the chain looks a bit like v's and the back of the chain looks a bit like dashes.
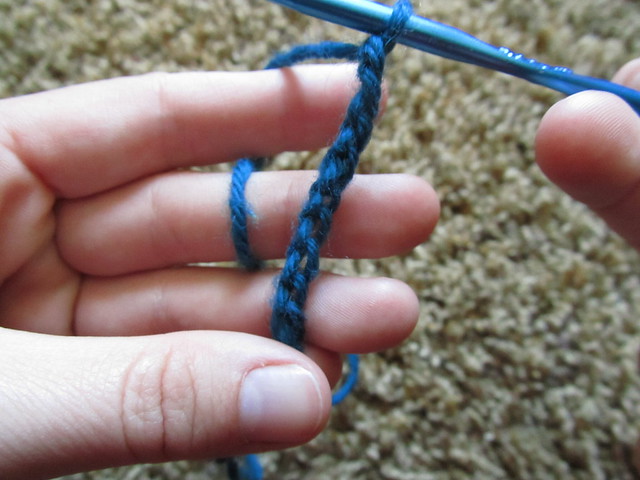 Now that you've found the back of your chain, you're going to put the hook into the first little dash that you can easily find. Trust me, the first one is a little bit tricky but the rest are sooooo much easier! It should look like this.
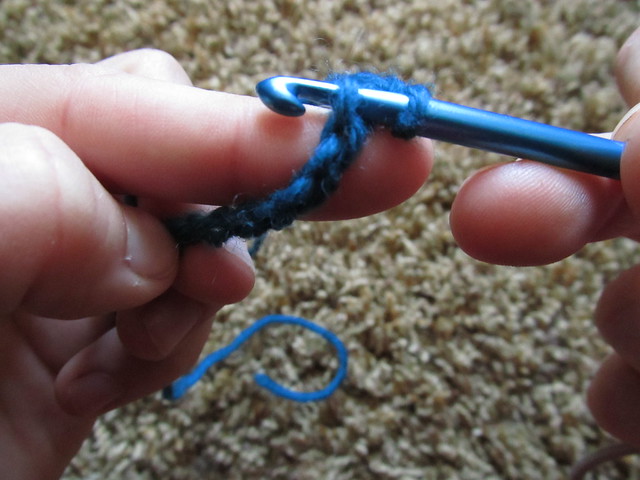 Go ahead and grab the working yarn that is attached to the ball with the crochet hook. Now you should have three little loops on your hook; one from the ball of yarn you just grabbed, the first dash in the back of the chain, and the very first loop that you had before.
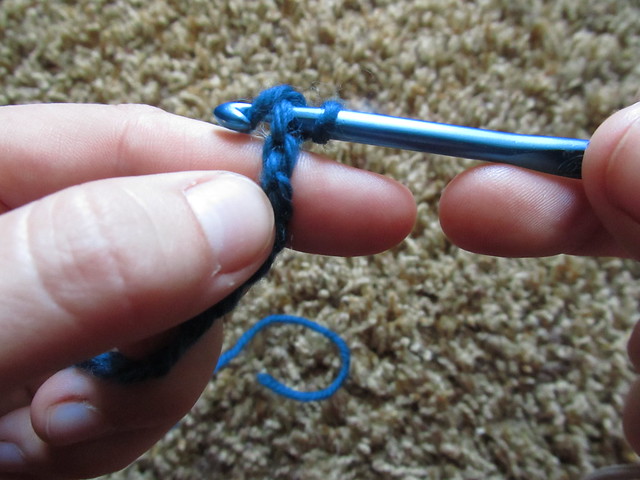 Now, gently pull the last loop on your hook through the other two loops on your hook. It will look a little something like this when you are done.
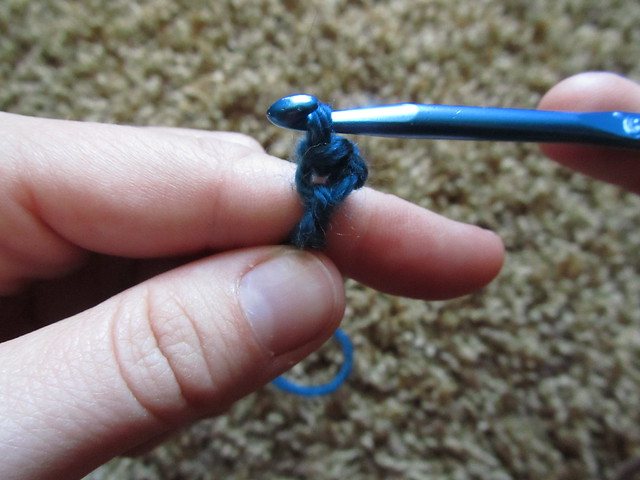 Now, all that's left to do is repeat that process with all the rest of the little dashes in your chain. It can be a little bit tedious but it is so rewarding! This little section is what the i-cord will look like when it's all finished.
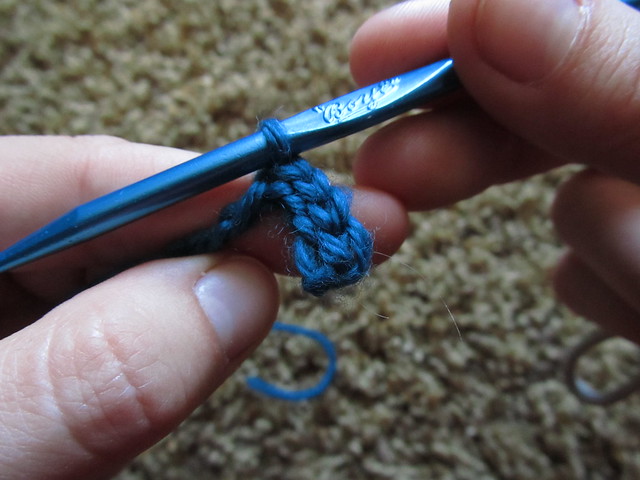 Keep going all the way til you reach the end of your chain until there is only one loop left on your hook. Cut the yarn that is attached to the ball (the working yarn) with a little bit of room for leeway (I always give at least an inch or two, maybe more) and pull the cut yarn through that last loop on your hook. Mine is a baby i-cord for demonstration purposes but there are so many uses for an i-cord. You are basically making rope that is slightly stretchy and very strong.
 At the end of the week, I'll show you what all the commotion is leading up to because it is a super fun project that I'm sure you're going to love!
I've got a little mini-series planned for you this week that I hope you will enjoy. It will be leading up to making something super cool and sustainable (it's a mystery! you'll just have to wait and see!), but first you need the proper tools to start.
So, as you may have gathered from the post title, we're going to be talking about crochet today. This will be a photo heavy post, and some of the next few as well, but I am hoping it will be very useful to you in the future. Crochet is one of the most useful skills I have learned because it is so versatile! You can keep electronic devices organized using a chain sinnet (secret code for crochet!), you can use it to mend holes in your favorite sweater, and you can make anything from clothing to socks, hats to toys and even gloves. Crochet is also awesome because it can be very relaxing and it reduces screen time when done as a hobby.
Today, I have a photo tutorial of how to make a slip knot and a crochet chain. All you need is a hook and a ball of yarn (I'm using some worsted weight yarn and a size G hook. Don't worry if that means nothing to you, size doesn't really matter)
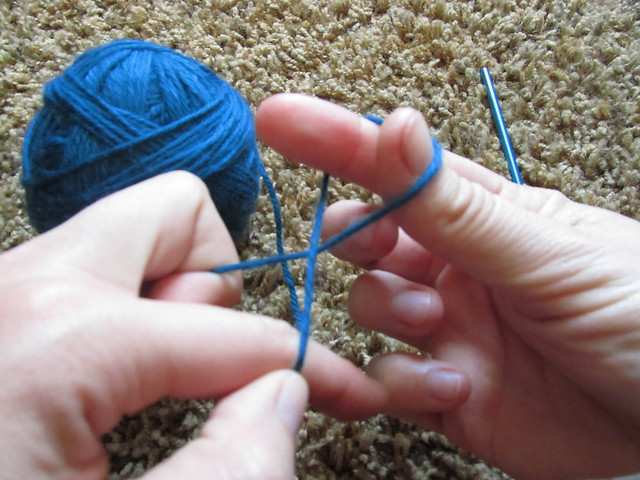 First you'll want to hold the tail of the yarn and the end that is connected to the ball in two separate fingers with a loop on your other hand (I'm right handed!). Twist the loop so that the tail side of the yarn is on top of the side connected to the ball of yarn.
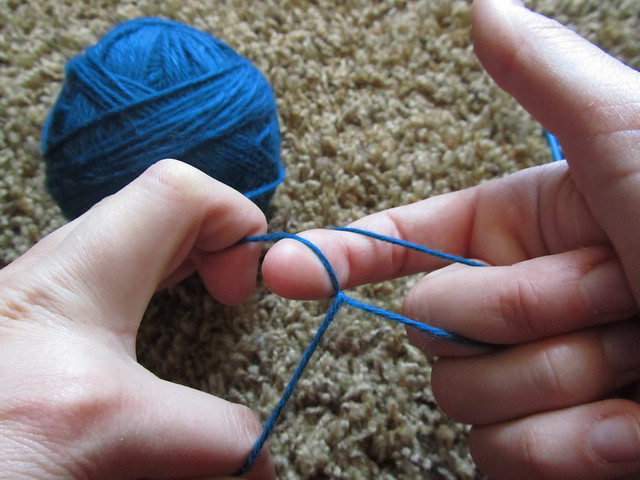 Using your index finger, reach through the hole that you just made and grab onto the yarn end that is connected to the ball... NOT THE TAIL SIDE!!!
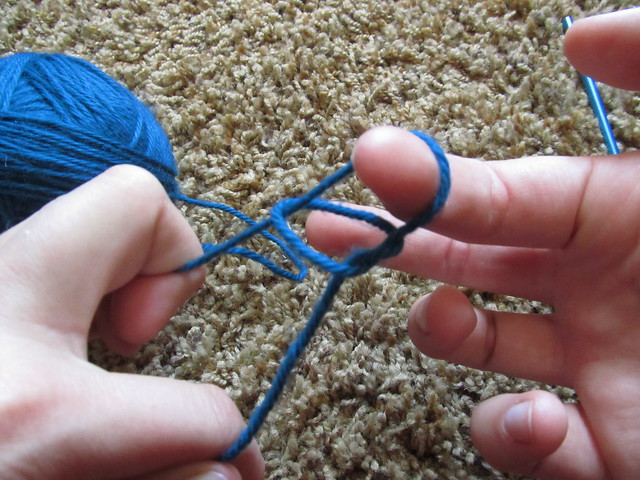 Pull the yarn through the loop so it looks something like this. With the loop still on your index finger, pull the two ends of the yarn tight. Now you have a loop.
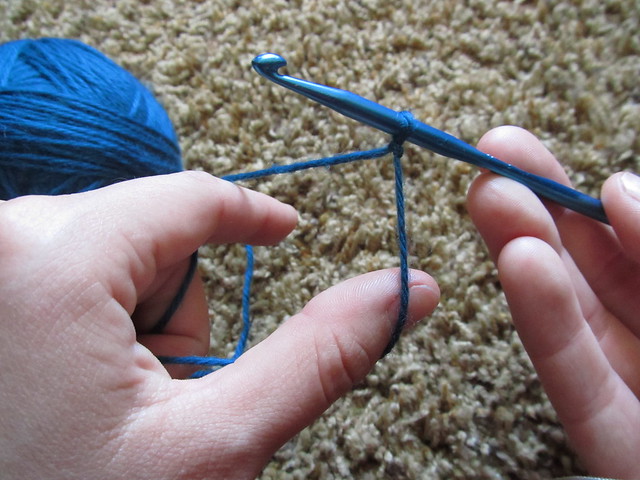 To make the chain, put the slip knot that you just created onto your crochet hook and pull it tight. I wrap the tail end around the thumb of my left hand and the ball end around my index finger but whatever works for you is fine...
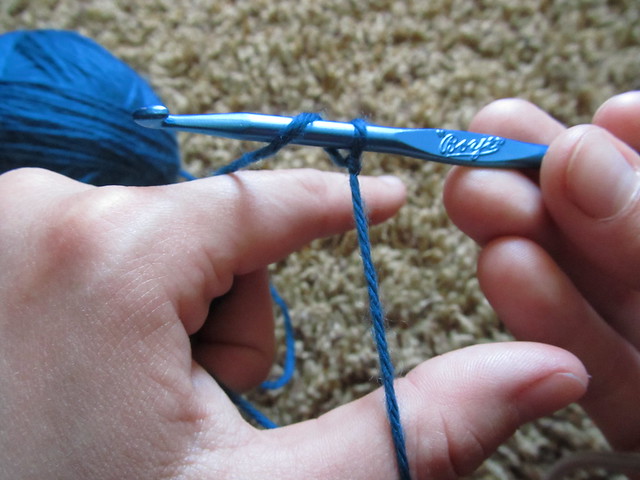 Wrap the yarn around the hook that is connected to the ball.
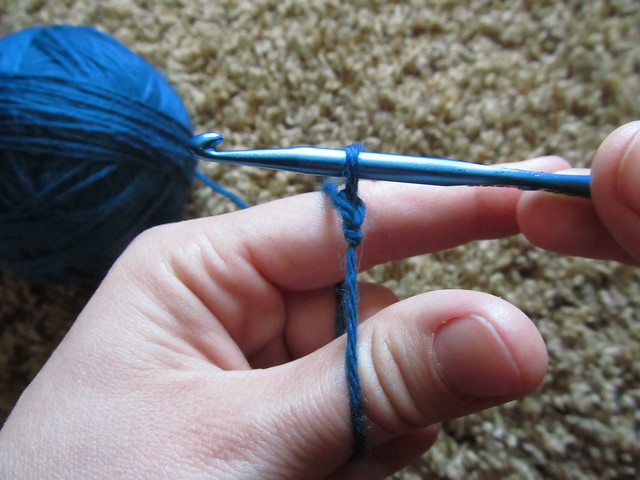 Gently pull it through the first hole of the slip knot. CAUTION: This part may be a little bit tricky for beginners because you don't have the muscle memory built up and it may feel like you are attempting to follow my directions with flippers on your hands. That's ok, as long as you don't give up and start crying. Just keep trying and you should pick it up soon.
 a
Once you get the hang of the whole crocheting business, you should have this nice little line of v's that looks like a chain. If you want to leave your chain as is, all you have to do is cut the yarn from the ball with about 2-3" of a tail (just to be safe, you don't really need this but you can cut it off later once your chain is secure). Wrap the yarn around the hook as if you are going to make another chain but then just pull the whole string through the loop and pull it tight. Look at you crocheting and everything! Does anyone else have a cool use for crochet that I didn't think of?
a
Once you get the hang of the whole crocheting business, you should have this nice little line of v's that looks like a chain. If you want to leave your chain as is, all you have to do is cut the yarn from the ball with about 2-3" of a tail (just to be safe, you don't really need this but you can cut it off later once your chain is secure). Wrap the yarn around the hook as if you are going to make another chain but then just pull the whole string through the loop and pull it tight. Look at you crocheting and everything! Does anyone else have a cool use for crochet that I didn't think of?
