A few years ago, I had a dream about myself wearing this braided headband. Don't ask me what the dream was about, all I remember is that I had this braided headband on and I was frolicking through a forest (weird right?!). Anyway, fast forward to last year when I made an awesome headband that was straight out of that dream. It's girly, cute, shimmery and so easy to style. It's more of a recipe than a pattern but it's yours for the taking.
After changing blogs, I lost the photos from the original pattern so I have a new and improved version for you which will also be linked to Ravelry if anyone is interested in seeing my patterns there.
Rosa Headband
Yarn:I suggest using sport weight or sock yarn. You will also need a tapestry needle, or a sewing needle with an eye big enough to put your yarn through
Needles: I used size US 2 double pointed needles. You will need double pointed needles
Notes: If the idea of having some of your stitches hanging freely scares you, it might be wise to invest in a stitch holder. Also, when you knit an i-cord (which is what you will be doing), you are basically knitting a very skinny tube without using a circular needle or 4 double pointed needles. If you've never done it before, just do what I say and it should work out. It's very easy!
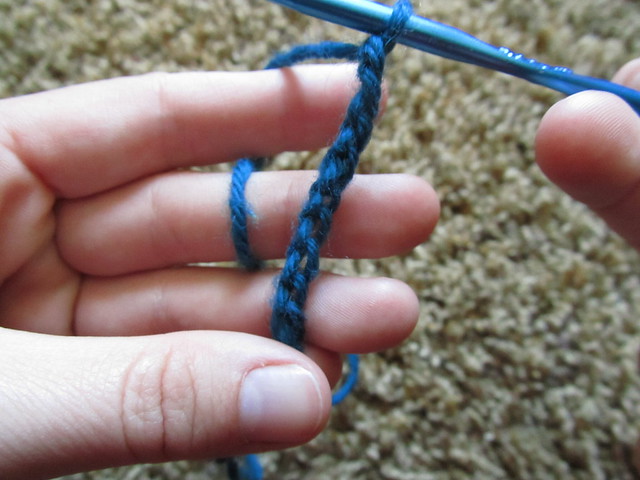
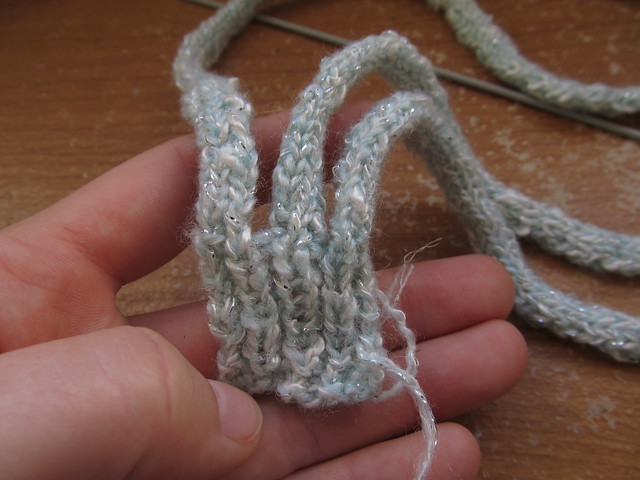
Pattern: With one double pointed needle (you will only need 2), cast on 9 stitches.
Row 1: (knit 1, purl 1) across all stitches.
Row 2-9: Work in ribbing as established
Now, if you would like to use a stitch holder, slip the last 6 stitches of the row onto a stitch holder so that the three remaining stitches include the stitch connected to the yarn ball. You can also let your stitches hang around; I found that the yarn I was using was not prone to unravelling easily.
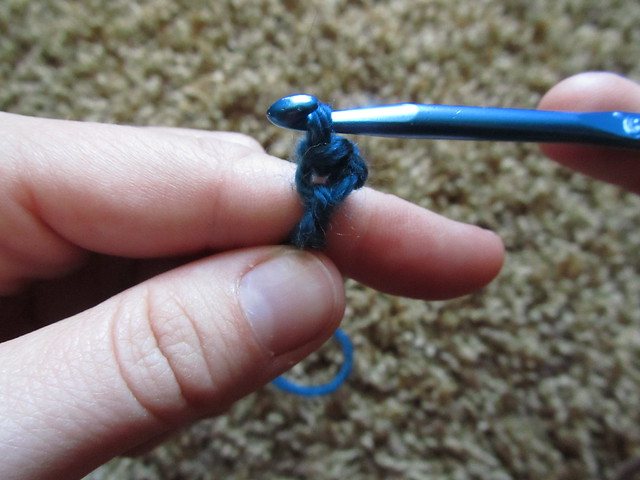
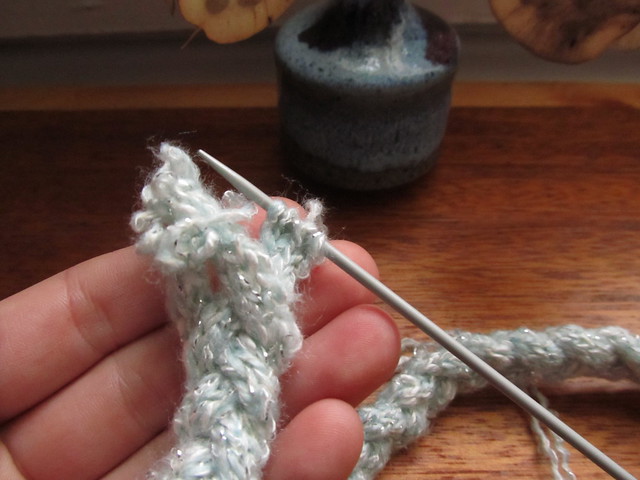
With 3 stitches on the needle, knit each stitch across. DO NOT FLIP YOUR KNITTING OVER! Slide the stitches from the left side of the needle to the right side of the needle and bring the yarn to the right side, keeping the yarn slightly taut. Put the needle with the stitches in your left hand and prepare to knit as you would normally. If you're a visual learner, here's a video you can watch that will show you how it's done.
For the next row, you are going to knit into the front and the back of the first stitch so that you have 4 stitches on your needle. Knit the rest of the stitches and slide them to the right of the needle.
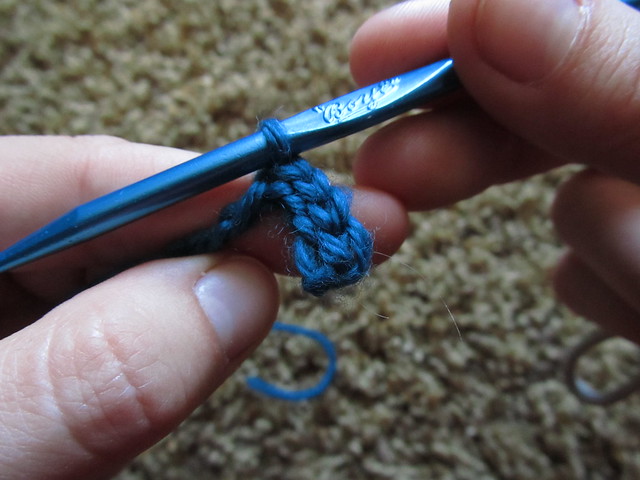
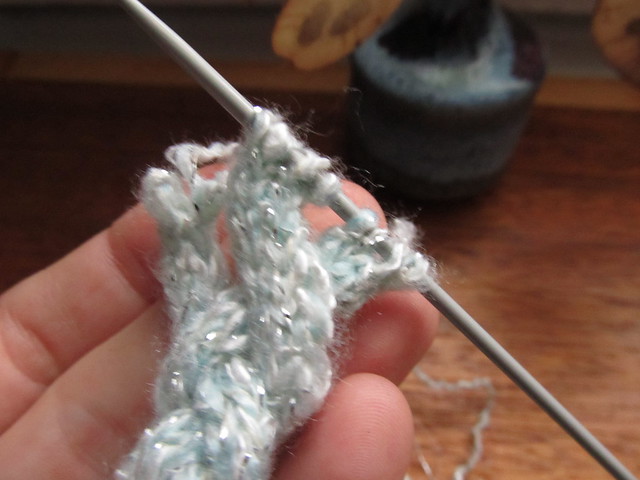
After you've increased to 4 stitches, continue knitting each row and sliding the stitches over (you should never see the back of your work while you are knitting), to produce an i-cord. It is unnecessary to count each row because we are going to measure it with a ruler.
Once your first i-cord is about 18 inches long (or it can be placed around your head without going all the way around), place the four stitches onto a needle holder and break the yarn with an inch long tail. Repeat the i-cord process with the remaining 6 stitches (3 stitches for each i-cord) until you have 3 i-cords total. You will not need to break the yarn from the third i-cord
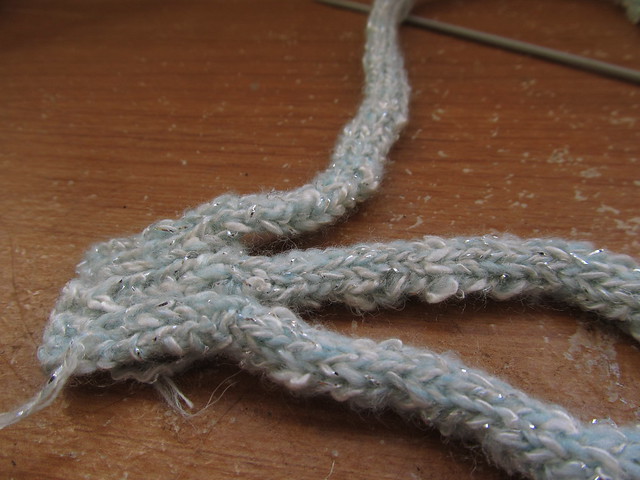
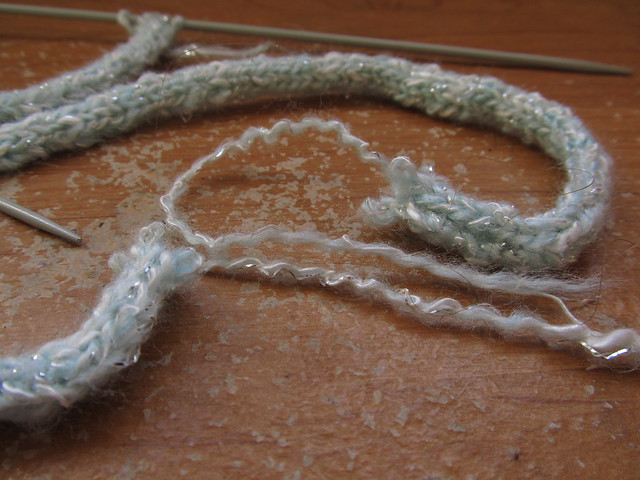
Being careful not to unravel your i-cords, braid them together like so
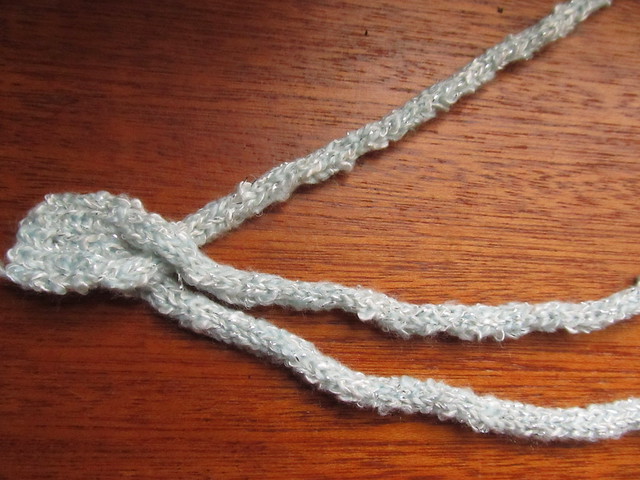
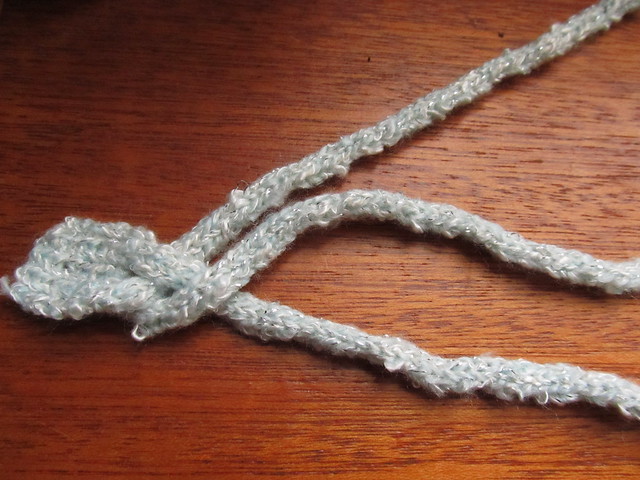
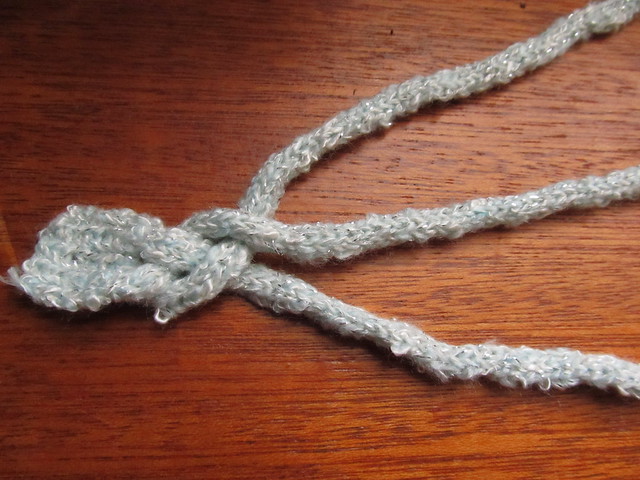
Until you've reached the end of your i-cords and the stitches look like this. You'll want to have the i-cord attached to the ball of yarn on the far right.
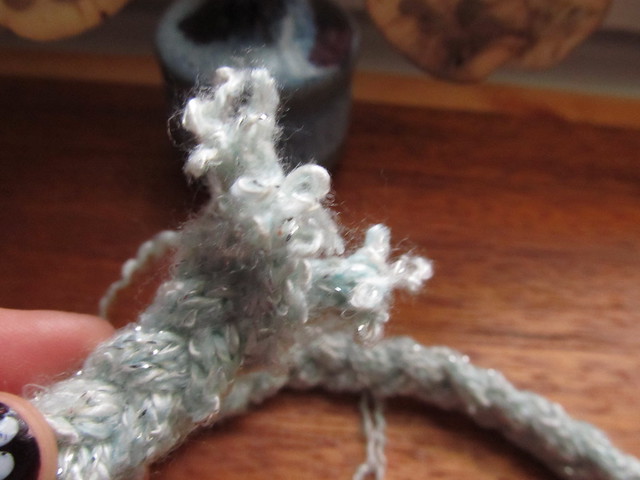
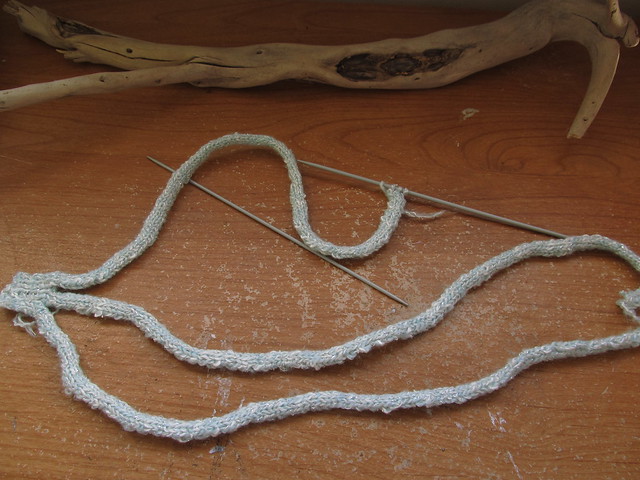
One at a time, pick up the stitches from your i-cords on the same needle
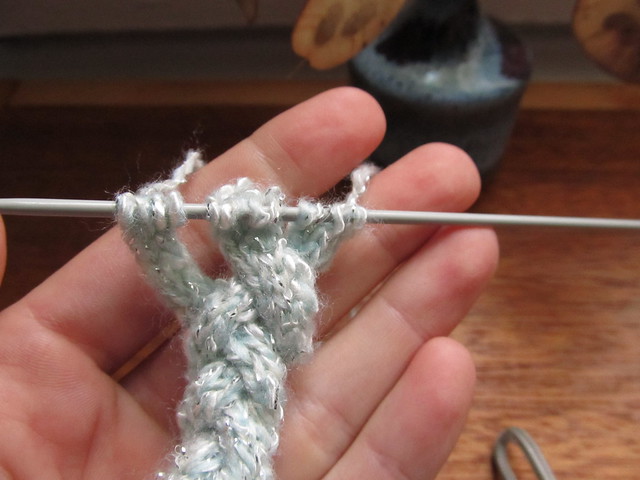
If your i-cords are not the same length after you've braided them, it's ok to unravel a few rows to even them out a little bit.
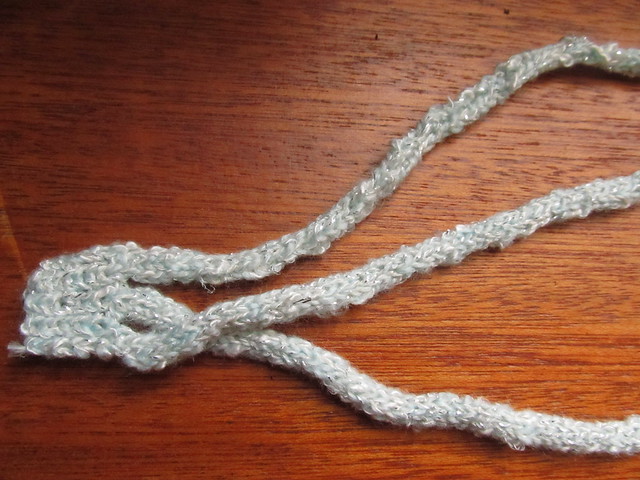
Row 1: (knit 2 stitches, knit 2 together) x 3. (9 stitches total)
Row 2: (knit 1, purl 1) across all stitches
Row 3-5: Work in ribbing as established
Row 6: knit 1, purl 1, knit 1, cast off 3 stitches, purl 1, knit 1
Row 7: purl 1, knit 1, purl 1, cast on 3 stitches, purl 1, knit 1, purl 1
Row 8-10 Work in ribbing as established
Row 11: Bind off all stitches. Weave in all ends with a tapestry needle
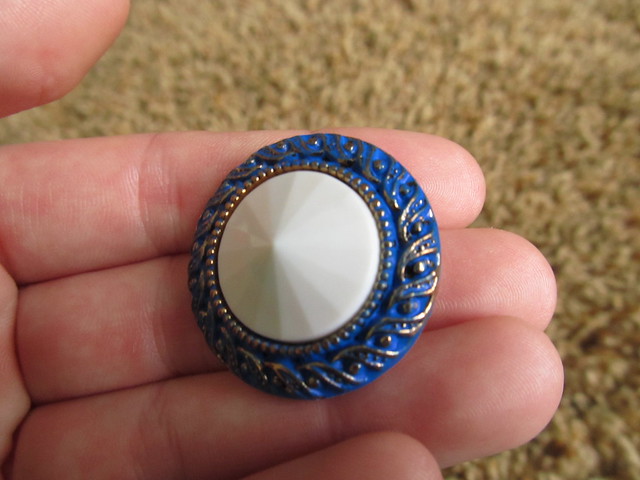
To fasten the headband, you will need a button that is small enough to pass through the hole that you made. I chose one that had similar colors.
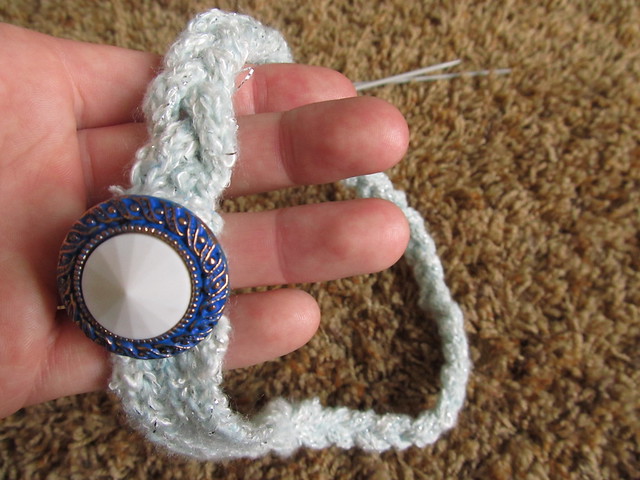
Sew the button in place. You've got yourself a new braided headband!