Tuesday, November 27, 2012

Tip of the Week: READ ALL THE THINGS!

The wintry weather coupled with my bizarre work schedule means that I have been reading quite a bit these days! I absolutely love to read and when I found two of these books, I could not put them down. Here's what I've been reading:
source: http://us.macmillan.com/noimpactman/ColinBeavan
A few months ago, I was researching sustainability blogs in order to begin work on my own blog and I found this one. Colin Beavan is an inspiration to me because he attempted something really radical and shared it with others because he felt so strongly about how our society needs to change. The book itself is very though provoking and discusses some of the tricky parts about global warming, including how playing the blame game isn't helpful. I watched the documentary as well and am following his blog. I have definitely got some ideas about how I can lighten my impact on the planet from his book. Plus, it's pretty funny!

source: http://www.buyolympia.com/q/Item=the-urban-homestead-expanded
Urban Homestead by Kelly Coyne and Erik Knutzen is basically a manual of how I want to live my life. It's all about how to create a homestead while living in an environment that doesn't have 100 acres, cows, farm equipment or a nearby fresh water source. It's got tons of tutorials about how to can food, make your own cheese, sourdough bread, how to compost and set up a worm compost bin (I'm seriously considering trying this even though we have a compost pile already!), how to fix a bike, and tons more. I haven't read the whole book yet but I will probably be using this one for years and years to come! 

These are the only two books I'm reading right now but I have a long book list that contains similar titles. Being informed is so important if you want to make any kind of difference. The first step towards being more sustainable isn't using reusable bags, isn't changing your light bulbs, isn't feeling guilty about all the things that you aren't doing or can't do. The first step is knowing what is happening, what other people are doing to help fix the health of the planet, and then decide what changes and additions you can make to your lifestyle in order to do some good. Every little bit helps :) What are you reading?

Monday, November 26, 2012

Easy and Free Knitting Patterns: Lace Hat


It's time for another free pattern! I debated whether or not I wanted to share this one but it's so darn fun that I couldn't keep it from you.  This pattern, which I call Janet, is a reference to my Grandma Janet who is the one who taught me how to knit (Hi Grandma!). When I first started knitting, there were so many dropped stitches, you'd think I was attempting to knit lace. Eventually, with a lot of patience, the best knitting reference guide ever, and a lot of repetition from my grandma, I finally mastered knitting. Now, somewhere between 8 and 12 years later (none of us can remember when I started knitting because I've been doing it so long), I am designing my own patterns and sharing them with you. It feels so good to have come this far :)
IMG_0067
Anyway, as usual with knitting, nothing really ever turns out exactly how you want it. I thought to myself "Self, I'm going to make a raspberry beret like in that Prince song. Hey, Self, I can use the scrap yarn that I got from my fiber teacher last year that just happens to be raspberry." Well, that didn't exactly turn out because I ran out of yarn (GASP!). If you're a knitter and you knit with scrap yarn, you know how frustrating it can be to get full swing into a project and not be able to finish. Instead of giving up, I decided to embrace the color block trend that is going on right now (not that I'm very trendy... I buy everything at Goodwill remember?). I grabbed another hunk of scrap yarn that I got from the same fiber teacher and Voila! Janet was born (the lace hat, not my grandma!)
IMG_0068
Janet Hat
Yarn: I used some scrap yarn that I had lying around in my stash. It appears to be worsted but in order to be positive, make sure you make a gauge swatch!
Needles: US Size 7 double pointed needles or appropriate needles to obtain gauge
Gauge: 21 stitches and 36 rows equals 4" in stockinette stitch, 22 stitches and 32 rows equals 4" in lace pattern.
Note: It is less important to achieve row gauge for this project because it is based on measurements. If you are a row or two off for the row gauge but are able to achieve stitch gauge, that should be fine.
IMG_0069
Lace Pattern: 
Round 1: (yo, ssk) around 
Round 2: knit every stitch

Pattern: 
Cast on 100 stitches onto 4 double pointed needles, place a stitch marker at end of round or keep track of the beginning and end of the round. 
Knit 9 rounds, purl 1 round, knit 9 rounds.
Now what you're going to do is fold the cast on edge backward at the purl row so that the knit side is facing out. Pick up the first stitch from the cast on edge and knit it together with the first live stitch on the needle. Continue all the way around.  I'll be making a photo tutorial of how to do this later in the week which I will link back to. 
Next round: (knit 4 stitches, knit into the front and back of the next stitch) repeat around. 120 stitches. 
Purl 1 round
Begin Lace Pattern. Continue in pattern until piece measures 7-8 inches (mine is 7.75 inches to be exact). 
Decrease Section: 
Round 1: (ssk, yo, ssk) repeat around (90 stitches)
Round 2 and every even round: knit every stitch
Round 3: (yo, sl1k2togpsso) around (60 stitches)
Round 5: Repeat Round 1 (45 stitches)
Round 7: Repeat Round 3 (30 stitches)
Round 9: Repeat Round 1 until last two stitches, ssk (22 stitches)
Round 11: Repeat Round 3 until last four stitches, yo, sl1k3togpsso (14 stitches)
Cut yarn, leaving a 3 inch tail. With a tapestry needle, thread tail through every stitch. Pull tight and weave in end. 

Note: There is no right or wrong way to make the color block happen. I decided to change yarns when I ran out of one color. You can use lots of scraps and make a hat with multiple thick stripes, you can knit the hat in all one color, or you can knit a hat with only two colors like I did. The possibilities are endless!
IMG_0070

Friday, November 23, 2012

Black Friday

It might seem pretty obvious if you have been reading my blog that I am not "down" with the Black Friday madness. I don't like the idea of shopping for the December holidays the day after and even the night of Thanksgiving because it devalues the family tradition that I love so much! 

If you are like me and avoided the Black Friday madness for some quality family/relaxation/friend/tradition (fill in the blank) time today, you might be interested in some of these links. 

Alternatives to Buying Gifts for the Holidays on the Northern California public radio station KQED here
The Story of Stuff Buy Nothing Do Something page with lots of alternatives to Black Friday madness here
And in case you haven't seen it yet, this video brings light to some of the darker sides of Black Friday shopping. I'm all about saving money and I'll be the last person to tell you to stop buying things altogether, but there are other ways to make the holidays memorable...

1. Support Local Businesses
A lot of people think that Black Friday helps boost the economy and therefore support workers because of all the money exchange. Usually, the sales and stores that get the most attention on Black Friday are ones that outsource their products, have factories over-seas, or use the boost in sales as a way to fund vacation homes rather than vacation bonuses for their workers. 

2. Don't Spend Money on New Things
You might be able to find the things that you want to give as gifts at second hand stores, on websites like Freecycle, the newly opened Yerdle, Craigslist, or Ebay. Trading and buying second hand are great ways of reducing the impact on the environment by using products that are already deemed "trash" a second life.

3. Make it yourself
Websites like Instructables, Pinterest or the countless number of blogs online will give you instructions on how to make your own gifts this holiday. 

4. Donate to a cause in someone's name
Donating to a good cause instead of buying "stuff" is not only noble and rewarding, but it can help people that really need it! One example I know of is Heifer International which allows you to purchase animals, tools, or education for poor families around the globe. 

I'm sure there are a lot more ways to find gifts for the holiday season but those are the ones I'm sticking with. What are your holiday gift giving plans? What did you today instead of Black Friday shopping?  

Thursday, November 22, 2012

Hot Apple Cider

Happy Thanksgiving everyone! This is the first year I have been away from my family for Thanksgiving and it feels a little weird. I went home last weekend, though, and supplied the apple cider for my family. It was super easy to make and the only down side I found was that using a juicer instead of an apple press doesn't produce as much juice. If you have a compost pile or feel brave enough to make some apple bread out of the pulp, it doesn't really matter whether you use a juicer or not. So, in honor of Turkey Day, here's how I did it...
IMG_6114
Of course, you have to get a bunch of apples! I still have a bunch on the tree in my yard, although some trees are already devoid of apples at this point. If you don't have access to a tree, you'll want about 12 organic apples. Organic is really important when juicing because all those pesky chemicals and pesticides that your body can sorta handle in whole fruit form are now reduced to a much higher concentration in your juice. It's just safer if you go with organics when juicing. 
IMG_6116
Here's my haul of apples, probably fuji but I'm not sure what kind they are. 
IMG_6118
Next, you'll want a clean working space, a cutting board and a sharp knife. You might want to work on a big table with nothing on it depending on your juicer. Mine likes to splatter a little bit so I used a scarf as a "table cloth" and just washed it when I was through. 
IMG_6119
Chop up all those apples and make sure all the stems, seeds, and hard bits are cut off. You can leave the peel on if you want since the juicer can usually handle a little bit of peel. 
IMG_6120
My juicer is a Waring Pro that I got last year on Amazon. The way it works: there is a small cutting thing, sorta like a cheese grater that rotates when the machine is turned on. The funnel at the top allows you to feed your fruits and vegetables into it and the pulp collects in the black bowl. The juice comes out of a little hole under the cheese grater part that leads to the funnel and into the silver cup. Mine splatters because the blade rotates so fast that it produces a lot of froth and air to get into the juice. When the bubbles pop, juice flies out a little bit. No problem if you have protected your work surface though. 
IMG_6121
I collected all the pulp and used a cheese cloth to squeeze more of the juice out. I also made bread from the pulp but it was dense and very ugly. I'm going to continue experimenting with the pulp because I don't want to waste it. 
IMG_6123
Finally, I added 1 tsp each of cinnamon, nutmeg, ground cloves, and ginger to my cider. I heated it up on the stove until it boiled to pasteurize it a little bit and then served it in mugs! Happy Thanksgiving everyone!

Wednesday, November 21, 2012

Teach a Man to Fish

Or in this case, teach a friend to knit! I spent my morning teaching a good friend (Hi B!) to knit so that she can make a hat for a Christmas gift. I have always homemade gifts for holidays since I learned how to knit and crochet. I find it so much more rewarding to make and give a handmade present because I put a LOT of time into making it. One year, I even made all my roommates little stuffed animals out of this book. 
SDC10472
I think it is so important to share skills and knowledge, which is one of the reasons I started blogging. When people share ideas they are excited about and help other people, they usually feel more involved and connected to their community. When I teach my friends or they teach me something awesome, I definitely bond with them over our newly shared skills. B and I will definitely have more knitting lessons in the future where we can bond over tea, chat about our lives, and just have fun! Is there anything you've been wanting to learn that a friend can teach you? Maybe next time you spend time with that person you could bribe them with a bottle of wine to share their skills with you... by the way, does anybody know how to play the ukelele?

Tuesday, November 20, 2012

Tip of the Week: Keep, Sell, Toss

Tip of the Week is a feature where I will share one easy step per week that you can try out that will help you on your way to a more sustainable life. Small steps lead to big changes!

I used to watch this show called "Clean Sweep" in which participants invite a group of organizers and designers into their home to help them organize two rooms. Basically, the organizers share tips and tools throughout the program that help anyone organize their "stuff" into three separate categories. The Keep category is obviously where all the items the family believes they want to keep, the Sell category is where items that will be sold at a garage or yard sale will go, and the Toss pile is stuff that no one wants. 

I am a college student for about the next 4 weeks and because I have spent the last four years of my life travelling back and forth between two homes, I have accumulated a ton of stuff! Kitchen stuff, art supplies from various classes I took for my major, random things that had sentimental value, and lots of stuff that other people were going to throw away that I rescued. I'm not a hoarder, I just happen to own a lot of things and haven't had the time to downsize. 

Because I would love to live and work in another state in the near future, it is important and necessary for me to downsize because I will be transporting my "stuff" with me. I have also found that it can be quite sustainable to go through your belongings because it allows you to make a mental inventory of your "stuff" and really decide what is necessary. I've also been a thrift shopper my whole life (I love it!), and if it weren't for the people that donate their unloved possessions, I wouldn't have the majority of my wardrobe, most of my kitchen supplies, my chair, pillows, tea pot, bowls... the list goes on and on. 

If I haven't convinced you yet to go through your belongings and appreciate what you have, this comedy segment by the late great George Carlin might make you reconsider!

Friday, November 16, 2012

Bicycle Adventures: Part 2

Originally when I planned this blog post, I thought it would be really cold and gray outside, in which case this photo of Phillipa basking in the sunlight might actually perk up your day. I woke up this morning to gray, clouds, last nights rain and.... what is this? Sun breaking through the clouds? What is that? 
IMG_0035
Which reminded me of a story I just have to share with you! Last year, I had a roommate who was on exchange from Africa (Hi L-dog!) and she was not accustomed to the weather in Bellingham. She was very ill-prepared with clothing fit for Africa and not for the breathtakingly chilly temperatures that our proximity to Canada would induce. One day, she came home after class, which means about a 20 to 30 minute walk from campus. She immediately crawled into bed as if she were sick and the other girls and I were worried. Later, she told us that coming home from class that day was the coldest she had ever been in her life! 

Now, I've lived in Bellingham for about 5 years now and I'm used to the abrupt change in temperature but I was confused about why she was so cold. The weather wasn't suddenly colder than the day before. The weather wasn't suddenly colder the next day. In general, the weather seemed pretty consistent in  my opinion at a steady jacket inducing freeze. The difference, she said, was that on this particular day, the weather decided to confuse my dear roomie by being sunny. What is the biggest lesson learned on this day? Sunny weather does not equal heat. Period. 

Anyway, I just wanted to share that story after realizing that the confusion strikes again (cold and sunny for those of you not paying attention!). Phillipa and I have been faring pretty well even through the cold because of my new gear... 
1. Mud flap to keep the mud from spraying up my back when I "accidentally" ride through puddles
2. Front and tail lights so that I can ride in the dark
3. A pink bell that a friend gave me to alert those painfully slow walkers that take up the whole sidewalk. Geez, who do they think they are, walking on the sidewalk where they're supposed to be ;)! 

Just a heads up, I have a lot to share with you for next week because this weekend, I'm celebrating Thanksgiving early! Woohoo!

Wednesday, November 14, 2012

Homemade Pizza Dough and Volunteering

I have a confession to make... I'm human! I've been working on a lot of different projects, recipes and tips for the blog lately and I wanted to share with you a bit of a success story and a failure. Maybe you can relate to my story and my struggles...

Since September, I have been volunteering A LOT. As I finish up my degree, I found myself with a lot of free time and a job that was slow to become full time (training took a while). I decided that instead of staying at home with nothing to do, I would take the opportunity to do some good for my community. My first volunteering location was the local food bank. 
                  IMG_6059
I've been volunteering there for a couple of hours a week on top of a volunteer internship that I'll talk more about soon, and it has been one of the most rewarding decisions I've made in a while. I used to be a Girl Scout and I have always found satisfaction with volunteering but while I was in school, I rarely had time to give back. The benefits are enormous because not only do I feel good about what I'm doing, I also get to spend that extra time I have helping people that really need help. I found this article about the benefits of volunteering that might be useful to you.

One of the great things about volunteering at a food bank is that I also get to take some of the food home that I help sort, collect and distribute. I usually take some vegetables and eggs. The fun thing about getting food from the food bank is that I get to try a bunch of veggies and fruit that I wouldn't purchase and experiment with them! With this in mind, I decided to attempt making a pizza from scratch with a squash and an onion, peppers home grown by my roommate, some cranberries I got at the farmers market, greens picked out of my garden, and some ricotta cheese that I bought at the store. 
IMG_6078
I baked up the squash (I only used about a quarter of one of the halves for an entire pizza! I also saved the seeds to bake and eat later. 
IMG_6083
I made the best pizza crust I've ever made that rose and everything! I also used rolled oats instead of cornmeal to keep the crust from sticking to the pizza stone. 
IMG_6087
I added all my beautiful toppings to the pizza (see the squash under everything else? There are so many greens that it's hard to tell!). 
IMG_6088
I pinched up the crust so that it even looked pizza like...
IMG_6093
I baked it in the oven for twenty minutes on 450 degrees. It came out looking like this! I cut it up, served myself a piece and....
IMG_6097
It was the most boring pizza I've ever eaten :( The only saving grace for the pizza was the crust, which was probably one of the easiest and tastiest pizza crusts I've ever eaten. Although I failed at making my first pizza, I did learn a few things in the process:
1. I don't like ricotta cheese. Or peppers that are homegrown by my roommate. 
2. Cranberries are an interesting flavor on pizza and I would highly recommend it again
3. There was not enough salty cheese on this pizza!
4. Cooking with new ingredients is really fun
5. I now officially know how to make pizza crust that rises and makes a pretty tasty backdrop, as long as the toppings are also tasty. I'll keep experimenting with this one and see if I can find a good combination of veggies and cheese that is acceptable to the palette :)

Almost Whole Wheat Pizza Crust for Dummies
                                (Makes 2 pizzas worth of dough)

Ingredients:
3 cups whole wheat flour
1 1/2 cups white flour
1 package of active dry yeast (I believe they come in 4 oz. satchels)
4-5 tablespoons of oil (I used 4)
About 2 cups of water, should be enough to make the dough soft and elastic
1 teaspoon salt (you can add more to taste)

Recipe:
1. In a measuring cup, add two cups of warm water, slightly warmer than you can stand on your wrist, with 1 package of dry yeast. Stir together with a spoon and let it dissolve for a few minutes. Mine did not dissolve all the way but my pizza crust still worked. NOTE: If your yeast is old, the package is broken, or your water is too hot, your yeast might not activate properly and you would have to start over. 

2. In a separate bowl, add flours, oil, and salt. 

3. When the yeast is mostly dissolved, add it to the flour mixture. Now, here comes the fun part! Since this blog here is about sustainable practices, you can ditch that upright mixer, hand blender, or whatever electric gadget you've got your eye on and settle for using your hands. It's super fun as long as you don't have an itch or need to answer a phone call immediately. Mix together thoroughly with your hands until the dough forms a ball and pulls away easily from the sides of the bowl. 

4. You can use a floured cutting board, table or other work surface but I like to knead the dough right in the bowl I was just using. It's a little bit more challenging but at least I don't have to do as much clean up. Anyway, knead the dough by pressing the heals of your palms into the dough and continually folding the dough onto itself for about 10-15 minutes. When the dough feels elastic and doesn't have any weird clumps that aren't mixed in, it should be ready. 

5. The dough needs to rise now so you can leave it in that same bowl or you can place your dough into a new bowl. Place a towel over the dough and let it rise for about 1 hour, or until the dough doubles in size. This is the step where it will become very obvious that your yeast did not activate. To aid in this process, and since I was baking the squash while making the pizza dough, I placed the dough bowl on top of the oven to keep it warm. Placing the dough bowl somewhere warm will help aid the yeast. 

6. Once your dough has doubled in size, punch it down a little bit to remove some of the excess air and divide the ball in half. Feel free to freeze half of your dough or stick it in the fridge for later. Half of the dough makes one full size pizza. 

7. With a rolling pin or just using your hands and gravity, slowly stretch out the dough evenly to form a disc. You might create holes in your dough; just patch them up by pinching the dough around the hole together. Once you've got a good size, place all your toppings on the dough and bake at 450 degrees for about 20 minutes and enjoy!

Tuesday, November 13, 2012

Tip of the Week: Learn Something New


Tip of the Week is a feature where I will share one easy step per week that you can try out that will help you on your way to a more sustainable life. Small steps lead to big changes!

The first Tip of the Week that I would like to share with you is something I have personally been working on for the last week and a half: Learn Something New! You might be wondering how learning something new will help you become more sustainable but I'll explain what I mean with a few simple criteria. 

1. New Skill Reduces Screen Time
While learning how to hack into your neighbors computer is probably pretty useful for some people, it doesn't cut down on the amount of time that we sit in front of the computer/television/phone with internet/etc. I found this article to be very thorough on the subject of "Switching Off". It is unavoidable in our modern age to use technology at some point, but finding other, energy friendly activities to fill your time is more eco-friendly

2. New Skill Doesn't Require Many Materials
This criteria is somewhat optional because there are ways to avoid purchasing a ton of materials for an activity that you might not enjoy (such as borrowing, sharing with others, renting), but in general it is easier to maintain a new skill if it doesn't take years to learn it and to acquire all the "stuff". The skill that I've been working on is watercolor and I had all the materials already. It's also a good idea to use material you already have because if you decide you don't like the new skill, it doesn't produce a lot of waste leftover from your little experiment

3. New Skill Could Be Something You're Already Good At
I've taken painting classes before because of my degree, so dipping my toes into the world of watercolor wasn't a stretch for me. Maybe your new skill could be whittling/carving wooden spoons from found lumber scraps or if you're good at writing, maybe poetry is your thing. Also, you're more likely to enjoy the new skill if you're already familiar with it.

4. Can Be Done In Social Settings
Number 4 is a big one because so many people watch television with their families! If you are trying to replace that social interaction time with a hobby you have to do alone and in a different room, chances are it won't last very long. But if you attempt a skill that can be accomplished in the presence of others and/or with other people, it might have some staying power in your life. 

WATERCOLOR TUTORIAL:
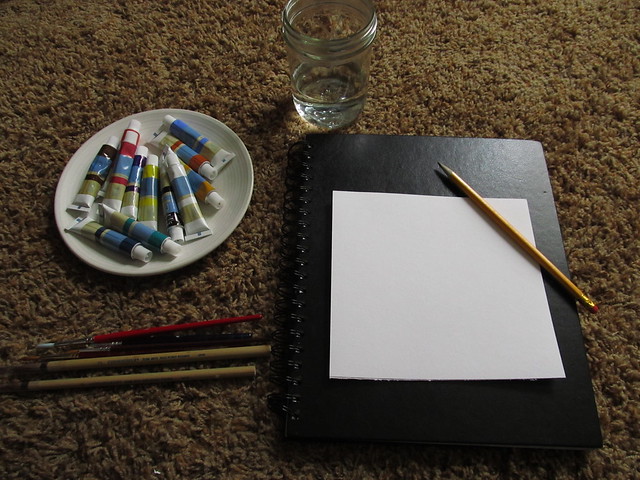
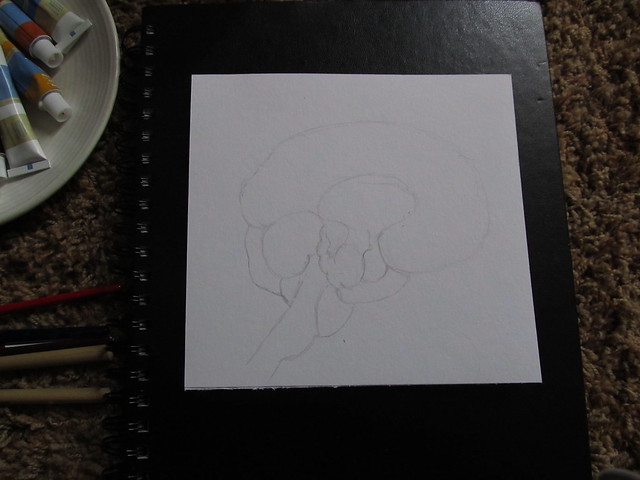
Gather all your materials: watercolor paint, clean water, paper, pencil, paintbrushes, sturdy surface, black pens
IMG_6062
Draw out your design using pencil. Source image for mine is here.
IMG_6066
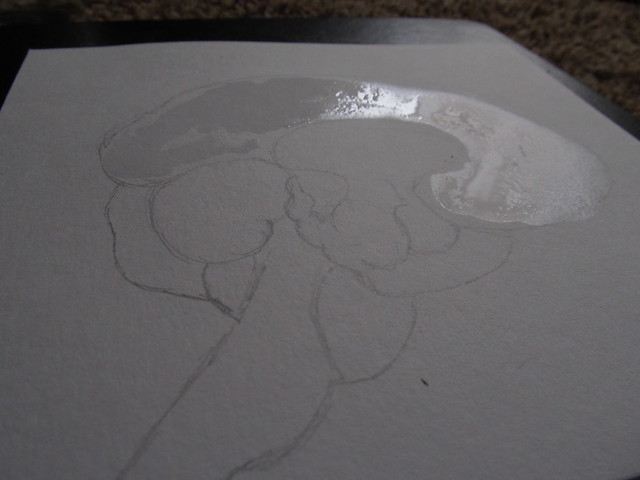
With your watercolor paint brush, start by getting the section of your drawing you want to paint first slightly wet. (Sorry about the dark photos, the lighting was bad!)
IMG_6067
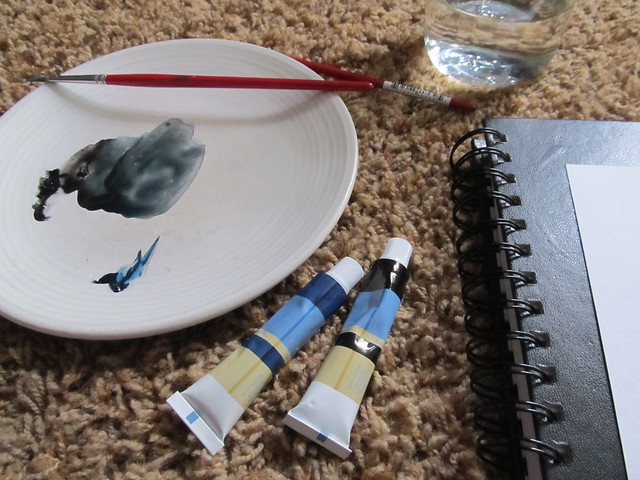
Mix your colors on a white plate so that you can accurately mix colors. I only used black and blue for mine. 
IMG_6070
The beauty of watercolor is that perfection is not important. As long as you stay in the lines while painting, you will do just fine. Even going outside the lines can be fun though sometimes...
IMG_6071
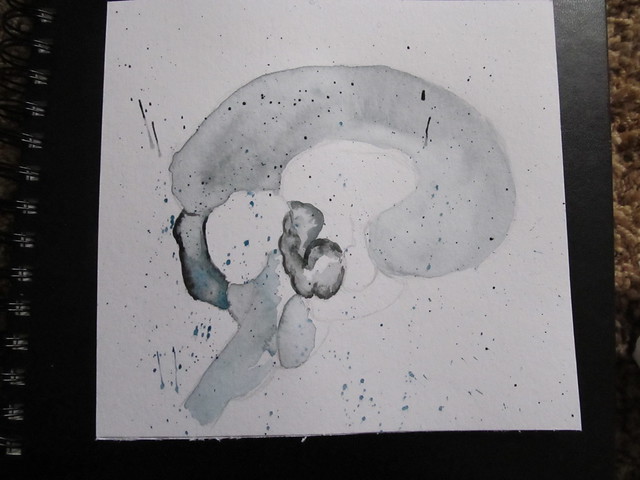
Experiment with applying the paint to see what you prefer. I tried leaving my paper dry, adding clear water after applying paint to smooth and spread it out, and I did a couple layers to get darker colors. 
IMG_6072
You can even add some paint splatters by adding a lot of paint on your brush and then tapping the brush on your finger over top of your page. Be careful though, paint splatters don't land nicely on your paper and nowhere else!
IMG_6074
After you've let your paper dry all the way, feel free to erase the lines that you don't need anymore. The next step is to draw over the lines you've made. I also filled in some of the sections with texture before moving on to the brain. 
IMG_6077
Think about drawing the brain as if you were folding thick, soft noodles on top of one another. There shouldn't be any corners, sharp edges, or many straight lines because that would mean the noodles had broken. Use a pencil to lightly draw in some of the brain. 
IMG_6099
I did a little at a time to make sure I liked how it was turning out. After making sure I liked it, I drew over the lines with black ink. 
IMG_6100
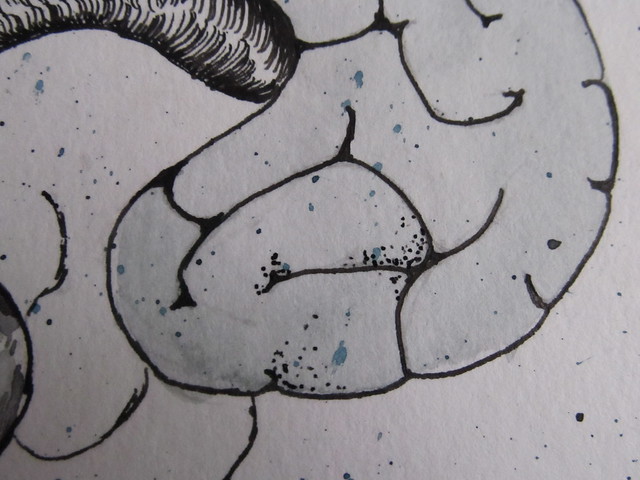
See what I mean about the sharp corners and lines? The left side of the drawing has sharp edges and the right side is a lot softer. Which side do you think looks more like a brain?
IMG_6102
Just rounding out the corners makes a world of difference here. Doesn't that look better?
IMG_6106
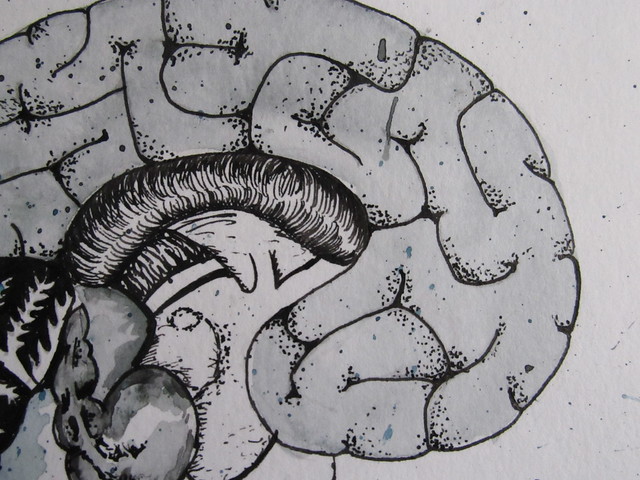
Now, to give my brain a little bit more dimension, I did a technique called stippling, which basically means an endless amount of tiny dots to build up a texture. I used the stippling technique to add a little bit of shadow. 
IMG_6107
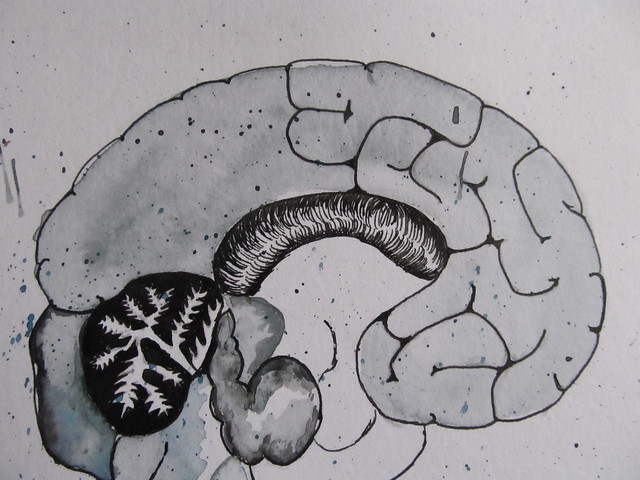
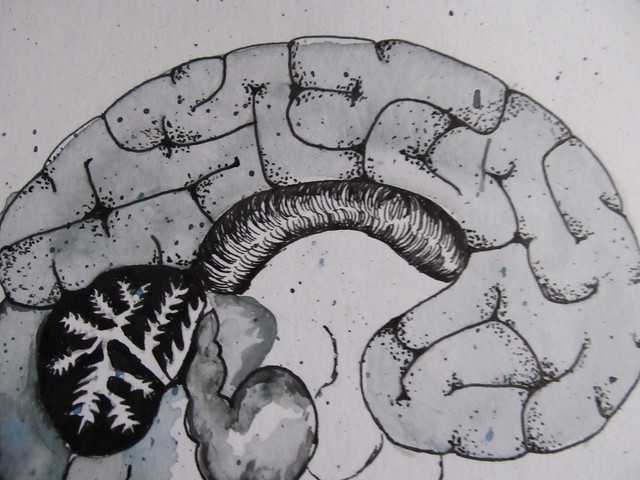
Now that the brain is all done, refer back to your source image (yours doesn't have to be a brain, but mine is). Add in the rest of the detail as best you can. Remember, don't be too hard on yourself since you are learning a new skill. 
IMG_6108
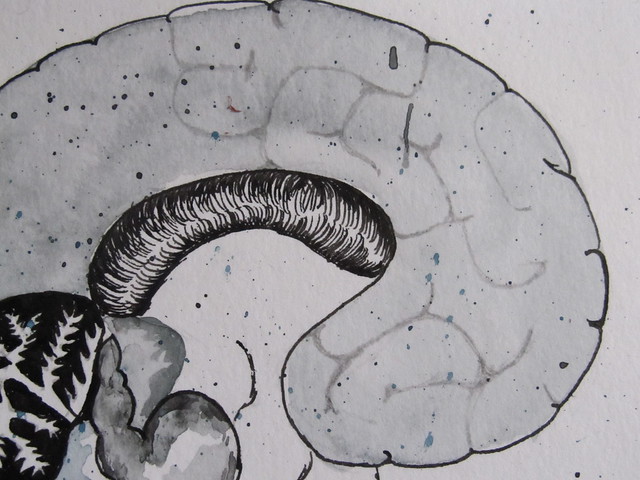
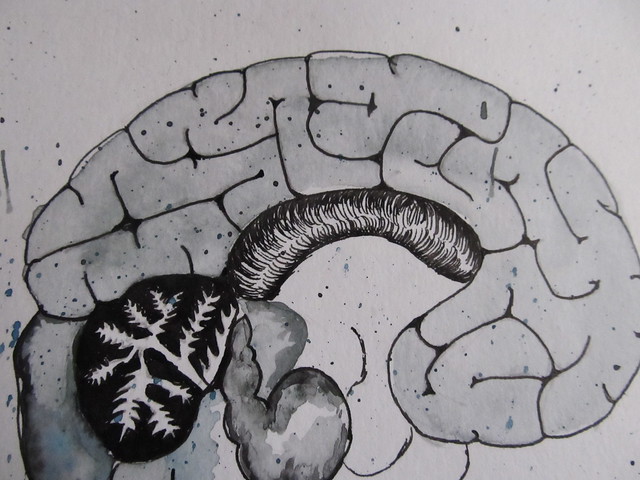
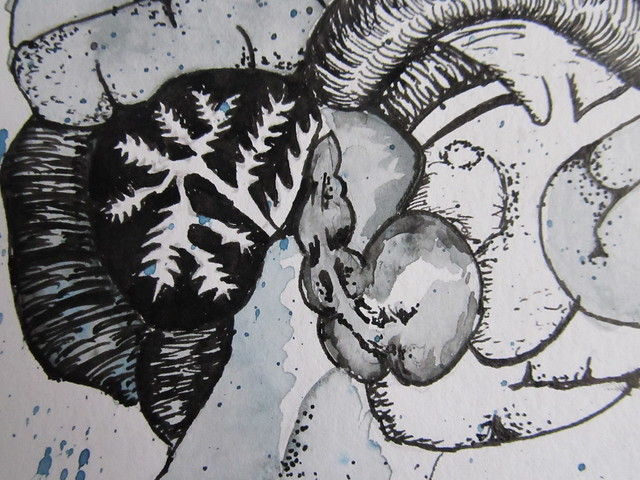
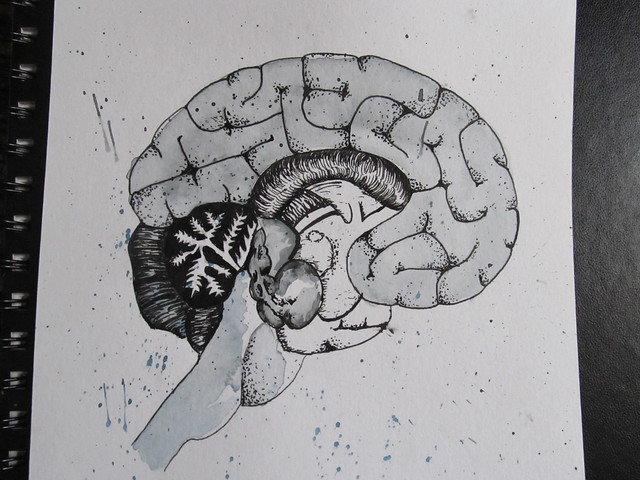
Here's a couple of detail shots. 
IMG_6110

IMG_6111
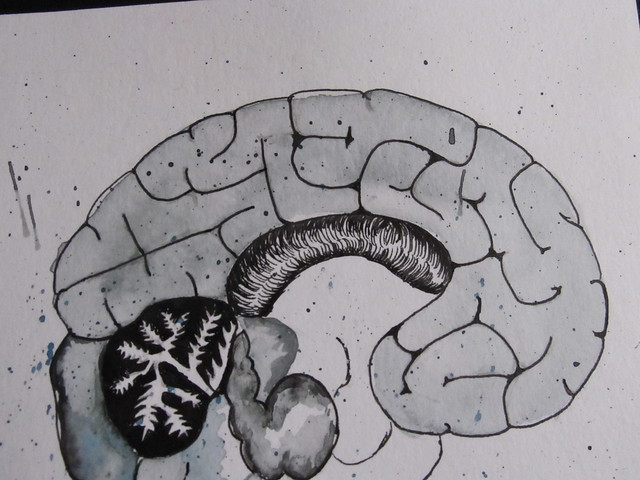
And my finished brain watercolor looks awesome (in my opinion!). Do you remember how I suggested you take up a new skill that you were already familiar with? Well, since I've taken lots of art classes for my education, I have a lot of experience with drawing and paint. So don't worry if you are not as satisfied with your first watercolor as I am with mine. The goal is to keep trying and not stress too much about it. Besides, if you're going to replace watching a little bit of television with a new hobby, it should be something you want to keep doing!
IMG_6112
Have you learned any new skills lately? If you have any questions, feel free to email me!

Sunday, November 11, 2012

Urban Chickens: The Apple Clash

Once upon a time, there were two chickens named Joann and Ursula. These two chickens live in a quaint little cage with an attached hen house where they frolic and peck all day to their hearts content. They often receive gifts of cantaloupe, corn, and apples from the tree across the yard. 

Although their lives are simple and quiet, Joann and Ursula become restless and decide to attempt internet dating, a simple way to spice up their vanilla lives. On a site called "Cluck and $%#@", these bright young ladies fall madly in love with the same rooster, Colonel Corn. The following video is the result of...

THE APPLE CLASH 

Saturday, November 10, 2012

Hearty and Healthy Whole Wheat Pumpkin Pancakes

I'm sure everyone has that one food that they are on bad terms with. Maybe it's sushi and the thought of eating just one bite of white stuff wrapped in green stuff wrapped in possibly uncooked seafood stuff makes you want to curl up into a little ball. Maybe you were in a hot dog eating contest and although you won the contest for eating 28 hot dogs in 12 minutes (I'm just making up that number by the way), you still ate 28 hot dogs and now you can't even go down that aisle of the grocery store. 

For me, the foodstuff that elicits slight disgust and a good cringe every time I'm in the room with them is.... pancakes. Now, I hope you'll continue reading my blog despite the fact that I dislike one of America's favorite food groups (because, let's face it, most people eat it as often as possible) because I am on a mission to conquer my aversion. I pride myself on not being a picky eater, or at least I used to, and now that I eat basically a vegetarian diet with as much organic and local food as I can possibly find, it has become hard to eat out or with friends that aren't veggie-crazy. 
IMG_6040
So this morning, being a Saturday morning and a ritual at least in my family to eat a good hearty meal on weekends, I decided to try making an acceptable pumpkin pancake that would satisfy and also not leave me feeling a little bit dirty for giving up my standards (hey, don't judge me!). I had some left over pumpkin puree from when I made pumpkin bread and I also have tons of applesauce that I canned earlier this fall. I found a recipe online that I could use as a template and I built a pumpkin pancake through trial and error. 
IMG_6042
I also have to mention that despite my attempts to try and branch out in the pancake world, I will probably never like or eat diner pancakes again. You know, those fluffy, golden, perfect pancakes that leave you hungry in an hour and are generally doused with so much maple syrup and butter that they resemble a mushy sponge? Well, I'm sure you can tell I'm not a huge fan. So, if you're like me and what a pancake that is a little bit more dense and leave you feeling full, these are the pancakes for you. 
IMG_6043
One last little note about these pancakes is that I try to cook as healthy and organic as possible. These pancakes are almost vegan, except for the addition of an egg, but it would be very easy to replace the egg with a traditional vegan egg replacement like plain yogurt. I've even heard of a concoction using flax and water but I've never tried it. 
IMG_6051
Hearty and Healthy Whole Wheat Pumpkin Pancakes                                                 (Makes 8-10)
Dry Ingredients:
1 1/2 cups whole wheat flour
1/2 cup rolled oats
1 teaspoon baking powder
2 teaspoons pumpkin pie spice
a pinch of salt

Wet Ingredients:
2 cups pumpkin puree
1 cup applesauce
1 1/4 cup milk (I used rice milk but you can use any kind that you have on hand)
1 egg
1/4 cup powdered sugar

Recipe: 
1. In a large bowl, add all the dry ingredients and sift together with a sifter or stir well with a fork. Set aside
2. In a separate large bowl, add all the wet ingredients and stir with a wooden spoon. Add the dry ingredients to the wet ingredients slowly by sprinkling a little bit in at a time and stirring until incorporated. At this point, if the batter is not runny enough for you or it looks a little more chunky than you'd like, feel free to add a little bit more milk 
3. In a non-stick pan, cast iron skillet that is oiled or some other kind of pancake friendly pan, cook the pancakes in 1/4-1/2 cup dollops at a time on medium heat for about 2 minutes on each side. NOTE: My stove cooks fast so I turned the heat way down and had to cook some of the pancakes very slowly once the pan was hot. The way to tell when a pancake is ready to be flipped is if you can see a change in color and texture around the edges of the pancake. Also, if you can get your spatula under the pancake without the pancake falling apart, it should be ready to flip. This is the hardest part for me because flipping pancakes requires a bit of patience. 
4. Depending on the kind of pan or skillet you are using, you might need to oil the pan in between pancakes to ensure that they don't burn.  
5. Enjoy your pancakes with a little bit of butter, pumpkin butter, powdered sugar, or just plain like I did. I think I could get used to this :)

Thursday, November 8, 2012

Low Tech Machines: Rocker Meets Awesome

So, it's been one of those weeks where you work so many hours in a row that you start using deodorant on your face and saying sentences that don't use real words but I am almost through! To pass the time during my short breaks of freedom, I've been surfing the net and I came across this Rocker machine that will blow your mind... or maybe it's just me because I love all things related to fiber but you should check it out... I may have to create something similar..... 

ECAL Low-Tech Factory/Rocking-Knit from ECAL on Vimeo.

Wednesday, November 7, 2012

Easy and Free Knitting Patterns: Rosa

IMG_6039
A few years ago, I had a dream about myself wearing this braided headband. Don't ask me what the dream was about, all I remember is that I had this braided headband on and I was frolicking through a forest (weird right?!). Anyway, fast forward to last year when I made an awesome headband that was straight out of that dream. It's girly, cute, shimmery and so easy to style. It's more of a recipe than a pattern but it's yours for the taking. 

After changing blogs, I lost the photos from the original pattern so I have a new and improved version for you which will also be linked to Ravelry if anyone is interested in seeing my patterns there. 

IMG_0049

Rosa Headband
Yarn:I suggest using sport weight or sock yarn. You will also need a tapestry needle, or a sewing needle with an eye big enough to put your yarn through
Needles: I used size US 2 double pointed needles. You will need double pointed needles
IMG_0050
Gauge: Any guess? It's not really that important, as long as you've got a good i-cord width that is pleasing to you
Notes: If the idea of having some of your stitches hanging freely scares you, it might be wise to invest in a stitch holder. Also, when you knit an i-cord (which is what you will be doing), you are basically knitting a very skinny tube without using a circular needle or 4 double pointed needles. If you've never done it before, just do what I say and it should work out. It's very easy!

Pattern: With one double pointed needle (you will only need 2), cast on 9 stitches. 
Row 1: (knit 1, purl 1) across all stitches. 
Row 2-9: Work in ribbing as established
Now, if you would like to use a stitch holder, slip the last 6 stitches of the row onto a stitch holder so that the three remaining stitches include the stitch connected to the yarn ball. You can also let your stitches hang around; I found that the yarn I was using was not prone to unravelling easily. 

IMG_0051
With 3 stitches on the needle, knit each stitch across. DO NOT FLIP YOUR KNITTING OVER! Slide the stitches from the left side of the needle to the right side of the needle and bring the yarn to the right side, keeping the yarn slightly taut. Put the needle with the stitches in your left hand and prepare to knit as you would normally. If you're a visual learner, here's a video you can watch that will show you how it's done. 

For the next row, you are going to knit into the front and the back of the first stitch so that you have 4 stitches on your needle. Knit the rest of the stitches and slide them to the right of the needle. 

After you've increased to 4 stitches, continue knitting each row and sliding the stitches over (you should never see the back of your work while you are knitting), to produce an i-cord. It is unnecessary to count each row because we are going to measure it with a ruler. 
IMG_0048
Once your first i-cord is about 18 inches long (or it can be placed around your head without going all the way around), place the four stitches onto a needle holder and break the yarn with an inch long tail. Repeat the i-cord process with the remaining 6 stitches (3 stitches for each i-cord) until you have 3 i-cords total. You will not need to break the yarn from the third i-cord
IMG_0008
Being careful not to unravel your i-cords, braid them together like so
IMG_0009

IMG_0010

IMG_0011
Until you've reached the end of your i-cords and the stitches look like this. You'll want to have the i-cord attached to the ball of yarn on the far right.
IMG_0014
One at a time, pick up the stitches from your i-cords on the same needle
IMG_0016

IMG_0017

IMG_0018
If your i-cords are not the same length after you've braided them, it's ok to unravel a few rows to even them out a little bit.
Row 1: (knit 2 stitches, knit 2 together) x 3. (9 stitches total)
Row 2: (knit 1, purl 1) across all stitches
Row 3-5: Work in ribbing as established
Row 6: knit 1, purl 1, knit 1, cast off 3 stitches, purl 1, knit 1
Row 7: purl 1, knit 1, purl 1, cast on 3 stitches, purl 1, knit 1, purl 1
Row 8-10 Work in ribbing as established
Row 11: Bind off all stitches. Weave in all ends with a tapestry needle
IMG_0032
To fasten the headband, you will need a button that is small enough to pass through the hole that you made. I chose one that had similar colors. 
IMG_0034
Sew the button in place. You've got yourself a new braided headband! 
IMG_6035