Showing posts with label Tip of the Week. Show all posts

Wednesday, January 2, 2013

Tip of the Week: Baking Soda and Vinegar

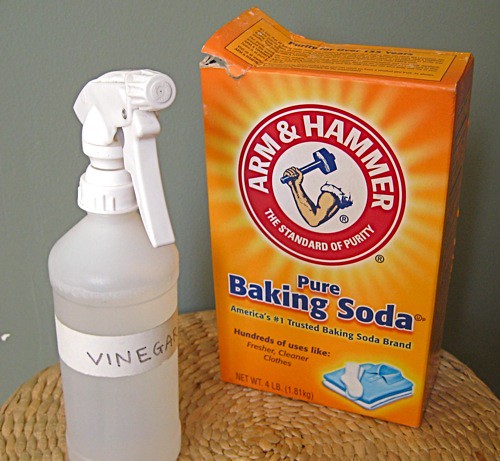
I know I am a little late posting this week's Tip of the Week, but better late than never right? There are a lot of people spouting the benefits of vinegar and baking soda around the internet and some of the books I'm reading right now (I got some really awesome homesteading books as gifts over the holidays) and I decided to try out a few. I've compiled a list of the uses I have found and loved for these two cleaning warriors. One of my favorite things about these two things ingredients is that there are SO MANY uses for them. I'm not even joking, you can probably do anything with baking soda and vinegar! So, what can you do with them?....
bakingsodavinegar

1. Washing Your Hair

I'll admit, I was a little bit skeptical about ditching my shampoo and conditioner (how does it remove the grease and stringiness? My scalp is an oil machine!). When I left my typical organic shower products at my parents' house for the holidays, I decided to try a technique I'd read about several times. First, I took a small mason jar that had previously contained jam and devoted it to my shower routine. Next, I sprinkled about a tablespoon of baking soda into the jar and took it in the shower with me (my jar is a half of a pint so if your jar is bigger, you'll need more soda or less water). When I'm ready to wash my hair, I fill the jar up with warm shower water and slowly drizzle the soda water over my scalp. It's not like regular shampoo because it isn't thick, it's more of a rinse. Trust me though, my hair is typically very oily unless I shower every day and since I've been using soda, I've been able to wash my hair less. I do the same technique (you can use separate jars probably but I just pour right out of the bottle) with a bottle of apple cider vinegar as a conditioner after you're done rinsing out the soda. The vinegar reacts with the residual soda and keeps your hair from looking like you've got major dandruff!

2. Cleaning Spills From Carpets

We had a baby visitor stay in our house recently who contracted some kind of tummy issues (probably a cold or food poisoning) which resulted in a lot of yucky carpet. While the carpet was still wet from the mess, we drizzled a little bit of white vinegar onto the yucky stuff, patted the spot dry with a rag, sprinkled baking soda onto the damp area, and waited for the carpet to dry. After everything was dry, we vacuumed up the mess and it didn't leave a stain! Also, it was really cool listening to the soda react with the vinegar. Until the mess dried, our carpet sizzled!!!!

3. Helping Relieve Nausea and Upset Stomach

One of my best friends taught me this one! Ok, I'll admit that it's kinda gross, but if you can get over the taste, this trick really works. In a little cup, put a small amount of baking soda into the bottom and cover with just enough water so that you can take a shot of soda water. Try and drink it as fast as you can because jeez is it gross. The soda water helps relieve nausea because it bubbles in your stomach, causing you to burp and relieve some of the pressure in your stomach. All around, this technique is a little gross but trust me, it works. 

4. Removing Soap Scum From Showers 

In my line of work, I do a lot of cleaning. Let me just repeat that... I do a LOT of cleaning. Sometimes my clients use harsh chemicals to clean that I don't want to be in contact with or I am allergic to the scent (it's not an official allergy but most artificial scents will give me a sneezing fit and a swollen nose). A really great compromise I have come up with is using baking soda and vinegar for almost all of my bathroom cleaning purposes. For soap scumy tubs, rinse the shower and tub so all the surfaces you want to clean are damp. Using a damp rag, add a little bit of baking soda so that your rag is a little "gritty". The soda acts as a gentle "sand paper" that scrubs away soap scum in minutes. Also, vinegar is a disinfectant and can be used anywhere that you would use bleach. I use apple cider vinegar because it smells better than distilled white. 

5. Drying Out Pimples

Baking soda is very absorbent, which is why it is such a magical substance. By mixing a tiny bit of water with a tiny amount of soda, I've created a paste that dries out zits in no time. Just apply it before you go to bed and in the morning wash off the film. It's best not to use too much of the paste on your face though because it can remove the natural oils that your body produces that keeps your skin happy and healthy. 

I'm sure there are many other uses for these two ingredients (or science fair experiments!), but these are the ones I've tested and have found success with. Do you have any helpful hints for these two wonder substances?

Tuesday, December 4, 2012

Tip of the Week: Make a Sub-irrigation System Houseplant

For this week's Tip of the Week, I'm demonstrating how I made a miniature sub-irrigation* system house plant! It worked out really well and I was able to use up some plastic single use items that were cluttering up my house. Sub-irrigation, when it comes to house plants, is a method of watering plants where the water is delivered below the soil and the root system and transported upwards (by the roots). Here's what I did... 
SDC10498
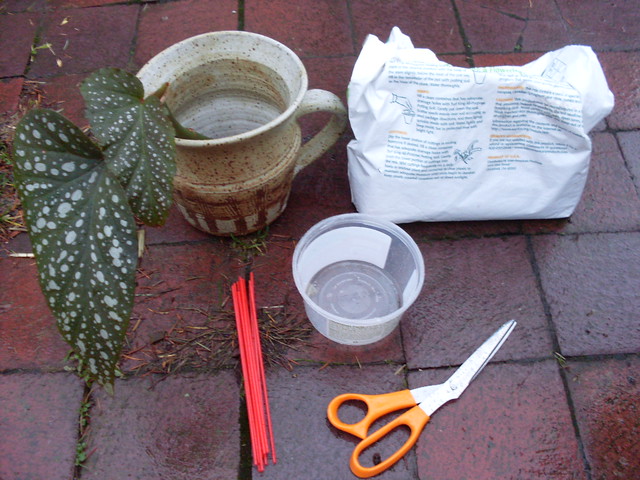
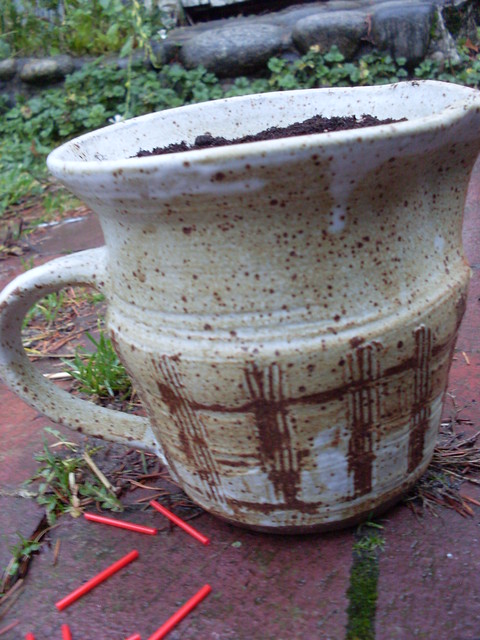
1) Gather all of the supplies. You'll need scissors, a plastic container that fits reasonably well in your pot, a thrift store pot that I got for $3, some kind of tubing or straws a tad shorter than your pot, soil, and a plant that you wish to transplant. (I don't know what kind of plant it is but I got the start from a roommate. The original plant is very large and tropical looking so this pot might be a temporary house for this houseplant). 
SDC10500
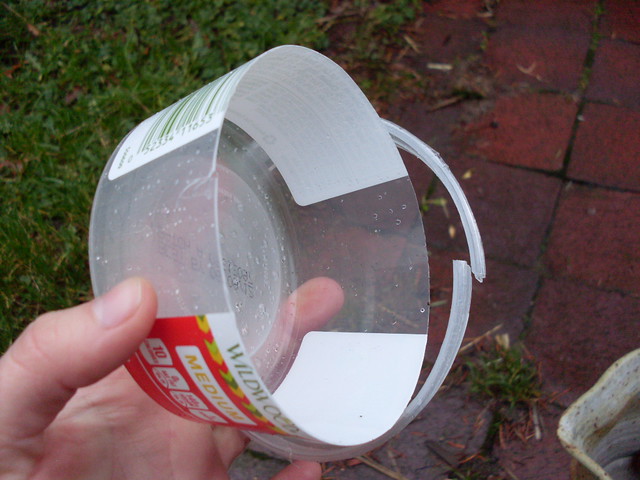
2) Cut the rim off of the plastic container. Your container should be fairly shallow because you don't want it to fill up your entire "pot". If the plastic is too big, there won't be any room for your plant.
SDC10501
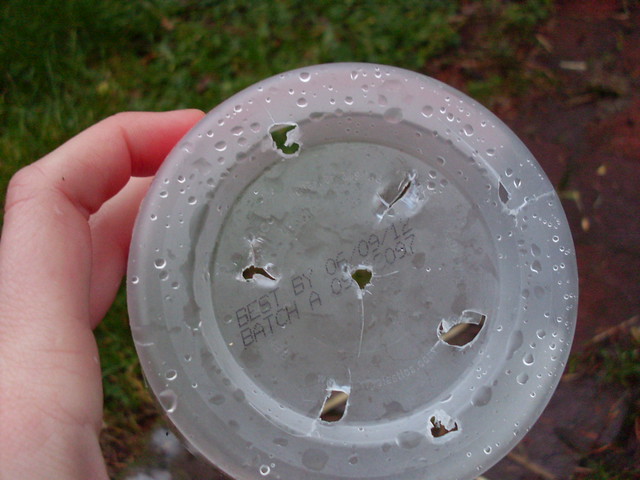
3) Punch some holes in the bottom of the container. I just used the scissors I used to cut off the rim of the container. You'll also want to make one big hole that you can fit your tubing/straws in.
SDC10502
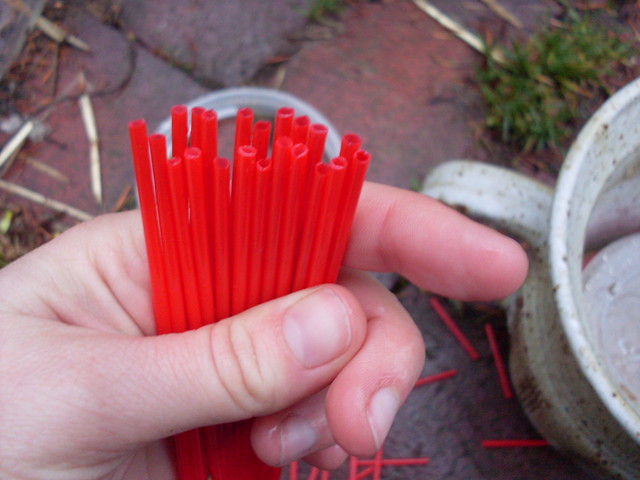
I've got to share a quick little story with you while I'm on the subject of straws. First of all, I do not recommend purchasing brand new straws or tubing to make this project. That would defeat the purpose of using found materials. Come on, be creative! These straws, although they might look like normal stirring straws, are far from normal stirring straws. The particular drinking straws that I used have been sitting in my backpack for a few months while I pondered what to do with them. You see, I am a bit clumsy. Seriously, I'm a clumsy person. I had aforementioned backpack on and turned rather quickly, dumping all of these never been used plastic stirring straws onto the ground and rendering them 100% useless instead of 95% useless. Ugh... anyway, moral of the story is that you should use some kind of tube-cylinder shaped object that you find instead of something brand  new. 
SDC10505
4) I had to chop my straws down a little bit. You want to make sure they don't poke out of your pot... unless you like that sort of thing. This step is more about aesthetics than usefulness. 
SDC10507
Yes, I know this picture is crooked but you can't see the straws can  you?
SDC10508
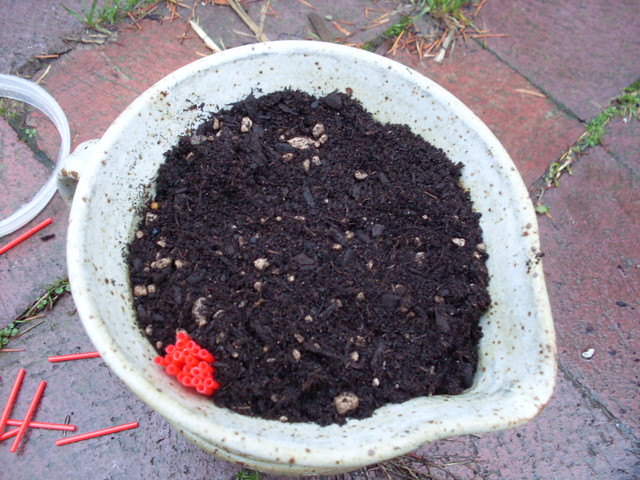
5) Place your plastic bowl with the straws into the bottom of your pot. Fill with soil until it almost reaches the top of the straws. 
SDC10509
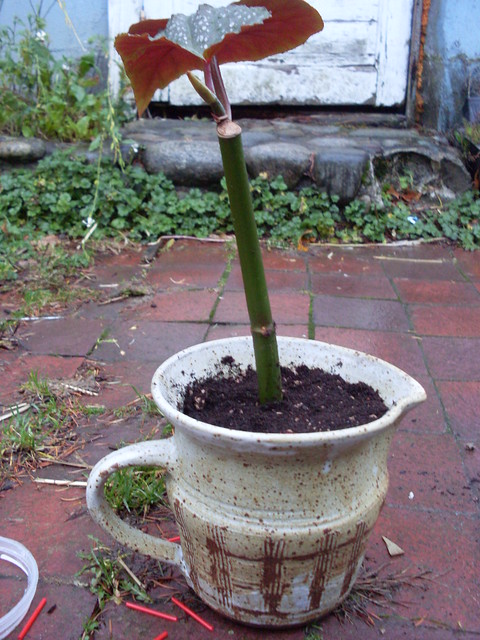
6) Finally, place your plant in the soil and pour water through the straws into the bottom of the pot. I'll keep you posted about how this plant develops. I might be switching out this cutting for a plant that requires a little less space. Good luck on your sub-irrigation system! 
*Sub-irrigation is sometimes called self-watering which is a misnomer because the pot and plant do not have the ability to water themselves. 

Tuesday, November 27, 2012

Tip of the Week: READ ALL THE THINGS!

The wintry weather coupled with my bizarre work schedule means that I have been reading quite a bit these days! I absolutely love to read and when I found two of these books, I could not put them down. Here's what I've been reading:
source: http://us.macmillan.com/noimpactman/ColinBeavan
A few months ago, I was researching sustainability blogs in order to begin work on my own blog and I found this one. Colin Beavan is an inspiration to me because he attempted something really radical and shared it with others because he felt so strongly about how our society needs to change. The book itself is very though provoking and discusses some of the tricky parts about global warming, including how playing the blame game isn't helpful. I watched the documentary as well and am following his blog. I have definitely got some ideas about how I can lighten my impact on the planet from his book. Plus, it's pretty funny!

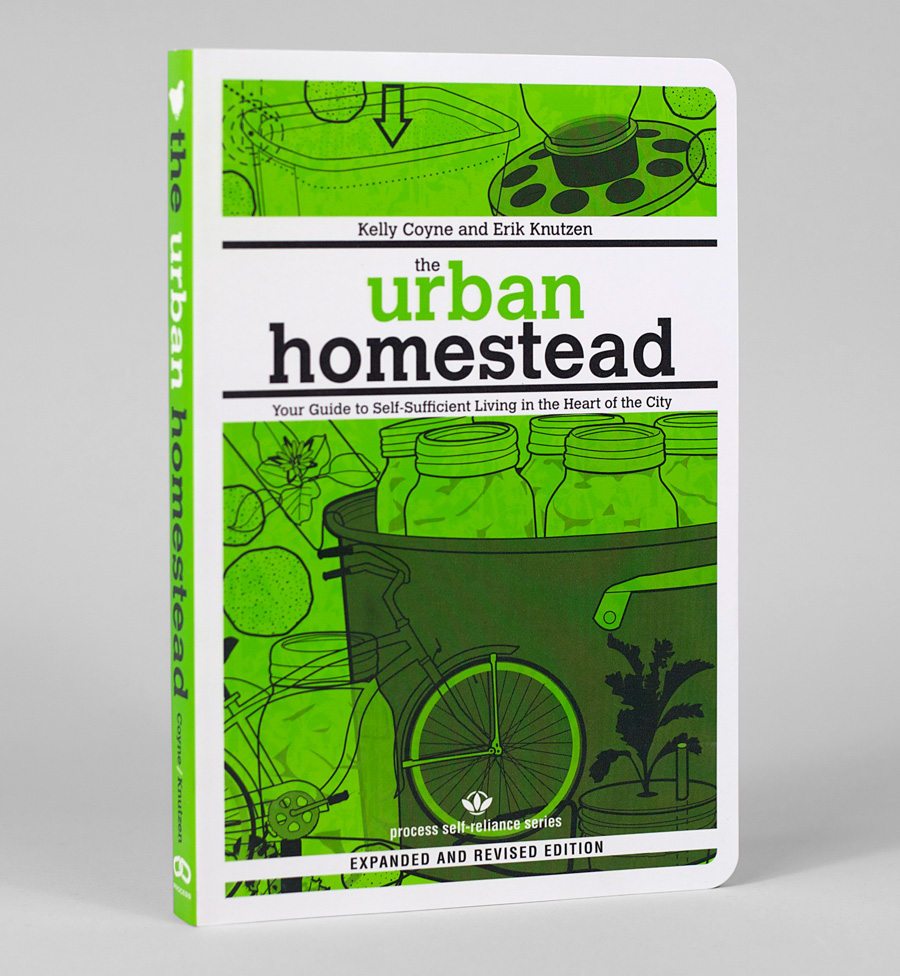
source: http://www.buyolympia.com/q/Item=the-urban-homestead-expanded
Urban Homestead by Kelly Coyne and Erik Knutzen is basically a manual of how I want to live my life. It's all about how to create a homestead while living in an environment that doesn't have 100 acres, cows, farm equipment or a nearby fresh water source. It's got tons of tutorials about how to can food, make your own cheese, sourdough bread, how to compost and set up a worm compost bin (I'm seriously considering trying this even though we have a compost pile already!), how to fix a bike, and tons more. I haven't read the whole book yet but I will probably be using this one for years and years to come! 

These are the only two books I'm reading right now but I have a long book list that contains similar titles. Being informed is so important if you want to make any kind of difference. The first step towards being more sustainable isn't using reusable bags, isn't changing your light bulbs, isn't feeling guilty about all the things that you aren't doing or can't do. The first step is knowing what is happening, what other people are doing to help fix the health of the planet, and then decide what changes and additions you can make to your lifestyle in order to do some good. Every little bit helps :) What are you reading?

Tuesday, November 20, 2012

Tip of the Week: Keep, Sell, Toss

Tip of the Week is a feature where I will share one easy step per week that you can try out that will help you on your way to a more sustainable life. Small steps lead to big changes!

I used to watch this show called "Clean Sweep" in which participants invite a group of organizers and designers into their home to help them organize two rooms. Basically, the organizers share tips and tools throughout the program that help anyone organize their "stuff" into three separate categories. The Keep category is obviously where all the items the family believes they want to keep, the Sell category is where items that will be sold at a garage or yard sale will go, and the Toss pile is stuff that no one wants. 

I am a college student for about the next 4 weeks and because I have spent the last four years of my life travelling back and forth between two homes, I have accumulated a ton of stuff! Kitchen stuff, art supplies from various classes I took for my major, random things that had sentimental value, and lots of stuff that other people were going to throw away that I rescued. I'm not a hoarder, I just happen to own a lot of things and haven't had the time to downsize. 

Because I would love to live and work in another state in the near future, it is important and necessary for me to downsize because I will be transporting my "stuff" with me. I have also found that it can be quite sustainable to go through your belongings because it allows you to make a mental inventory of your "stuff" and really decide what is necessary. I've also been a thrift shopper my whole life (I love it!), and if it weren't for the people that donate their unloved possessions, I wouldn't have the majority of my wardrobe, most of my kitchen supplies, my chair, pillows, tea pot, bowls... the list goes on and on. 

If I haven't convinced you yet to go through your belongings and appreciate what you have, this comedy segment by the late great George Carlin might make you reconsider!

Tuesday, November 13, 2012

Tip of the Week: Learn Something New


Tip of the Week is a feature where I will share one easy step per week that you can try out that will help you on your way to a more sustainable life. Small steps lead to big changes!

The first Tip of the Week that I would like to share with you is something I have personally been working on for the last week and a half: Learn Something New! You might be wondering how learning something new will help you become more sustainable but I'll explain what I mean with a few simple criteria. 

1. New Skill Reduces Screen Time
While learning how to hack into your neighbors computer is probably pretty useful for some people, it doesn't cut down on the amount of time that we sit in front of the computer/television/phone with internet/etc. I found this article to be very thorough on the subject of "Switching Off". It is unavoidable in our modern age to use technology at some point, but finding other, energy friendly activities to fill your time is more eco-friendly

2. New Skill Doesn't Require Many Materials
This criteria is somewhat optional because there are ways to avoid purchasing a ton of materials for an activity that you might not enjoy (such as borrowing, sharing with others, renting), but in general it is easier to maintain a new skill if it doesn't take years to learn it and to acquire all the "stuff". The skill that I've been working on is watercolor and I had all the materials already. It's also a good idea to use material you already have because if you decide you don't like the new skill, it doesn't produce a lot of waste leftover from your little experiment

3. New Skill Could Be Something You're Already Good At
I've taken painting classes before because of my degree, so dipping my toes into the world of watercolor wasn't a stretch for me. Maybe your new skill could be whittling/carving wooden spoons from found lumber scraps or if you're good at writing, maybe poetry is your thing. Also, you're more likely to enjoy the new skill if you're already familiar with it.

4. Can Be Done In Social Settings
Number 4 is a big one because so many people watch television with their families! If you are trying to replace that social interaction time with a hobby you have to do alone and in a different room, chances are it won't last very long. But if you attempt a skill that can be accomplished in the presence of others and/or with other people, it might have some staying power in your life. 

WATERCOLOR TUTORIAL:
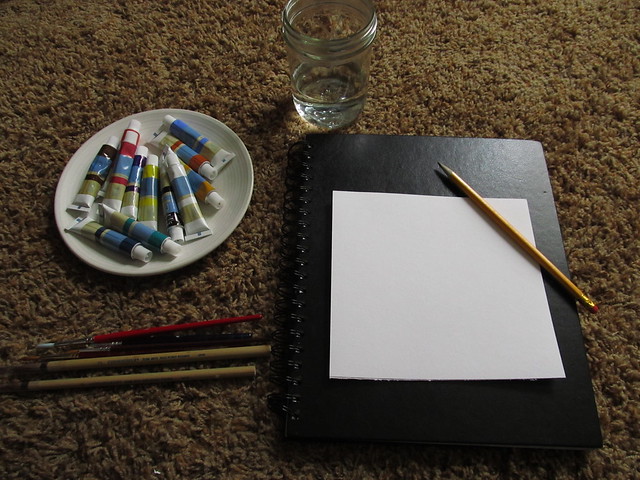
Gather all your materials: watercolor paint, clean water, paper, pencil, paintbrushes, sturdy surface, black pens
IMG_6062
Draw out your design using pencil. Source image for mine is here.
IMG_6066
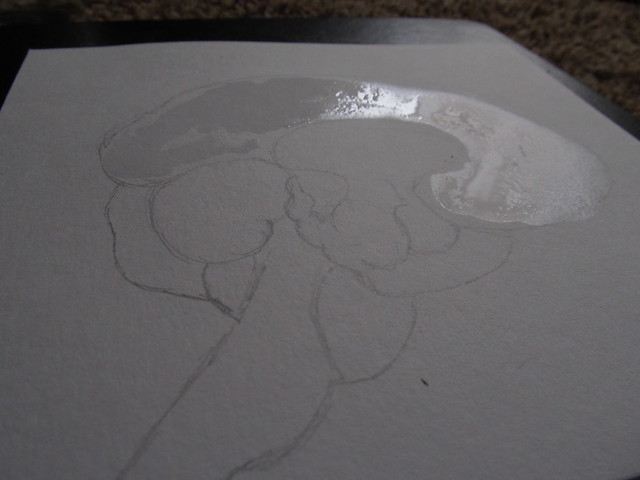
With your watercolor paint brush, start by getting the section of your drawing you want to paint first slightly wet. (Sorry about the dark photos, the lighting was bad!)
IMG_6067
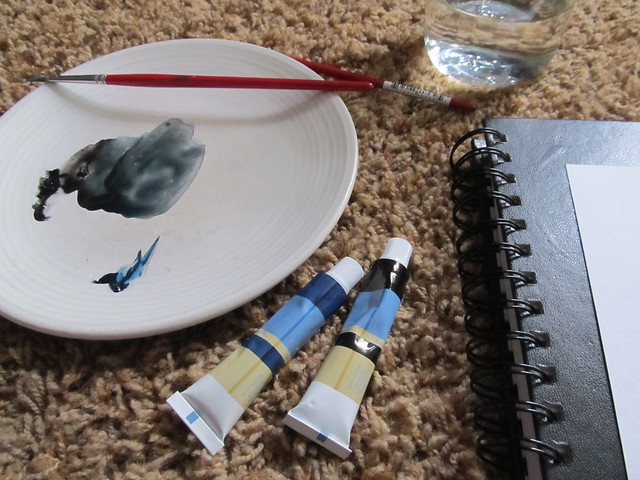
Mix your colors on a white plate so that you can accurately mix colors. I only used black and blue for mine. 
IMG_6070
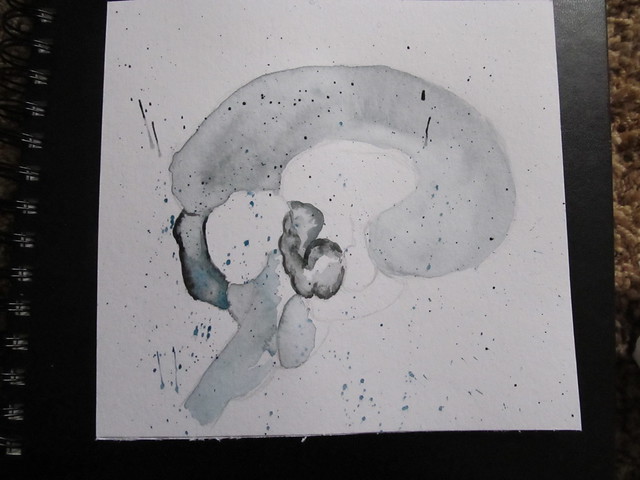
The beauty of watercolor is that perfection is not important. As long as you stay in the lines while painting, you will do just fine. Even going outside the lines can be fun though sometimes...
IMG_6071
Experiment with applying the paint to see what you prefer. I tried leaving my paper dry, adding clear water after applying paint to smooth and spread it out, and I did a couple layers to get darker colors. 
IMG_6072
You can even add some paint splatters by adding a lot of paint on your brush and then tapping the brush on your finger over top of your page. Be careful though, paint splatters don't land nicely on your paper and nowhere else!
IMG_6074
After you've let your paper dry all the way, feel free to erase the lines that you don't need anymore. The next step is to draw over the lines you've made. I also filled in some of the sections with texture before moving on to the brain. 
IMG_6077
Think about drawing the brain as if you were folding thick, soft noodles on top of one another. There shouldn't be any corners, sharp edges, or many straight lines because that would mean the noodles had broken. Use a pencil to lightly draw in some of the brain. 
IMG_6099
I did a little at a time to make sure I liked how it was turning out. After making sure I liked it, I drew over the lines with black ink. 
IMG_6100
See what I mean about the sharp corners and lines? The left side of the drawing has sharp edges and the right side is a lot softer. Which side do you think looks more like a brain?
IMG_6102
Just rounding out the corners makes a world of difference here. Doesn't that look better?
IMG_6106
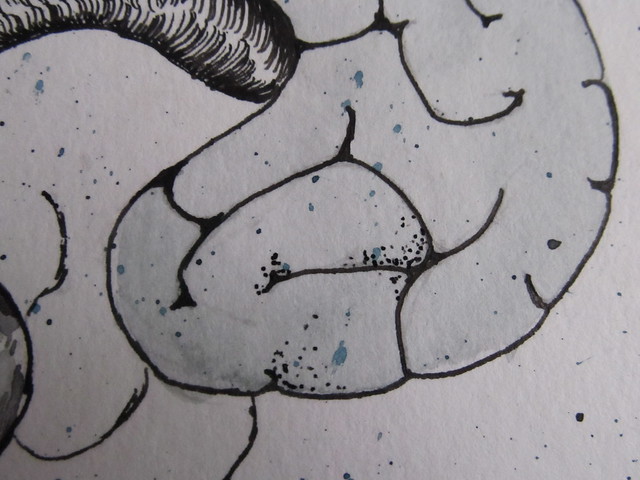
Now, to give my brain a little bit more dimension, I did a technique called stippling, which basically means an endless amount of tiny dots to build up a texture. I used the stippling technique to add a little bit of shadow. 
IMG_6107
Now that the brain is all done, refer back to your source image (yours doesn't have to be a brain, but mine is). Add in the rest of the detail as best you can. Remember, don't be too hard on yourself since you are learning a new skill. 
IMG_6108
Here's a couple of detail shots. 
IMG_6110

IMG_6111
And my finished brain watercolor looks awesome (in my opinion!). Do you remember how I suggested you take up a new skill that you were already familiar with? Well, since I've taken lots of art classes for my education, I have a lot of experience with drawing and paint. So don't worry if you are not as satisfied with your first watercolor as I am with mine. The goal is to keep trying and not stress too much about it. Besides, if you're going to replace watching a little bit of television with a new hobby, it should be something you want to keep doing!
IMG_6112
Have you learned any new skills lately? If you have any questions, feel free to email me!